Why Use a Contact Proof Printer?
After developing a roll of 35mm film, you need a quick way to see all your negatives before deciding which frames to enlarge. A contact proof printer lets you expose an entire roll onto a single sheet of photographic paper, giving you a miniature positive image of every frame. The Paterson 35mm Contact Proof Printer is designed for exactly this task, making it easy to organize your darkroom workflow.
Paterson 35mm Contact Proof Printer – Key Details
-
Paterson 35mm Contact Proof Printer: An entire 36 exposure 35mm roll on a single 8 x 10in (20.3 x 25.4cm) sheet of paper. This 35mm model takes six strips of 6 exposures. You can proof a full roll in one exposure, saving time and paper. The six-strip layout matches standard 36-exposure rolls.
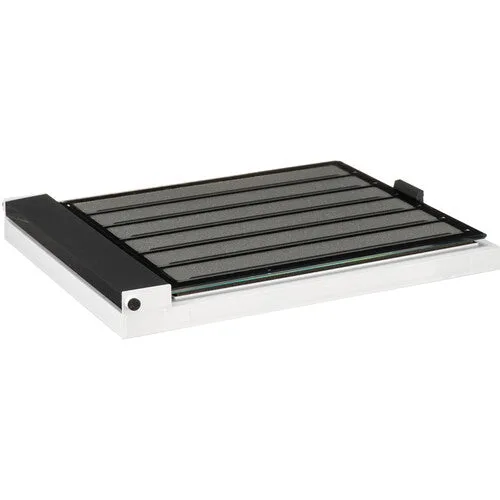
Paterson 35mm Contact Proof Printer
-
Paterson 35mm Contact Proof Printer: Negatives are easily positioned in slots on the mask of the Paterson Proof Printers and the resulting contact sheet enables easy choice of which negatives to enlarge. No need to tape or glass down your negatives – the built-in mask holds them flat and aligned, reducing the chance of blurry or misaligned proofs.
How to Use the Paterson 35mm Contact Proof Printer
The following steps describe the basic process for making a contact proof sheet. Always work under safe lighting (e.g., red safelight) when handling unexposed paper.
- Prepare your negatives: Cut your developed and dried 35mm film into six strips of six frames each. Handle the negatives by the edges to avoid fingerprints.
- Load the printer: Open the hinged mask of the Paterson 35mm Contact Proof Printer. Place each strip into the corresponding slot, emulsion side down (dull side facing the paper). Close the mask to hold the negatives flat.
- Insert the paper: In the dark (under safelight), slide a sheet of 8×10in (20.3×25.4cm) photographic paper into the printer beneath the mask. Ensure the paper lies flat and is fully covered by the mask.
- Expose the proof sheet: With the printer closed, place it under your enlarger or a uniform light source. Make a test exposure (typical starting point: a few seconds at f/8, depending on your light source and paper speed). Develop the test sheet and adjust exposure as needed.
- Process the paper: Remove the exposed paper and develop it according to the paper manufacturer's instructions. After fixing and washing, you have a contact proof sheet showing all 36 frames.
Choosing Which Negatives to Enlarge
Once your contact sheet is dry, examine it with a loupe or magnifier to identify the sharpest, best-exposed frames. Mark your favorites on the proof sheet with a grease pencil or by circling them. The resulting contact sheet becomes a permanent reference for your darkroom printing sessions.