Quick answer
Set up the Westcott X-Drop frame by fully unfolding the legs and locking the crossbar before attaching the backdrop. Hang the fabric from the top edge first, then work down the sides to keep it taut and wrinkle-free.
Why the X-Drop frame suits small studios and location work
The X-Drop frame is designed for 5' × 7' and 5' × 12' backdrops, giving you a compact footprint that fits into tight studio corners or a car boot. That portability means you can set up a clean background quickly on location, but the lightweight build also means you need a stable floor and careful handling when extending the frame.
Because the frame supports two backdrop lengths, check which size you are using before you start. A 5' × 12' backdrop will need more floor space behind the subject and a higher crossbar position than a 5' × 7'.
When a second pair of hands helps
The frame is manageable alone, but hanging a 5' × 12' backdrop is easier with a helper to keep the fabric off the floor while you attach the top edge. If you work solo, lay the backdrop over a clean sheet or table before lifting it onto the frame.
Step-by-step X-Drop frame setup
- Unfold the frame on a clear floor: Place the frame flat on a clean, level surface and unfold the legs until they are fully extended. Common mistake: forcing a leg before the hinge is clear can damage the locking mechanism. Check that all leg joints are locked before lifting the frame upright.
- Lock the crossbar at the correct height: Raise the crossbar to the position that matches your backdrop size: lower for 5' × 7', higher for 5' × 12'. Make sure both ends click or lock securely. Common mistake: setting the bar too high for a 5' × 7' backdrop, which leaves the fabric hanging loose at the bottom. Test the crossbar by pressing down gently—it should not move.
- Stand the frame upright and check stability: Lift the frame into position and spread the legs fully. On smooth floors, place sandbags or weights on the feet. Common mistake: skipping weights on hard floors, which lets the frame slide during a session. If the frame wobbles, adjust the leg spread before hanging the backdrop.
- Attach the backdrop at the top edge first: Drape the backdrop over the top crossbar and secure it according to the backdrop's attachment method (sleeve, clips, or pole pocket). Start at the centre and work outward. Common mistake: pulling one corner too tight before the rest is attached, which causes diagonal wrinkles. The top edge should be straight and evenly tensioned before you move down.
- Smooth the fabric down the sides: Working from the top corners downward, gently tension the fabric and secure the sides if your backdrop allows. For a 5' × 12' backdrop, let the excess fabric pool slightly on the floor rather than stretching it. Common mistake: over-tensioning the sides, which can pull the frame off balance. Step back and check for wrinkles under your planned lighting before you start shooting.
Product facts
-
Westcott X-Drop Backdrop Frame for 5 x 7ft and 5 x 12ft Backdrops: Works with Westcott X-Drop backdrops in 5' × 7' and 5' × 12' sizes. You can use one frame for both portrait and full-length setups, but confirm your backdrop size before assembly.
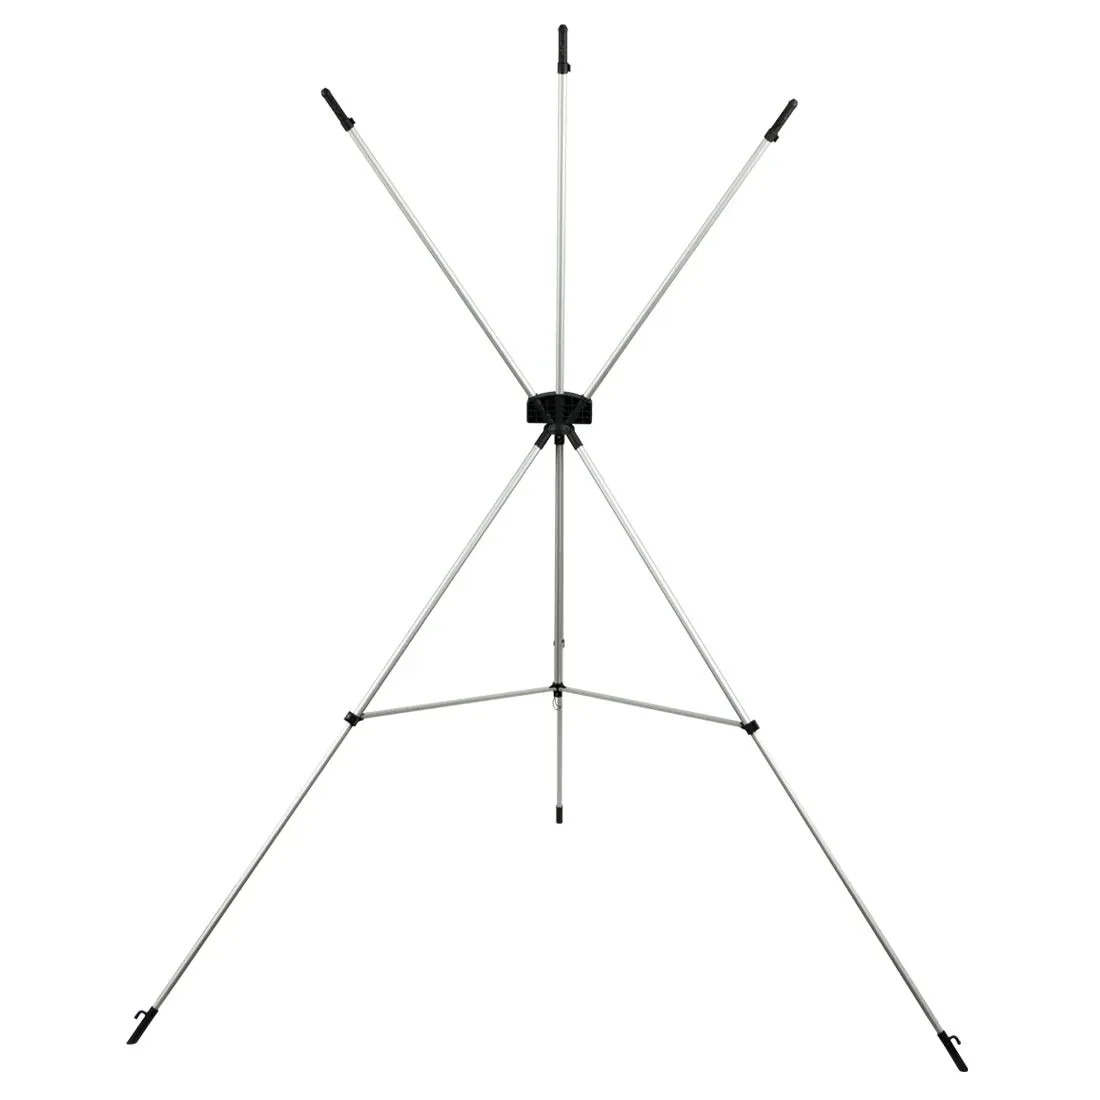
Westcott X-Drop Backdrop Frame for 5 x 7ft and 5 x 12ft Backdrops