إجابة سريعة
ابدأ بمشبك شعر معدني بسيط أو مشبك تمساح، ثم اربط زرًا أو قلادة بظهر مسطح باستخدام غراء قوي أو بضع غرز محكمة. اجعل الزخرفة صغيرة ومتمركزة حتى يظل المشبك يفتح ويغلق بسلاسة. اختبر الثبات قبل ارتدائه.
أسرع طريقة للحصول على مشابك شعر يدوية الصنع سترتديها فعلاً هي أن تبنيها حول ما تملكينه بالفعل: زرّ عالق، قلادة إضافية، مشبك بسيط من عبوة متعددة. لا تحتاجين إلى غرفة حرفية مليئة بالمستلزمات. تحتاجين إلى لاصق جيد أو إبرة وخيط، مع القليل من الصبر حتى تجف الأشياء.
يشرح هذا الدليل العملية كاملة بالترتيب، من اختيار المشبك الأساسي إلى اختبار القطعة النهائية. على طول الطريق سترين أين تفشل معظم إكسسوارات الشعر اليدوية، والخيارات الصغيرة التي تمنع مشابك الشعر ذات الأزرار وإكسسوارات الشعر بالتعليقات من التفكك بعد أسبوع.
اختاري المشبك الأساسي المناسب أولاً
كل شيء يعتمد على القاعدة. مشبك التمساح المعدني المسطح أو الباريت العادي يمنحك سطحًا ثابتًا للصق أو الخياطة عليه. تجنّبي المشابك التي تحتوي بالفعل على زخرفة بلاستيكية ضخمة، لأنك ستبني على سطح غير مستوٍ وقد تسقط القطعة الجديدة. تأكدي من أن المشبك يفتح ويغلق بثبات قبل أن تلتزمي به.
طابقي حجم المشبك مع الزخرفة. زر مقاس 5/8 بوصة يبدو ضائعًا على باريتة عريضة لكنه يجلس بشكل مثالي على مشبك تمساح صغير. إذا كنتِ تستخدمين زرًا أكبر، اختاري قاعدة أعرض حتى يبقى الوزن متوازنًا. المشبك الثقيل من الأعلى سينزلق من الشعر الناعم مهما أتقنتِ لصقه.
- اختبري شد الزنبرك قبل التزيين: المشبك الذي يبدو مرتخيًا سيزداد سوءًا بمجرد أن يحمل وزنًا إضافيًا.
- ضعي الزر أو التعليقة على المشبك قبل اللصق لترى التوازن النهائي.
اختاري طريقة تثبيت تناسب القطعة
اللصق سريع، لكنه يعمل جيدًا فقط على القطع المسطحة الخفيفة. الزر ذو الساق، أو التعليقة ذات الحلقة المعلقة، يحتاج إلى خيط بدلاً من ذلك. للصق، استخدمي لاصق حرفي أو مجوهرات قوي واتركيه يجف للمدة الكاملة المكتوبة على الملصق، وليس فقط حتى يصبح لزجًا. للخياطة، استخدمي خيطًا مزدوجًا ومرريه عبر فتحات الزر ثلاث مرات على الأقل.
If you're working with a charm that has a closed loop, you can sew the loop directly to a fabric-covered clip or wire it to the barrette's hinge area. The key is to keep the attachment point away from the part of the clip that flexes, or the movement will work the thread loose over time.
- A common mistake: using hot glue on metal. It peels off in cool weather and leaves a messy residue.
- If the piece has any wobble after curing, reinforce it with a stitch rather than adding more glue.
Add a fabric or felt backing for grip and coverage
A small piece of felt or fabric glued to the underside of the clip does two things: it hides the glue blob and it gives the clip a little grip on slippery hair. Cut the felt slightly smaller than the clip's flat surface so it doesn't peek out at the edges. This step also lets you sew a button directly through the felt and the clip's top bar for a much stronger hold.
If you're covering the whole clip in fabric, wrap it before you add the embellishment. Wrapping after means you'll be gluing over your decoration, which rarely ends neatly. Let the fabric wrap dry completely before the next step.
- Use a thin felt, not a thick craft foam, so the clip still closes with a satisfying snap.
- Trim any stray threads now, before they get sealed under glue.
Let it cure, then test the hold
This is the step most people skip. Let the finished clip sit undisturbed for the full curing time, then open and close it ten times and give the embellishment a gentle tug. If it shifts, fix it now rather than after you've worn it. A clip that passes the tug test will usually survive daily wear.
Test it in your hair, too. Clip it into a small section and shake your head. If it slides, the problem is usually weight or a smooth base, not the glue. Adding the felt backing from the previous step often solves it.
- Checkpoint: if the button spins freely, the glue didn't bond. Remove it, clean both surfaces, and try again.
- Store finished clips on a ribbon or in a small box so they don't tangle with each other.
The build order, step by step
- 1. Gather and sort your pieces: Lay out your base clips, buttons, and charms. Match each embellishment to a clip that can carry its weight, and set aside anything with a shank or loop for sewing rather than gluing. Checkpoint: if you can't picture the finished clip balanced, change the pairing before you start.
- 2. Clean and scuff the metal: Wipe the clip's flat surface with rubbing alcohol to remove oils, then lightly scuff it with fine sandpaper. This is the single biggest factor in whether glue holds on metal. Common mistake: skipping this and gluing straight onto a shiny new clip.
- 3. Attach the embellishment: Glue flat-backed pieces with a strong craft adhesive, or sew shanked buttons and looped charms with doubled thread. Keep the attachment clear of any part of the clip that flexes. Use a toothpick to apply glue so it doesn't squeeze out past the button's edge.
- 4. Add the felt or fabric backing: Cut a piece of thin felt slightly smaller than the clip's flat surface and glue it on, or wrap the whole clip in fabric if you want full coverage. This hides the glue and adds grip. Checkpoint: the clip should still snap shut with normal tension.
- 5. Cure fully, then test: Leave the clip undisturbed for the full curing time on your adhesive. Then open and close it ten times and tug gently on the decoration. If anything shifts, fix it now. A clip that passes this test is ready to wear.
Pieces that work well for this project
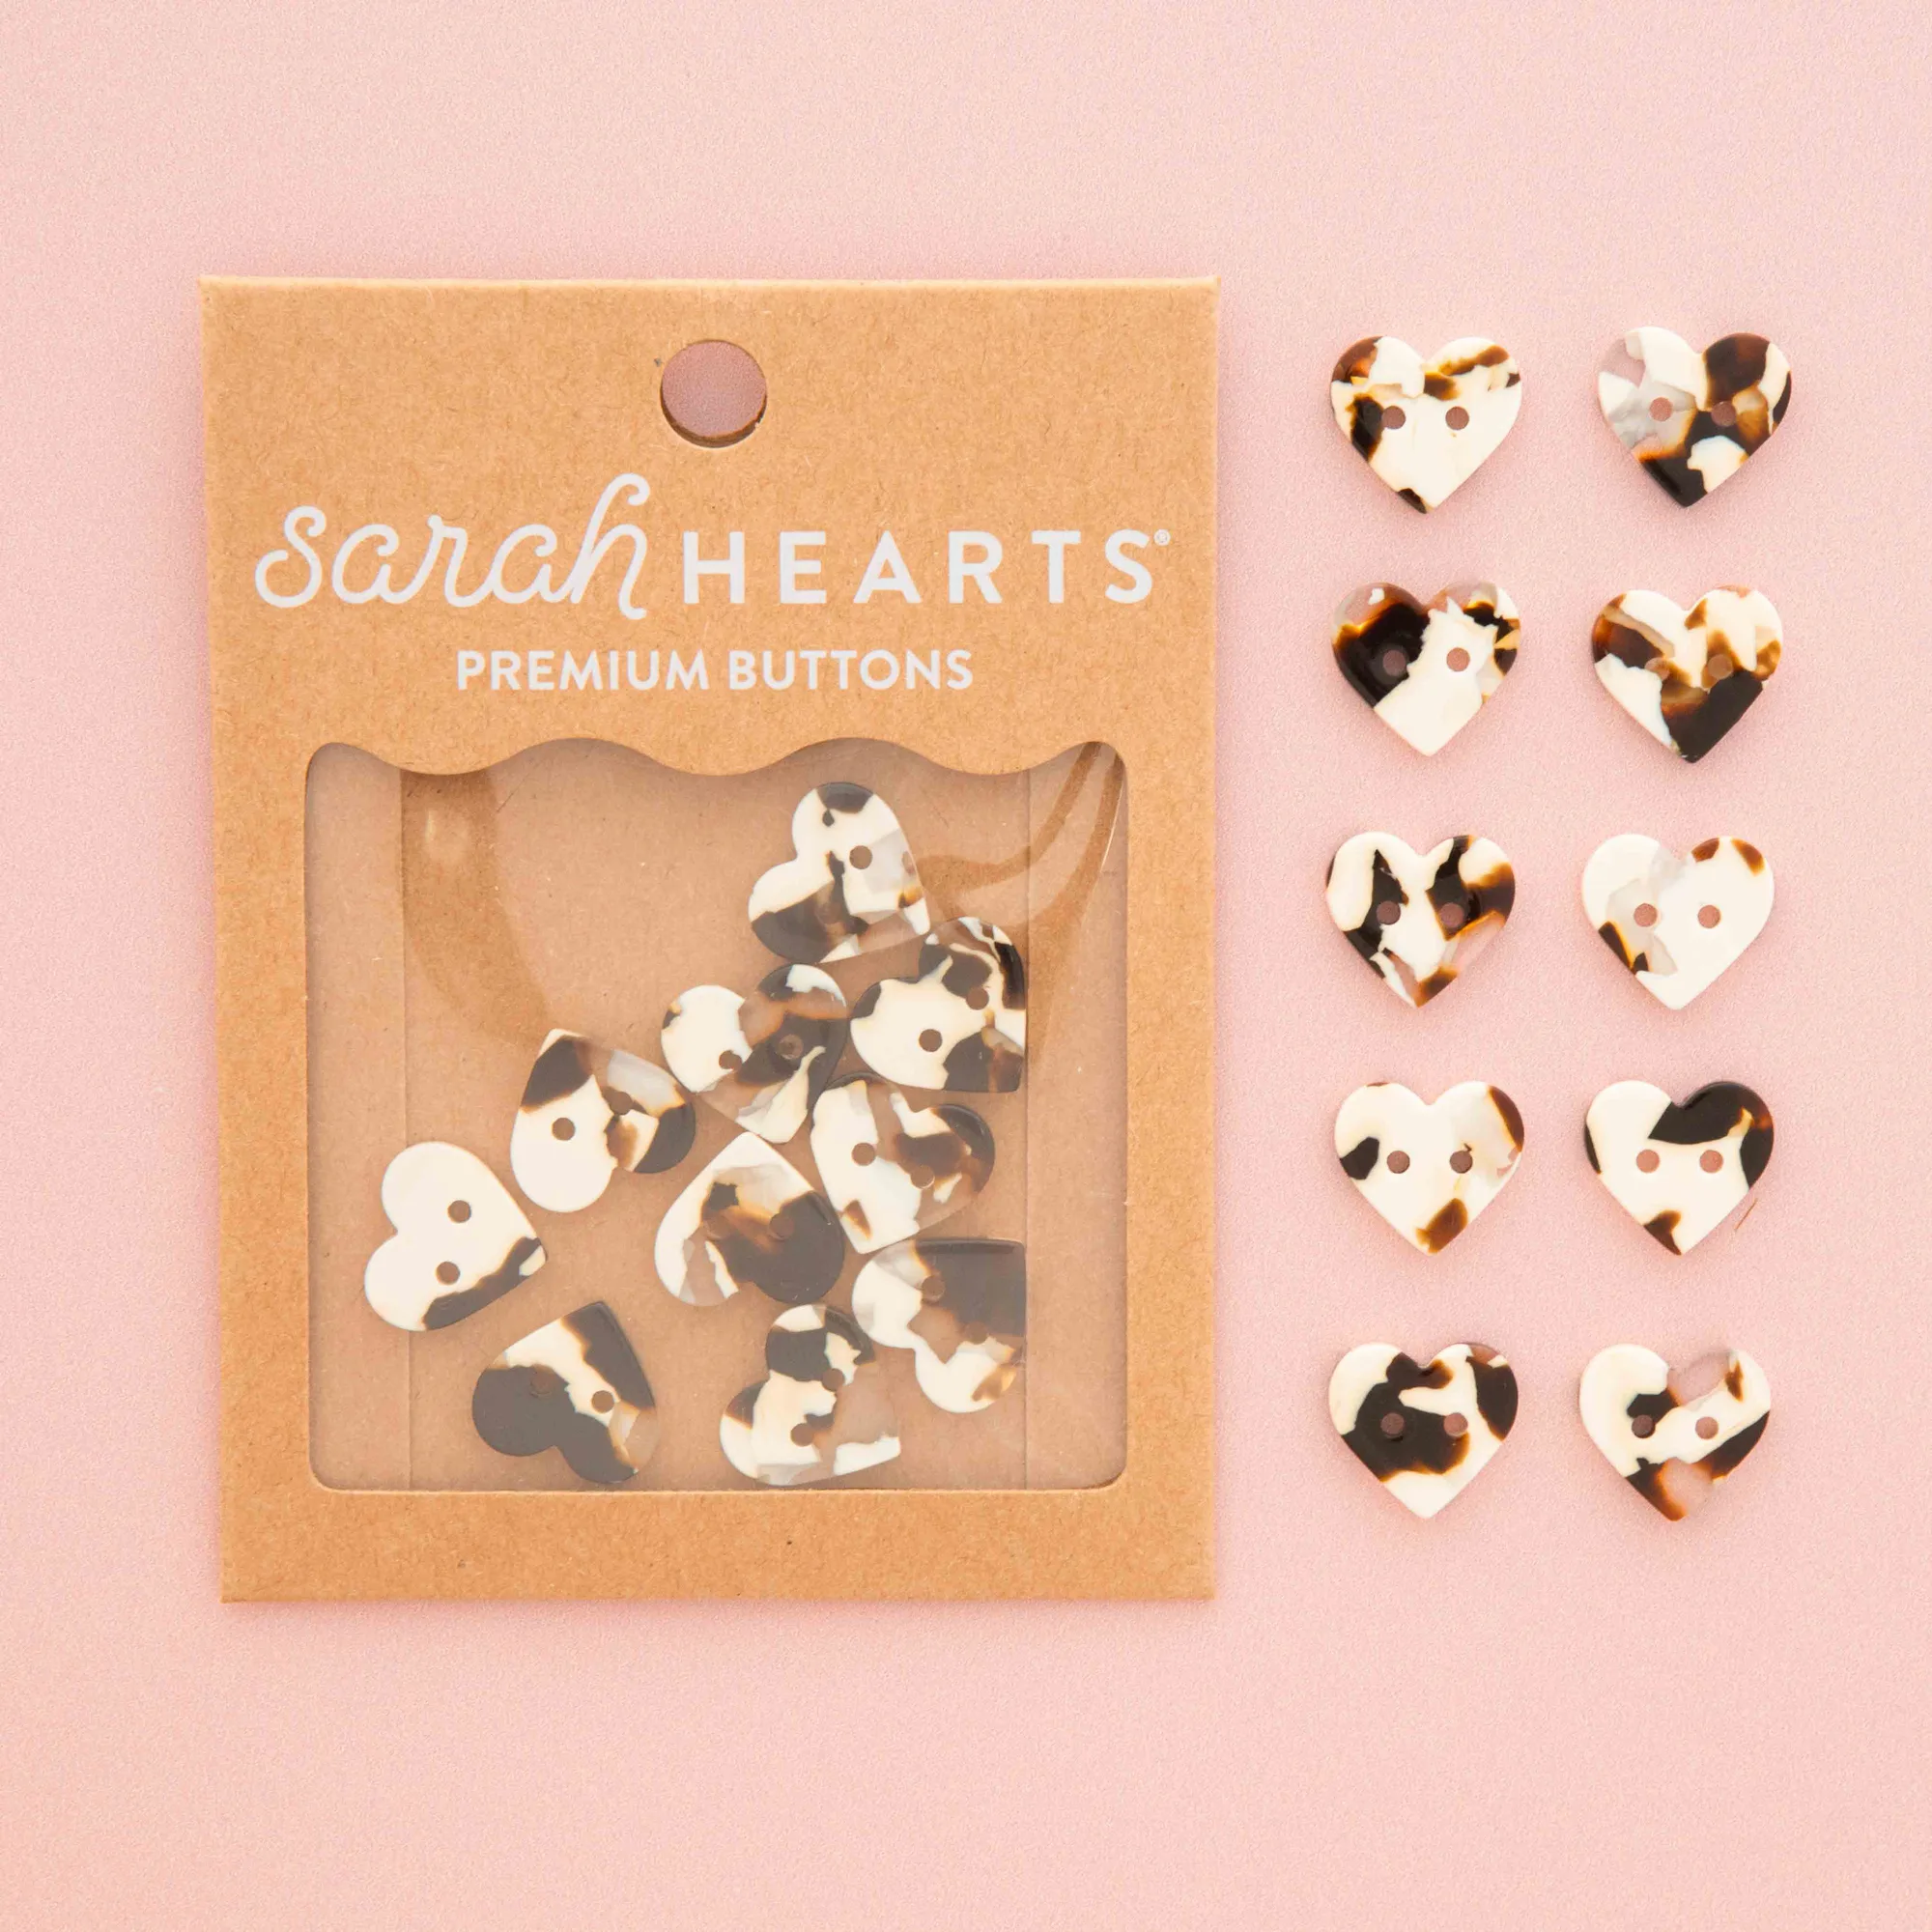
- Small Black + Cream Tortoise Heart Buttons: These 5/8-inch heart buttons are made from eco-friendly cellulose acetate in a speckled tortoise design and come in packs of 10, with a larger 1-inch size also available. The 5/8-inch size is ideal for small alligator clips, while the 1-inch version suits wider barrettes. Ten to a pack means you can make a matching set without hunting for more.
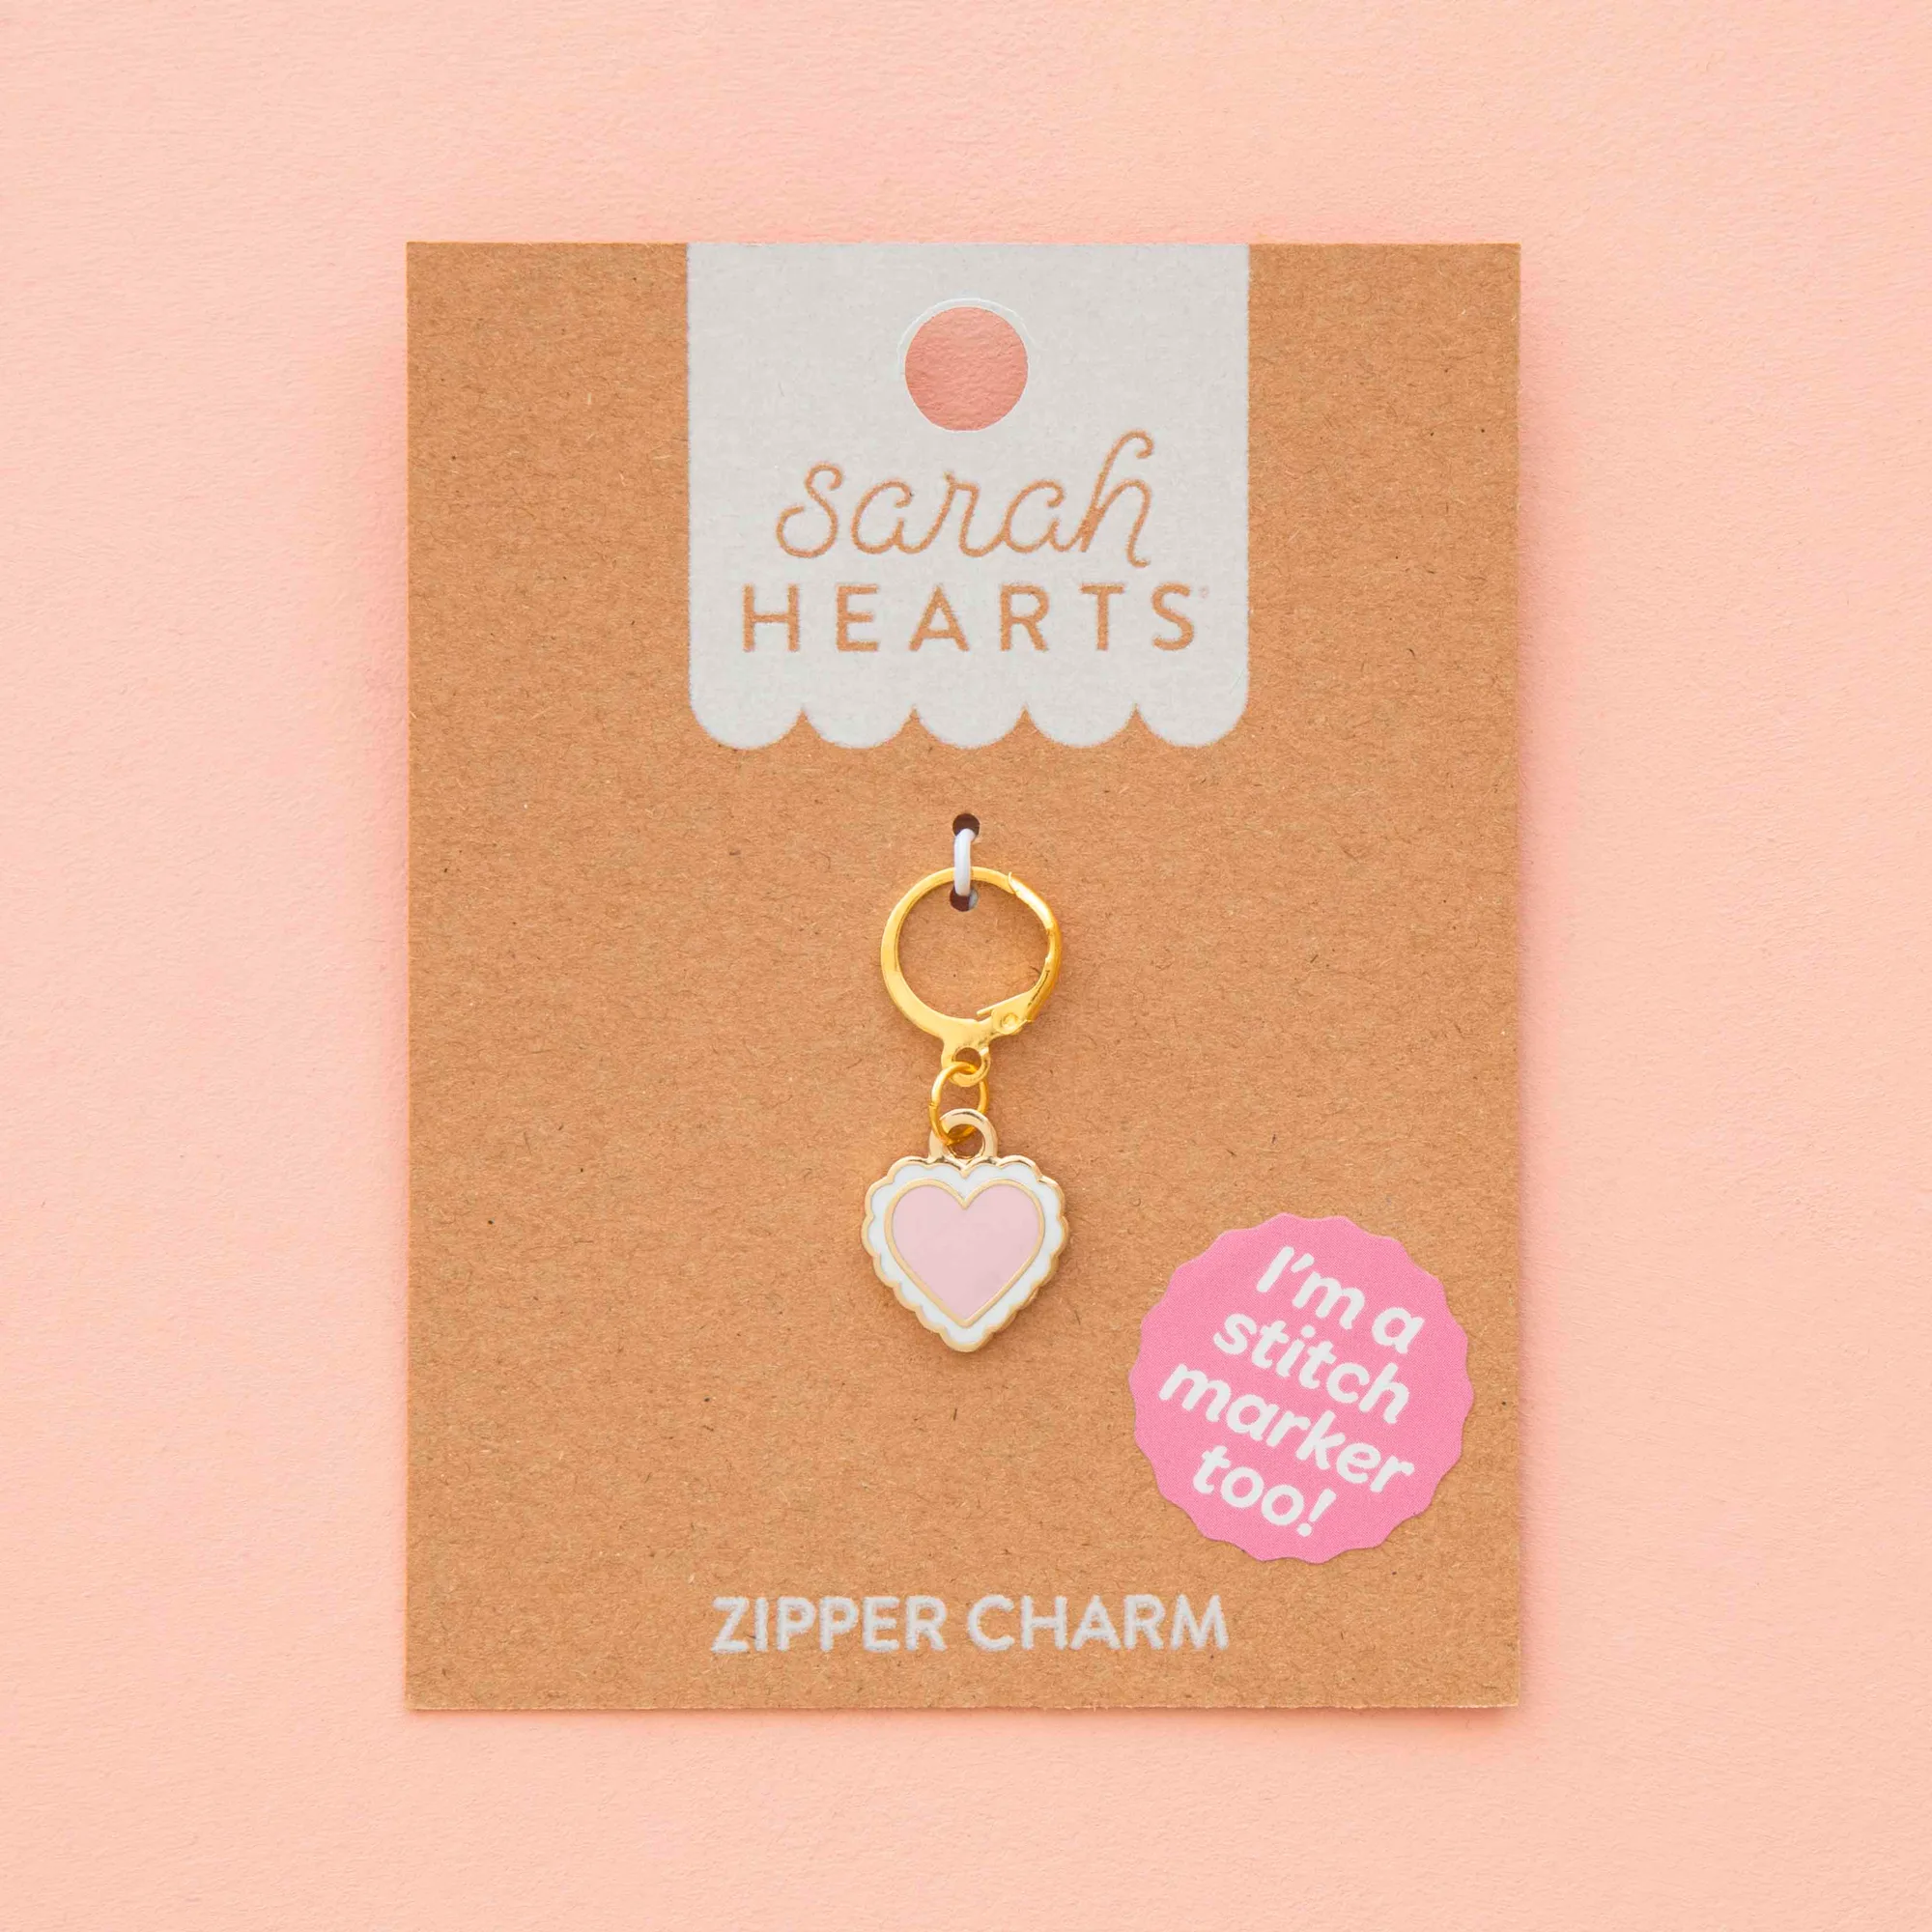
- Sweet Heart Enamel Stitch Marker: This metal enamel marker has a large circle clasp and measures 1.5cm by 1.4cm, and it doubles as a charm for necklaces, bracelets, or a zipper accessory. The open clasp means you can slide it onto a ribbon-wrapped clip or sew it down through the ring, so it works as a charm without any glue at all.
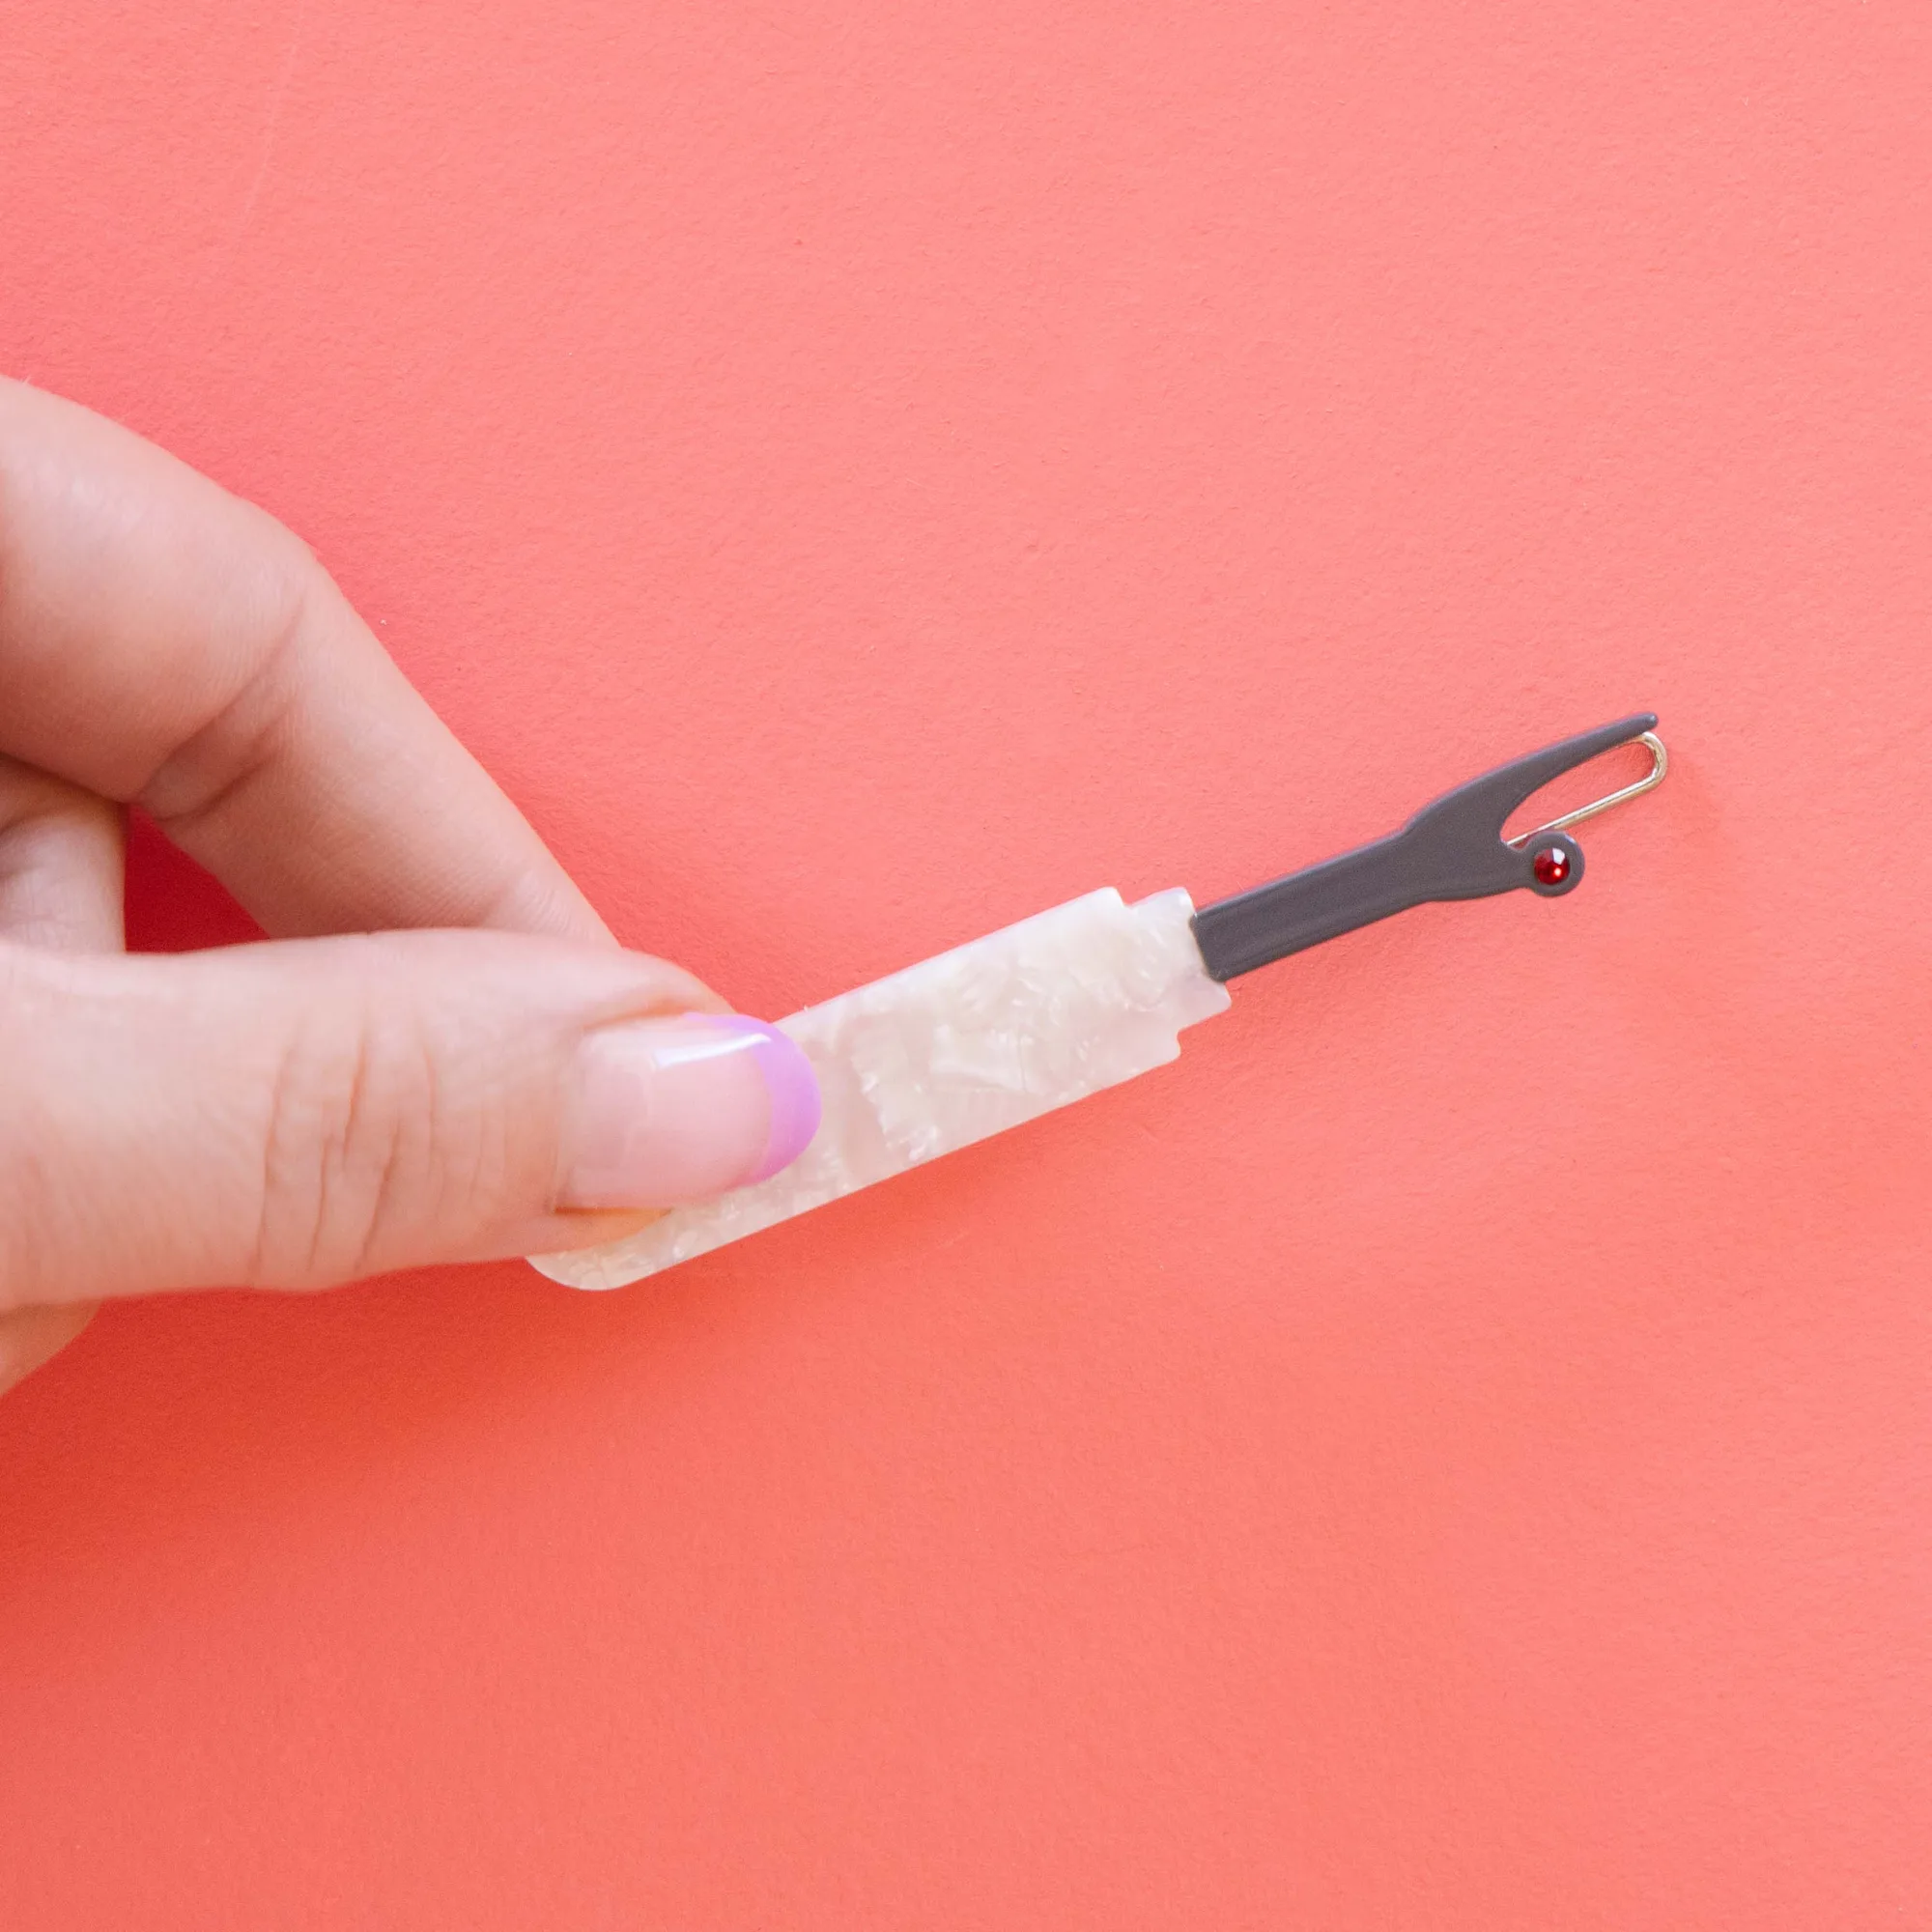
- Seam Ripper Barrette: This miniature clip recreates a seam ripper with a pearlescent handle and rhinestone sparkle, with a ball and clasp closure, designed to grip small sections of hair. It shows what a finished sewing-themed clip looks like, which is useful as a reference point if you're making a matching set or a gift for a sewing friend.
Once you've made one clip this way, the rest go quickly, and you'll start seeing every stray button as a future hair accessory. Start with a single small clip and a pair of heart buttons, get the cure time right, and you'll have a handmade piece that holds up to real wear.