Quick Answer
2 inch trapezoid templates are versatile for creating geometric patterns like zigzags and diamonds in English paper piecing. Choose the right paper or acrylic shape and seam allowance for your project.
Why Choose 2 Inch Trapezoids?
Trapezoids add dynamic angles to EPP projects that hexagons or squares can't achieve alone. The 2 inch size works well for both small accessories like pouches and larger quilts, giving you a balanced scale that isn't too fiddly or too oversized.
One trade-off: trapezoids have non-parallel edges that require careful alignment during stitching. If you're new to EPP, practice with a few pieces before committing to a full project.
Fabric Selection Tips
Solid or tone-on-tone fabrics help the trapezoid shape stand out, while busy prints can hide the angled edges. For geometric designs, choose fabrics with high contrast between adjacent pieces to emphasize the pattern.
Cotton quilting fabric works best because it holds creases well and doesn't stretch. Avoid slippery fabrics like silk until you're comfortable with the technique.
How to Use 2 Inch Trapezoid Templates
- Select Your Template Type: Choose paper templates for a single project or acrylic templates if you plan to reuse them. For paper, decide between seam (1/4" or 3/8") or no seam options. Windowed templates let you see fabric placement for fussy cutting. Check that your chosen seam allowance matches your basting method.
- Cut and Baste Fabric: Cut fabric pieces leaving at least 1/4" beyond the template edge. Wrap fabric over the template and baste through the paper or use glue basting. Fold corners neatly—trapezoids have acute angles that can bunch if not pressed flat. Common mistake: pulling fabric too tight warps the shape. Keep it snug but not stretched.
- Arrange Your Design: Lay out trapezoids on a flat surface to plan the pattern. Rotate pieces to create zigzags, diamonds, or chevrons. Use a design wall or take a photo for reference before stitching. Label rows with sticky notes to avoid confusion during assembly.
- Stitch Pieces Together: Hold two trapezoids right sides together and whipstitch along one edge using a matching thread. Start and end with a few backstitches for security. Match points precisely at corners to maintain sharp angles. Checkpoint: after every few joins, lay the work flat to ensure edges align and the shape lies flat.
- Remove Papers and Finish: Once all pieces are joined, gently remove the paper templates. Press seams open or to one side with a warm iron. Add backing and binding to complete your project. Leave papers in until the entire piece is assembled—removing early can distort the shape.
Product Facts
-
2" Trapezoids: Available as Small Pack (32 pieces), Large Pack (192 pieces), or Bulk Pack (384 pieces). Seam options include 1/4" Seam, 3/8" Seam, and No Seam. Choose the pack size based on your project scale and the seam allowance that matches your preferred basting method.
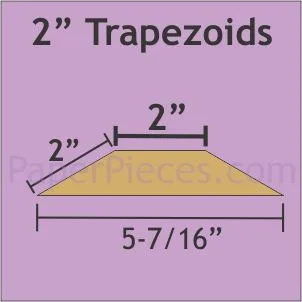
2" Trapezoids
