Quick answer
For most adjustable bag straps, you need three pieces: a slider to set length, a ring or loop to anchor the strap to the bag, and a buckle or clip if you want it removable. Match the hardware finish and size to your webbing width, and test the adjustment before you sew the final seam.
Adjustable bag straps are one of those details that make a bag feel custom. Whether you are making a crossbody bag, a shoulder bag, or a tote with a removable strap, the hardware you choose determines how easily the length changes and how secure the strap stays. This guide explains the common hardware options, how they work together, and how to pick the right combination for your project.
We will focus on sliders, rings, and webbing adjusters—the three components that do most of the work. You will also find decision rules for matching hardware to webbing width, finish, and bag style, plus a few practical tips for installation and testing.
How adjustable strap hardware works
An adjustable strap typically uses a slider (also called an adjuster) that the webbing threads through in a specific path. The slider creates friction, so the strap holds its length until you intentionally move it. A ring or loop at the bag attachment point gives the strap a place to connect, and a buckle or swivel clasp lets you detach the strap entirely. The combination of these parts determines how the strap functions.
The most common setup for a crossbody bag is a slider on the strap itself, with one end sewn to a ring on the bag and the other end threaded through the slider and then sewn or looped back. This creates a continuous adjustment range. If you want a removable strap, add a swivel clasp or a side-release buckle at one or both ends.
- Thread the webbing through the slider exactly as the manufacturer intends; a wrong path will slip or jam.
- Leave at least 1 inch of webbing tail beyond the slider for easy gripping.
- Test the adjustment with the bag loaded before you trim or sew the final tail.
Slider types and when to use them
Sliders come in several shapes: rectangular, oval, and tri-glide. Rectangular sliders are the most common for flat webbing and offer a secure hold. Oval sliders work well with softer or thicker webbing because the curved shape reduces friction points. Tri-glide sliders are often used for straps that need to be adjusted frequently, such as on a camera bag or a child's backpack, because they allow smoother movement.
The material and finish matter as much as the shape. Metal sliders, such as those in gunmetal or matte black, are durable and hold up to heavy use. Plastic sliders are lighter and less expensive but may wear faster under constant load. For a bag that will see daily use, metal hardware is usually the better long-term choice.
- Match slider width to your webbing width—usually 1 inch or 1.5 inches for bag straps.
- Choose a slider with a smooth, rounded interior to reduce webbing wear.
- If you use a patterned webbing, a simple slider shape keeps the focus on the fabric.
Rings, loops, and attachment points
Rings and loops connect the strap to the bag. D-rings are common because they are strong and easy to sew into a seam. O-rings and rectangle rings are also used, depending on the look you want. The ring size should match the width of your strap or the clip you plan to use. If you are using a swivel clasp, the ring needs to be large enough for the clasp to move freely.
For a clean look, you can sew the strap directly to the bag without a ring, but that makes the strap permanent. If you want the option to change straps, install a ring or loop at each attachment point and use a swivel clasp or buckle on the strap. This also makes it easier to replace a worn strap later.
- Reinforce the area where the ring attaches with a small piece of stabilizer or a second row of stitching.
- Use a ring with a welded joint for heavy loads; welded rings resist pulling open.
- Check that the ring's finish matches your slider and other hardware for a cohesive look.
Adjusting strap length: practical tips
The adjustment range depends on how much webbing you leave free. A typical crossbody strap adjusts from about 30 to 55 inches, but you can customize this. Measure the desired drop length—the distance from your shoulder to the top of the bag—and add extra for the adjustment tail. Remember that the slider takes up about 1 to 2 inches of webbing, so account for that in your cutting length.
When threading the slider, follow the path that creates friction. A common path is: webbing goes up through one slot, over the center bar, and down through the other slot. This creates a bind that holds the length. If the strap slips, you may have threaded it incorrectly or the slider is too large for the webbing thickness.
- Cut webbing at least 6 inches longer than your longest desired length to allow for adjustment and sewing.
- Use a hot knife or fray check on webbing ends to prevent fraying.
- Mark your preferred length with a pin before sewing the final seam so you can repeat it.
Matching hardware to your bag style
The hardware you choose should suit the bag's purpose and aesthetic. For a minimalist crossbody, a slim rectangular slider and small D-rings in a matching finish keep the look clean. For a rugged or utility bag, heavier hardware in gunmetal or antique brass adds durability and style. If you are making a child's bag, consider plastic hardware for weight savings, but check that it is strong enough for the load.
Finish consistency matters. If your bag has a zipper with a gunmetal pull, choose gunmetal sliders and rings. Mixed metals can look intentional, but it is easier to get a cohesive result by sticking to one finish family. Also consider how the hardware will wear—matte finishes may show scratches more than polished ones.
- For a removable strap, use swivel clasps that match the ring size and finish.
- If you use a side-release buckle, make sure the buckle's width matches your webbing.
- Test the hardware with the bag loaded to ensure it does not dig into your shoulder.
Decision rules for adjustable bag strap hardware
- If you want a fixed-length strap that never changes: Skip the slider and sew the strap directly to the bag or use a simple ring and loop. This is the most secure option and reduces hardware weight. Choose this for minimalist bags or when you know the exact length.
- If you need frequent length changes: Use a tri-glide or oval slider with smooth edges, and pair it with a swivel clasp so you can remove the strap entirely. Metal hardware holds up better than plastic for daily adjustments. Best for crossbody bags and camera bags where the strap moves often.
- If you are matching hardware to a specific finish: Pick one finish family—gunmetal, matte black, antique brass, or rainbow—and use it for all visible hardware: sliders, rings, buckles, and zipper pulls. Check that the slider and ring sizes are compatible with your webbing and clasp. Consistent finish makes a handmade bag look more professional.
Hardware and materials that work well
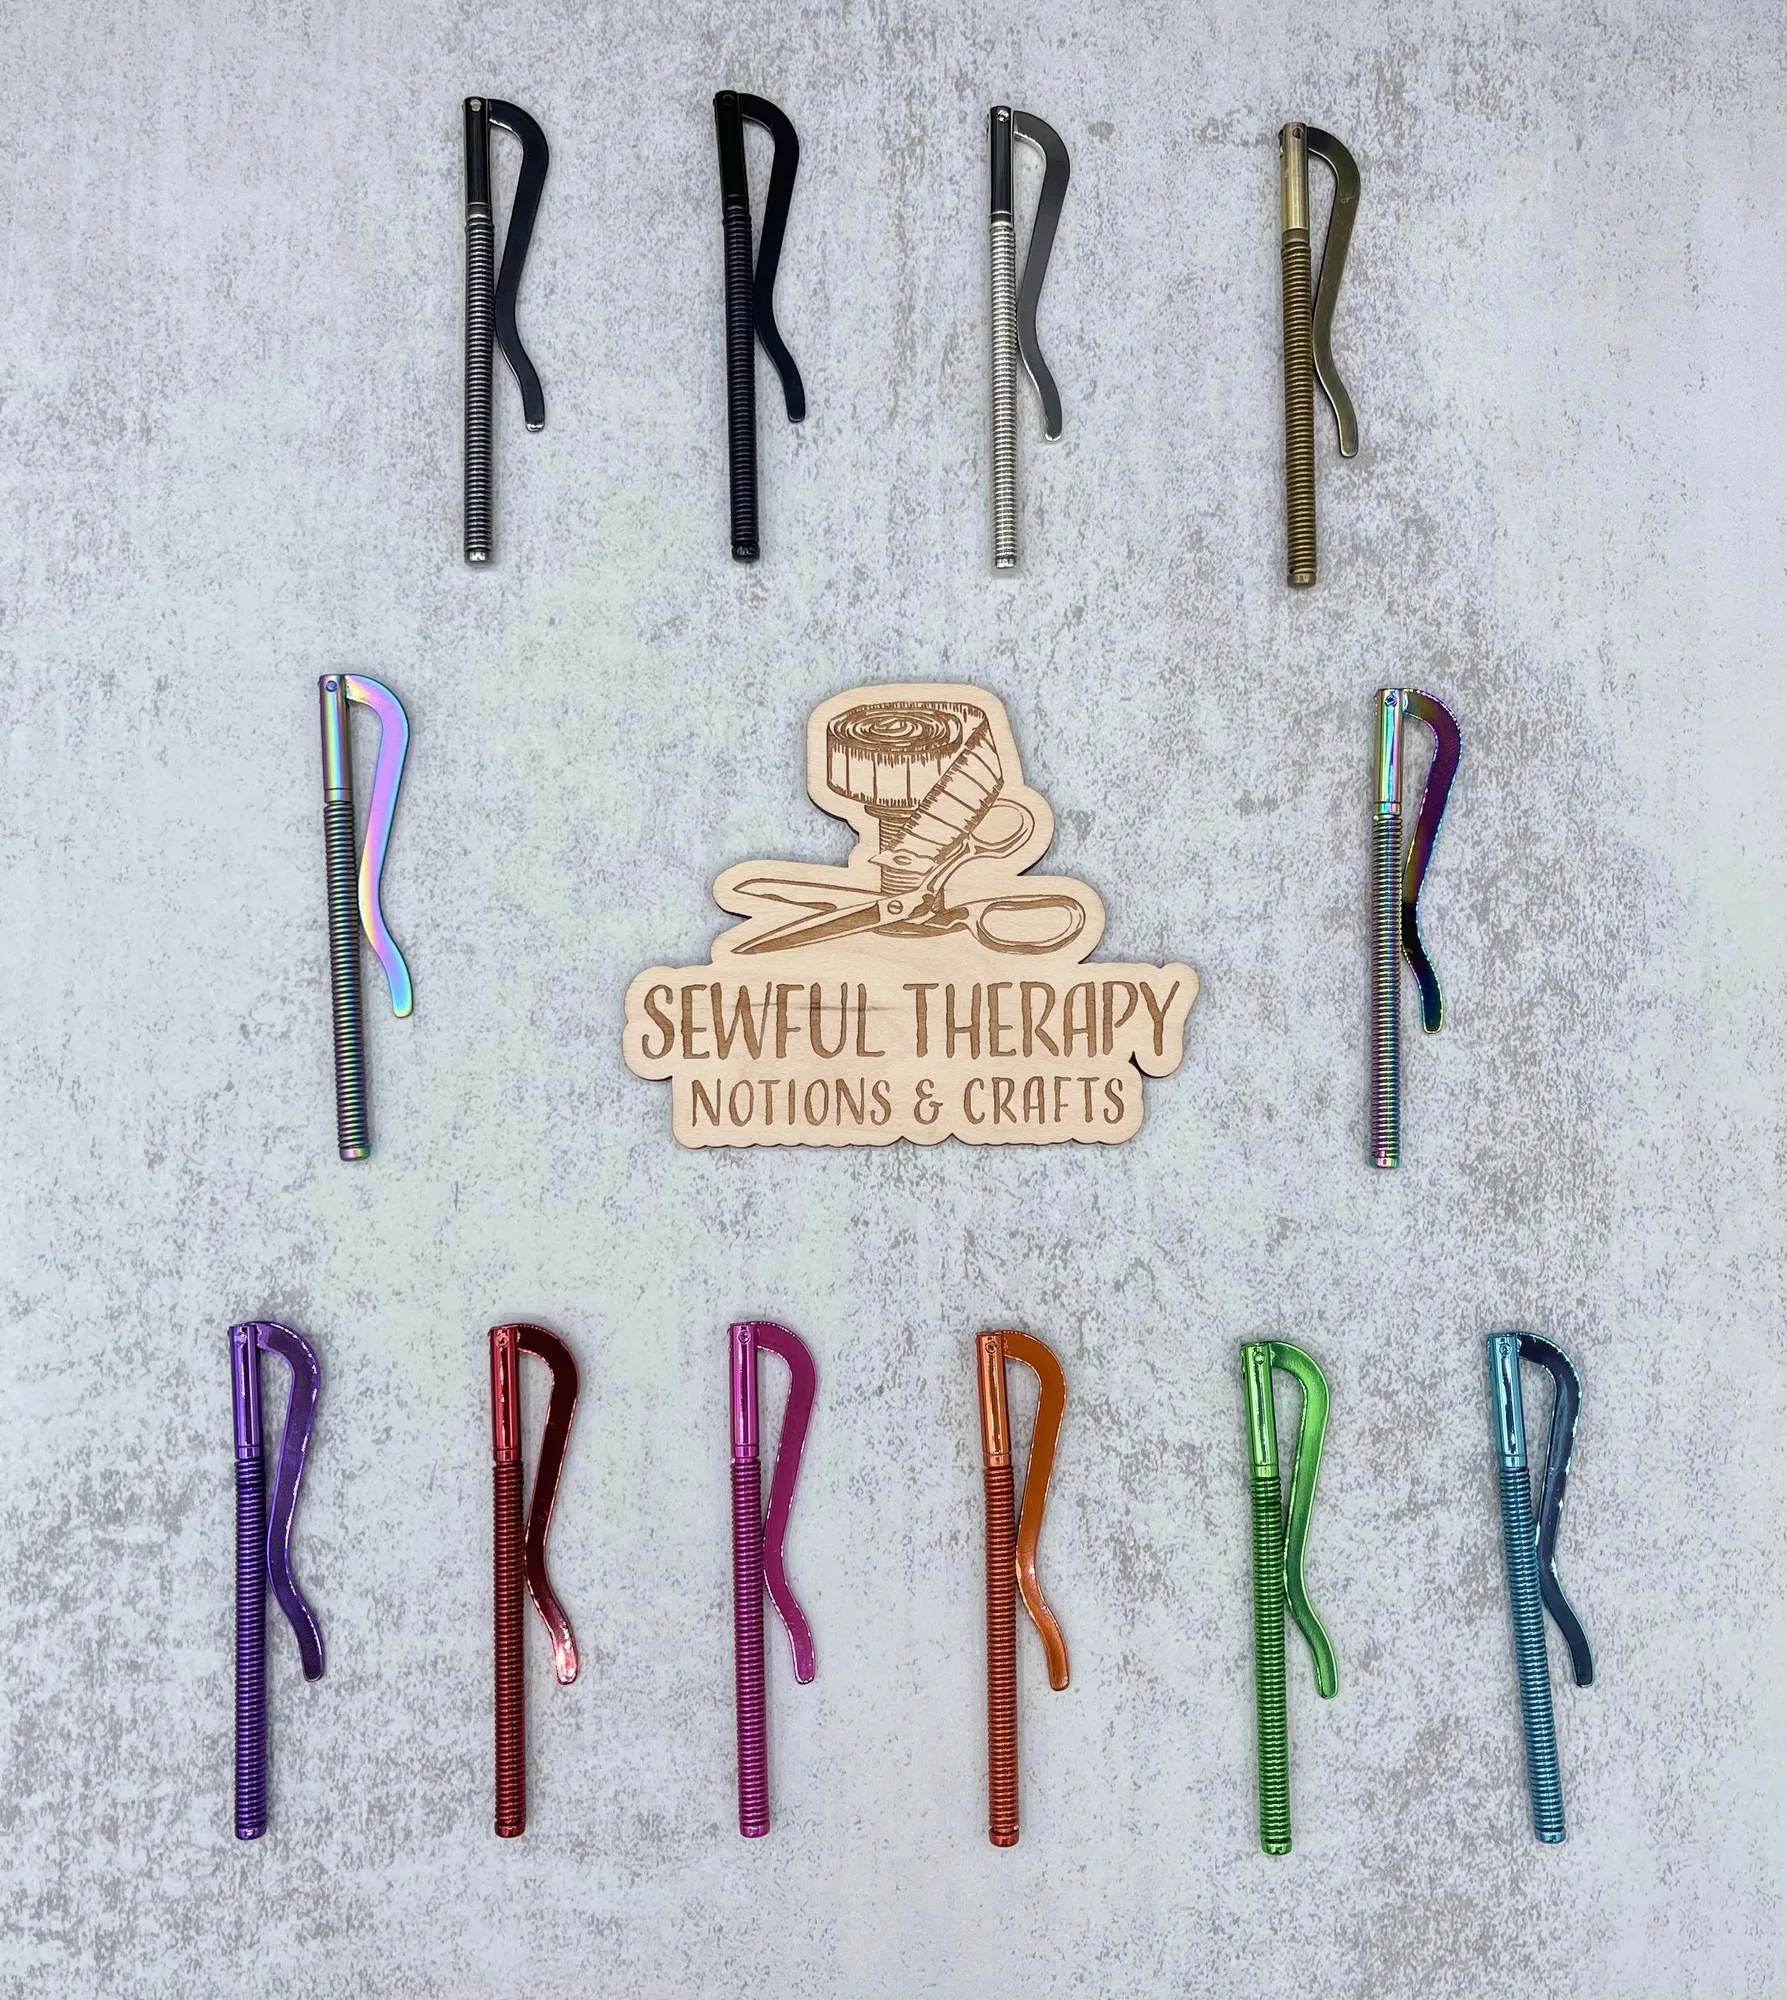
- Chroma: $pring Loaded Money Clip: Available in 12 color finishes including silver, gunmetal, rainbow, matte black, and more. Great for minimalist wallets and securely holds cash. While designed for money, the finish options and secure hold make it a useful reference for matching small hardware finishes to your bag's sliders and rings. The variety helps you coordinate a cohesive look.
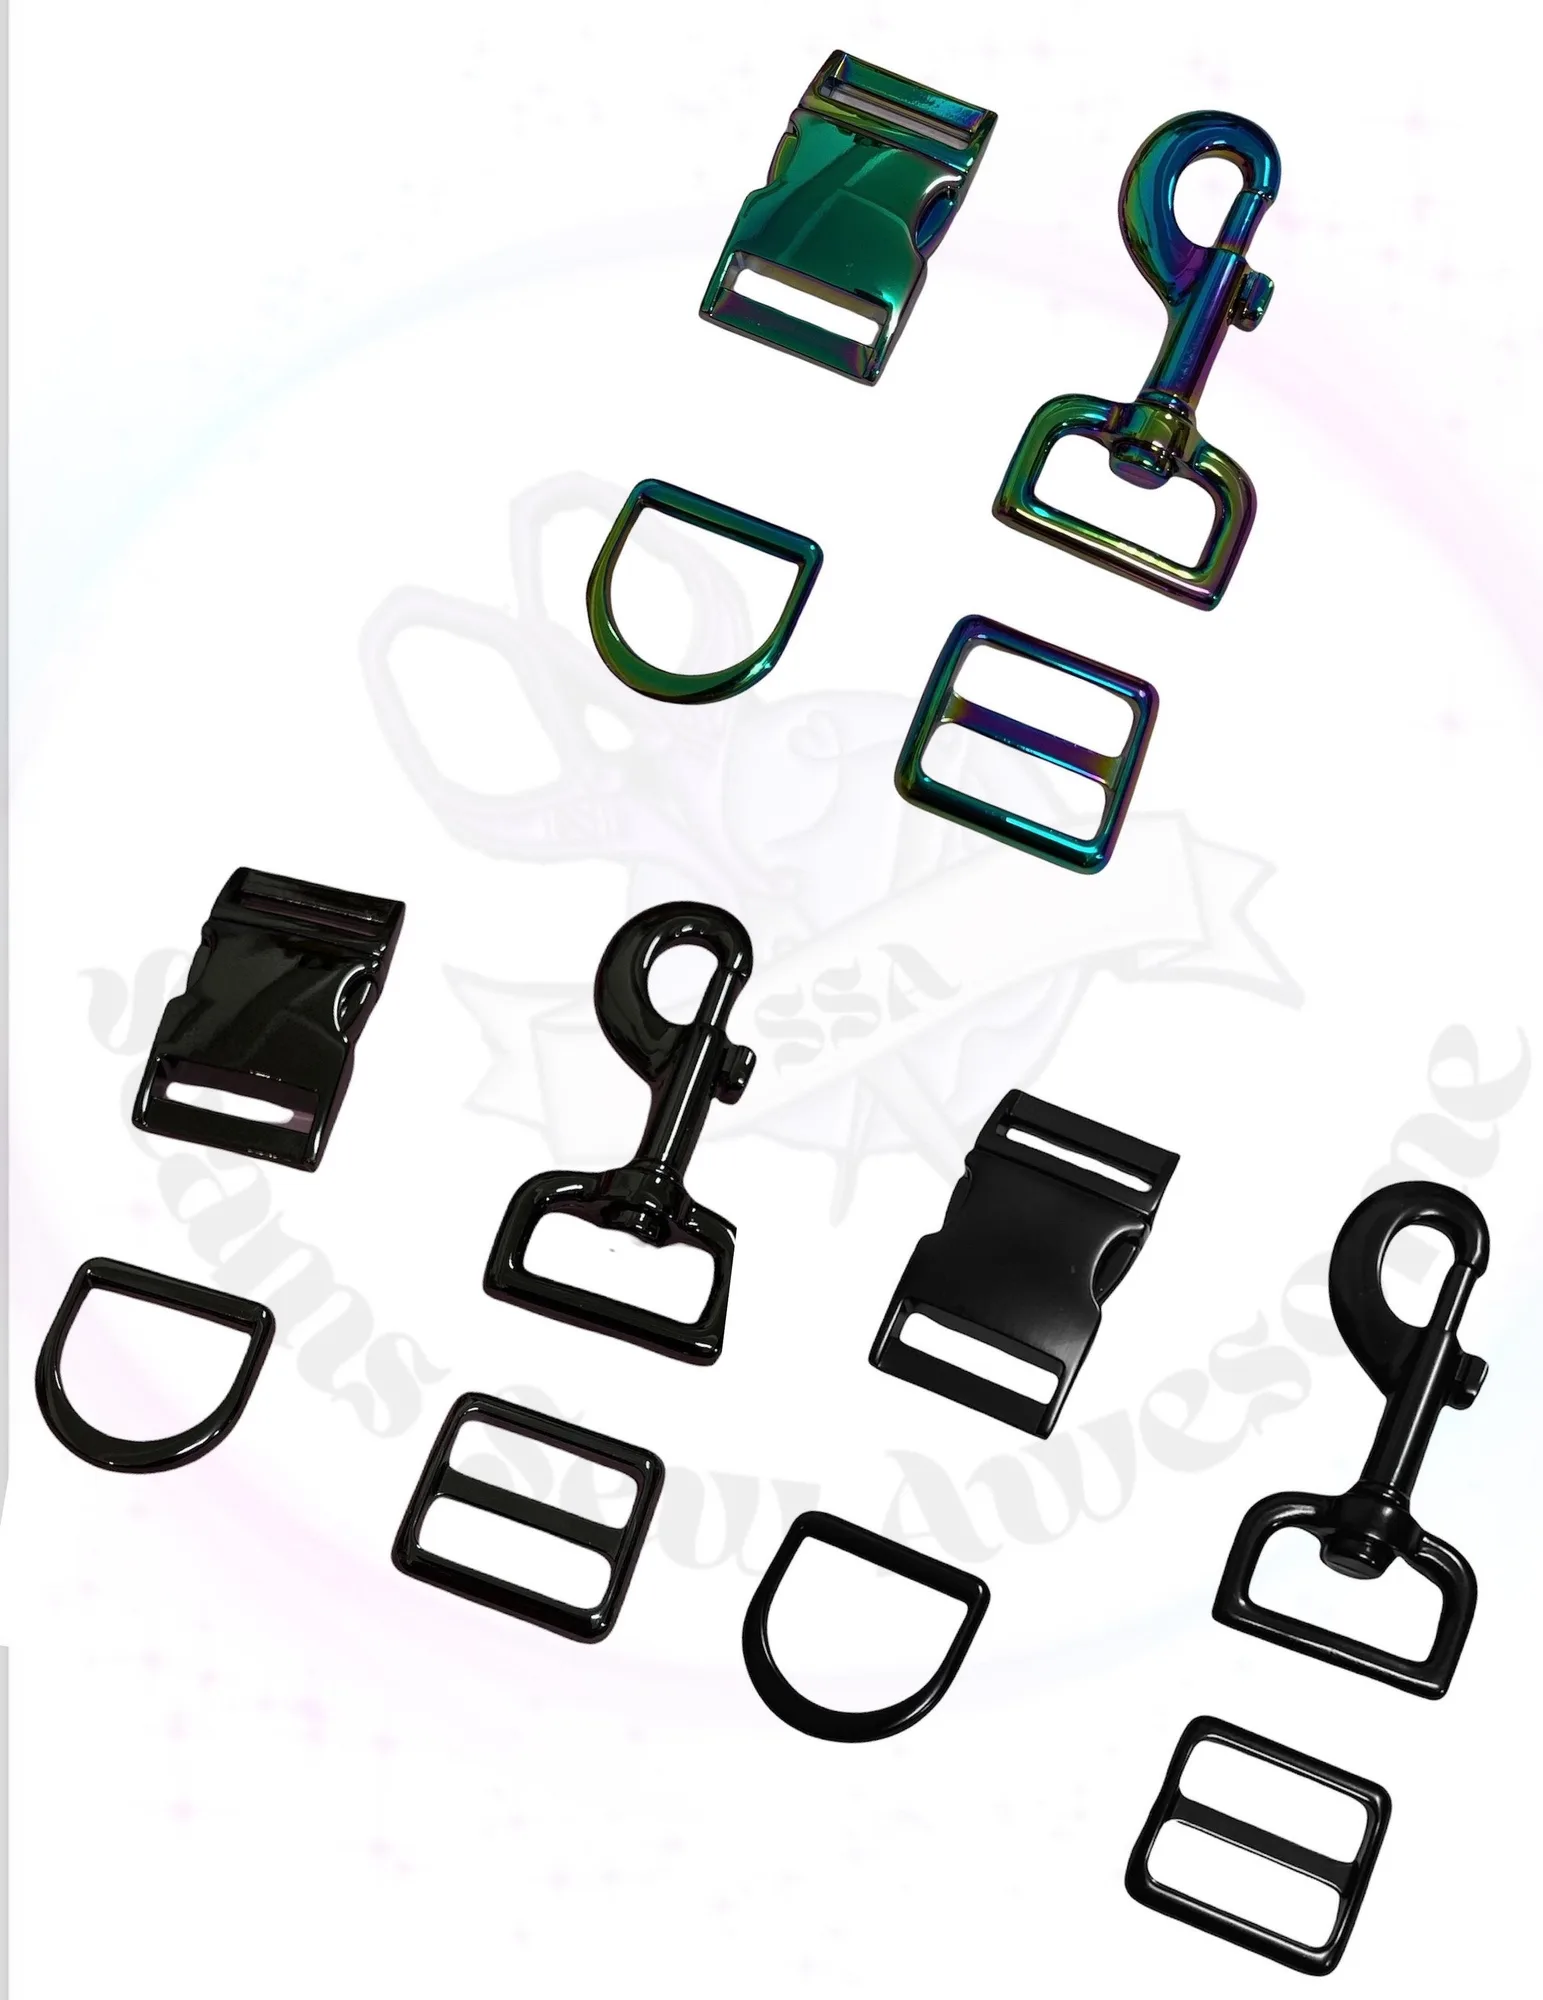
- Heavy Duty Pet Collar Hardware Kit SSA: 4-piece kit in 1 inch: lobster claw swivel clasp, D-ring, adjuster, and curved side release buckle. Welded joints for strength. Finishes: rainbow, gunmetal, matte black. This kit includes the exact components needed for an adjustable strap—slider, ring, and clasp—in a durable, pet-grade construction that translates well to bag making. The 1-inch size fits common webbing.
Is this hardware right for your project?
Best for
- Bag makers who want a removable, adjustable crossbody or shoulder strap
- Projects using 1-inch or 1.5-inch webbing
- Anyone who wants to match hardware finish to a specific bag design
Not for
- Bags that need a completely fixed strap with no hardware visible
- Ultralight projects where every gram counts (plastic hardware may be a better fit)
- Straps narrower than 3/4 inch, which require smaller specialty hardware
Adjustable bag strap hardware is a small investment that makes a big difference in how your bag functions and feels. Start with a slider, a ring, and a clasp in a finish you love, then test the adjustment before you sew. With the right components, your strap will hold its length, move smoothly, and last for years.