Start with the arms, then the heads
A six-light rail gives you two layers of adjustment: the arms that carry pairs of lamps and the individual heads. On the DLLT 6-Light Flexible Track Lighting Rail, the fixture has three arms, two of which rotate 350°, and each of the six lamp heads rotates 360° horizontally and 90° vertically. Work from the largest movement to the smallest: set the arm positions first, then aim each head, so you are not fighting one adjustment while making another.
This order matters because moving an arm shifts every head on it. If you aim heads first and then swing an arm, you will re-aim the same lamps twice.
Aim the rail in four passes
- 1. Set the arm spread: Rotate the two adjustable arms to spread the six lamps across the ceiling area you want to cover. Leave the fixed arm where it falls; the two rotating arms do the repositioning.
- 2. Aim the outer heads at the wall or feature: Point the heads nearest the edge of the rail toward the art, wall, or surface you want to accent. Use the 360° horizontal and 90° vertical range to angle each glass shade without forcing it.
- 3. Aim the inner heads for ambient fill: Set the middle pair or pairs to spread light into the room rather than onto a single point. This is where the fixture shifts from accent lighting to general illumination.
- 4. Step back and check from the seated view: Look at the wall from where people actually sit or stand. Adjust any head that throws glare toward eye level or leaves a dark gap between beams.
What the glass shades change about aiming
The frosted matt white glass shades on this fixture soften the beam compared with an open spotlight. That makes the rail more forgiving for living room art and ambient use, but it also means the visible hotspot is less sharp. Aim by watching the pool of light on the wall rather than by judging the angle of the head alone.
Because the shades are glass, keep your hands clean and dry when adjusting the heads, and avoid twisting the shade itself. Turn the lamp head at its joint, not by gripping the glass.
Fixture details that affect aiming and placement
-
DLLT 6-Light Flexible Track Lighting Rail, Modern Directional LED Spot Ceiling Light Fixture with Glass Shade, for Living Room, Dining Room, Bedroom, Kitchen, Brush Steel: Three arms, two of which rotate 350°, with six lamp heads that each rotate 360° horizontally and 90° vertically. This is the adjustment range you are working with; knowing it prevents forcing a head past its stop.
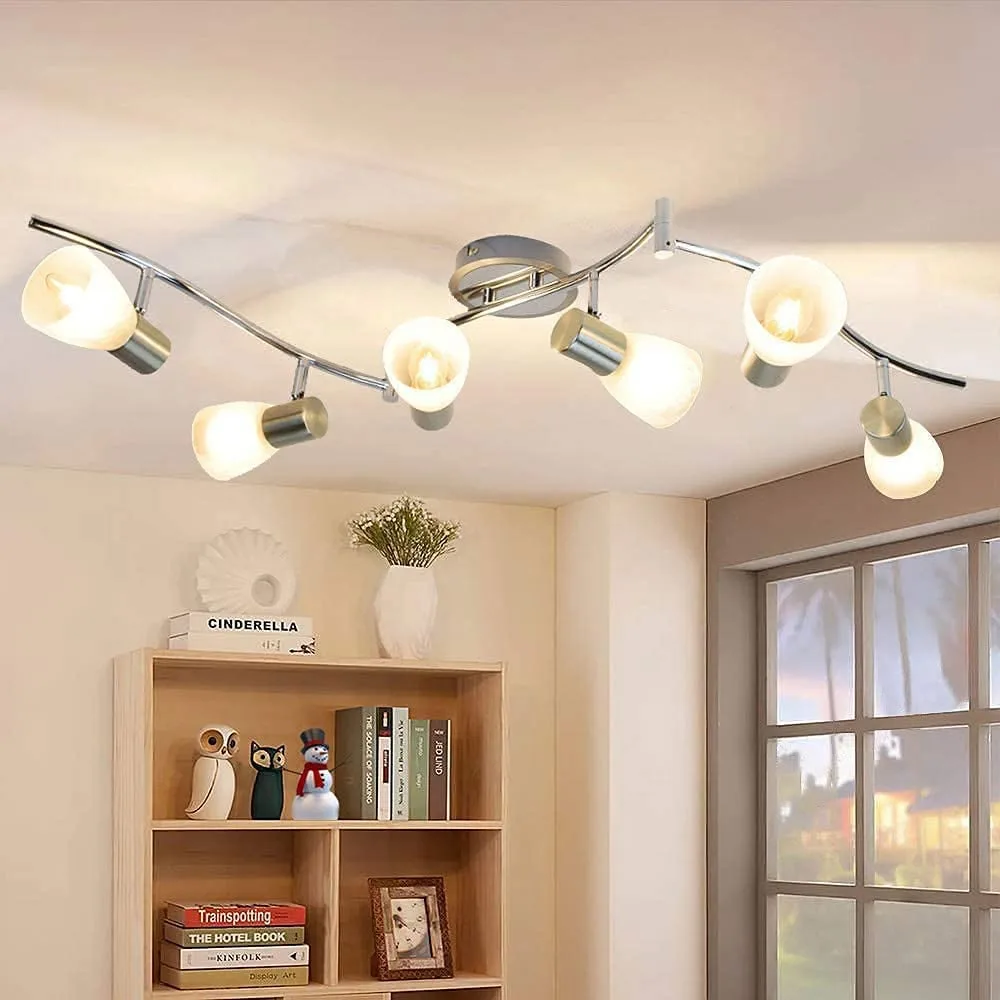
DLLT 6-Light Flexible Track Lighting Rail, Modern Directional LED Spot Ceiling Light Fixture with Glass Shade, for Living Room, Dining Room, Bedroom, Kitchen, Brush Steel
-
DLLT 6-Light Flexible Track Lighting Rail, Modern Directional LED Spot Ceiling Light Fixture with Glass Shade, for Living Room, Dining Room, Bedroom, Kitchen, Brush Steel: Total length 47.64 inches (121 cm); lamp body length 15.75 inches (40 cm); 4.84" H x 2.95" W (12.3 cm x 7.5 cm). The rail's footprint tells you how far the six heads can spread before you need to choose a different mounting position.
-
DLLT 6-Light Flexible Track Lighting Rail, Modern Directional LED Spot Ceiling Light Fixture with Glass Shade, for Living Room, Dining Room, Bedroom, Kitchen, Brush Steel: Supports up to 6 x 40 W bulbs; compatible bulb types include LED, incandescent, halogen, and CFL; E12 base, 110–120 V, UL certified for US use. Bulb choice affects beam character and heat; confirm the base and voltage before you buy bulbs for the aimed fixture.
-
DLLT 6-Light Flexible Track Lighting Rail, Modern Directional LED Spot Ceiling Light Fixture with Glass Shade, for Living Room, Dining Room, Bedroom, Kitchen, Brush Steel: Light direction is adjustable, but the fixture is not dimmable. If you want to soften the scene after aiming, plan on bulb choice or separate control rather than a dimmer on this rail.
Aiming for a living room art wall
For track lighting for living room art, use the two rotating arms to place heads on either side of the piece, then angle each head slightly inward so the beams overlap on the wall rather than crossing in the middle of the room. Keep the heads closest to the art on the outer arms and use the remaining heads for gentler fill.
The fixture is rated for sloped or vaulted ceilings with the included canopy mounting plate, so the rail can follow the ceiling line. On a slope, aim the heads after the rail is mounted, because the ceiling angle changes the starting position of every lamp.
Checkpoints before you tighten anything
- Check the beam on the surface, not the ceiling: Stand where the light is meant to land and confirm the pool of light covers the art or task area without spilling onto the ceiling.
- Check for glare at seated height: Sit down and look toward the rail. If a head points into your eyes, tilt it down or outward until the glare is gone.
- Check that arms clear each other: The two rotating arms have 350° of movement; make sure they do not collide with the fixed arm or the ceiling hardware when you swing them.
- Check the bulb wattage: Do not exceed 40 W per bulb. If you are using LED bulbs, match the E12 base and the 110–120 V rating.
When the aim still feels wrong
If the light looks uneven after a full pass, the problem is often the arm spread rather than the head angles. Bring the arms closer together to concentrate the beams, or spread them wider to reduce overlap. The glass shades also make the fixture less punchy than a bare spotlight, so for very tall walls or large art, accept that this rail works best as accent and ambient lighting rather than a tight gallery spot.
The supplied information does not include a recommended aiming distance or angle, so treat the checkpoints above as observation points rather than manufacturer settings. The manual linked in the product record is the place to confirm installation and safety details before you mount the rail.