Quick answer
To sew the Aunty Iris quilt, you need the paper pattern, fabric for the curved petals and background, and your Wonder Curve Ruler. Follow the steps below for cutting, piecing, and assembling the blocks.
Understanding the Aunty Iris Design
The Aunty Iris quilt features flowing curves and gentle petals that form a modern floral composition. Designed for the Wonder Curve Ruler, it eliminates the need for pins or templates, making curved piecing approachable. The pattern is available as a paper pattern, which includes full-size templates and instructions.
Because the design relies on smooth curves, fabric choice matters: high-contrast solids or tone-on-tone prints help the petals stand out. Avoid busy prints that hide the curve lines.
Fabric Requirements
The pattern specifies yardage for the background, petals, and binding. For a throw-size quilt (approximately 60" x 72"), you'll need about 2.5 yards of background fabric and 1.5 yards of assorted petal fabrics. Always pre-wash your fabrics to prevent shrinkage after piecing.
Since the pattern uses the Wonder Curve Ruler, you'll cut curved shapes directly from strips. Plan your fabric selection to include at least 4-5 contrasting colors for the petals to create depth.
Sewing Steps for Aunty Iris
- 1. Cut the Background and Petal Strips: Using the Wonder Curve Ruler, cut background strips and petal strips according to the pattern's cutting chart. Stack multiple layers to speed up the process, but ensure the ruler stays aligned to avoid shifting. Common mistake: cutting strips too narrow — double-check the width before cutting.
- 2. Piece the Curved Units: Place a background strip right side up and a petal strip right side down, aligning the curved edges. Sew along the curve using a 1/4" seam allowance, easing the fabric gently. Do not stretch or pull. Common mistake: pulling the fabric causes distortion — let the feed dogs do the work.
- 3. Press the Seams: Press the seam allowance toward the petal fabric to reduce bulk. Use a dry iron to avoid stretching the bias edges. Let the unit cool flat before trimming. Common mistake: pressing with steam can distort curves — use a dry iron.
- 4. Trim the Units to Size: Trim each curved unit to the dimensions specified in the pattern, squaring up the edges. Use a rotary cutter and ruler for accuracy. Common mistake: trimming too much off the ends — measure twice, cut once.
- 5. Assemble the Quilt Blocks: Arrange the curved units in the block layout shown in the pattern. Sew units together in rows, then join the rows to complete each block. Press seams open to reduce bulk. Common mistake: misaligning units — pin the intersections before sewing.
- 6. Finish the Quilt Top: Sew the completed blocks together, add borders if desired, and layer with batting and backing. Quilt as desired, then bind. Common mistake: forgetting to square up blocks before joining — check each block for size consistency.
Product Facts
-
Aunty Iris (Paper): The Aunty Iris quilt is a fresh, floral-inspired design created with the Wonder Curve Ruler by Sew Kind of Wonderful. Flowing curves and gentle petals come together to form an elegant, modern composition reminiscent of the graceful iris flower. This means you can achieve precise curved piecing without pins or templates, saving time and reducing frustration.
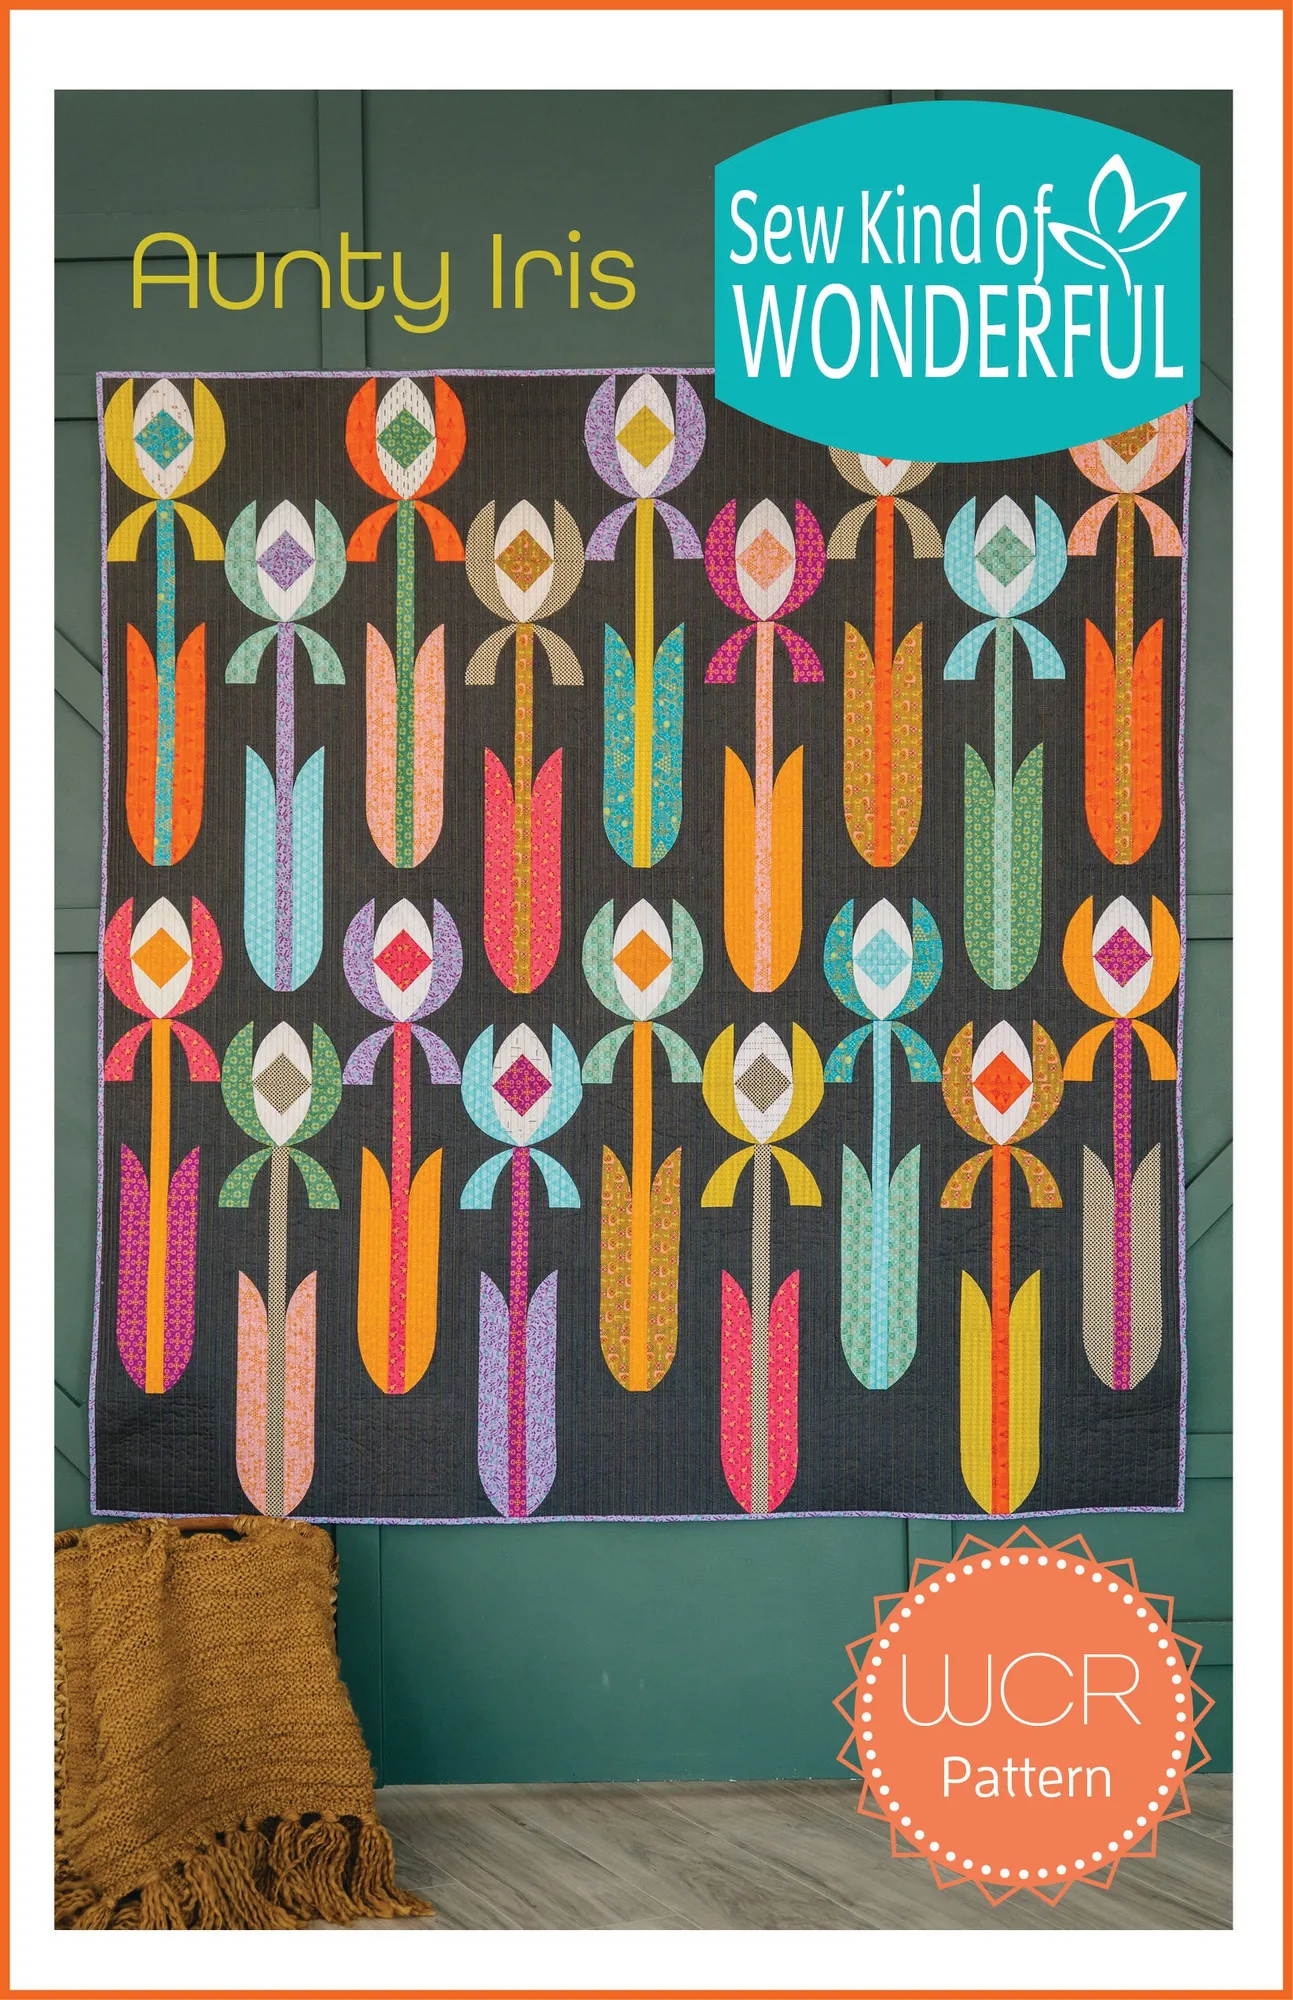
Aunty Iris (Paper)