Why a round beach ball makes a satisfying stitch
The Beach Ball canvas from Wheelhaus Needlepoint is a 3.5 round design on 13 mesh. Its simple, curved segments make it an approachable project for stitchers who want to practice working with rounded shapes without committing to a large canvas. Whether you are new to needlepoint or looking for a quick, cheerful project, this canvas offers a chance to refine your technique on a small scale.
Because the design is hand painted and stitch painted, the colors are clearly defined, which helps you plan your stitches. The canvas is available as canvas only or as a thread kit that includes a curated selection of silk and wool fibers, a thread ring, a tapestry needle, and a stitch brochure. If you choose the canvas only, you will need to supply your own threads.
What you get with the Beach Ball canvas
-
Beach Ball: 13 mesh, design 3.5 round, hand painted, stitch painted needlepoint canvas The 13 mesh size means the holes are relatively large, making it easier to see your stitches and suitable for a range of thread weights. The 3.5 round design is compact, so you can finish it quickly.
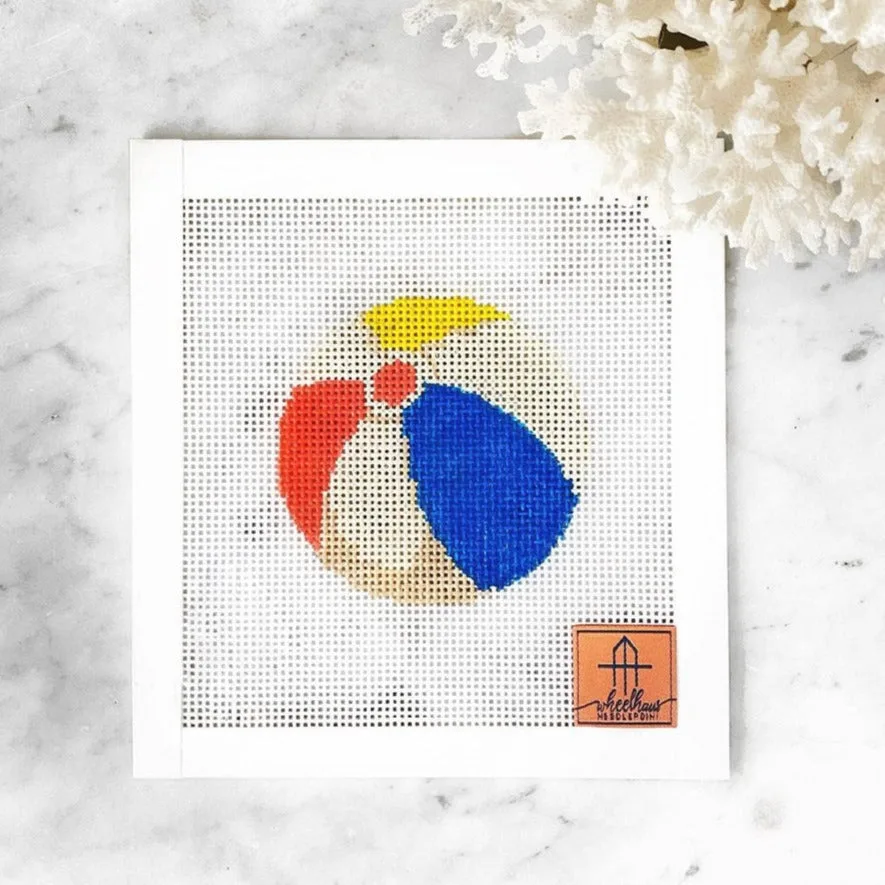
Beach Ball
-
Beach Ball: Canvas only includes one of our seven stitch pamphlets, a WIP Project Card, and a reusable PVC protective project baggy. The stitch pamphlet gives you a starting point for stitch ideas, while the project card and baggy help you keep your work organized and protected between sessions.
-
Beach Ball: Thread kit includes the canvas, a curation of silk and wool fibers, a thread ring, a tapestry needle, and a stitch brochure. The kit provides all the threads you need, saving you the trouble of sourcing colors. The thread ring keeps threads organized, and the tapestry needle is ready to use.
Choosing stitches for curved segments
The beach ball's design is made up of curved panels that meet at the poles. When stitching curved shapes, you want stitches that can follow the contour without creating gaps or overlapping. Stitch pamphlets included with the canvas may offer suggestions, but you can also experiment with stitches that are adaptable to curves.
Basketweave is a classic background stitch that works well for filling areas, but it can be challenging to adapt to tight curves. For the curved panels, consider stitches that are more flexible, such as tent stitch variants or stitches that can be compensated easily. The key is to maintain consistent tension and to compensate stitches at the edges where colors meet.
Stitch ideas for the Beach Ball
- Tent stitch: A simple, versatile stitch that can follow curves by adding or skipping stitches as needed. It creates a smooth surface and is easy to compensate.
- Basketweave: Best for larger areas, but can be used in curved sections with careful compensation. It provides good coverage and a durable finish.
- Slanted Gobelin: A straight stitch that can be worked in varying lengths to fill curved shapes. It adds texture and can be directional to emphasize the ball's roundness.
- French knots: Use for small accents or to add texture at the poles or along seams. They can mimic the look of a real beach ball's textured surface.
Setting up your Beach Ball project
Before you begin stitching, take a few moments to prepare your canvas and materials. This will help your project go smoothly and protect your work.
- Unpack and inspect: Check that your canvas and any included threads are in good condition. If you purchased the canvas only, gather your threads and needles.
- Mount your canvas: Consider using a frame or stretcher bars to keep the canvas taut while stitching. This is especially helpful for maintaining even tension on a round design.
- Plan your stitch order: Decide which area to stitch first. Many stitchers work from the center outward or from one panel to the next. The stitch pamphlet may offer guidance.
- Use the project card and baggy: Keep your WIP Project Card handy to note your thread choices and progress. Store your canvas in the reusable PVC baggy when not stitching to protect it from dust and snags.
Tips for stitching curved shapes
Stitching curves requires attention to how stitches behave at the edges. When you encounter a curve, you may need to use compensation stitches—partial stitches that fill in the gaps—to keep the outline smooth. Work slowly and check the front of your canvas frequently to ensure the curve looks continuous.
Another tip is to use a laying tool or your needle to adjust stitches as you go, keeping them from twisting. This is especially important with silk threads, which can be slippery. The thread ring included in the kit can help keep threads separated and reduce tangling.
Thread choices and color planning
If you purchased the thread kit, you will have a curated selection of silk and wool fibers. These threads are chosen to complement the canvas colors. Silk adds a subtle sheen, while wool provides a matte, durable finish. You can use them as-is or mix them to create texture.
If you are using your own threads, consider the effect you want. For a realistic beach ball, you might use smooth threads like silk or cotton for the panels and a contrasting thread for the seams. The stitch pamphlet may suggest specific threads, but feel free to experiment.
Finishing and using your Beach Ball
Once your stitching is complete, you can finish the canvas as you like. The canvas does not come finished or stitched, so you will need to decide how to display or use it. Popular options include framing it as a small piece of art, turning it into an ornament, or incorporating it into a larger project such as a pillow or bag.
Because the design is round, it lends itself well to ornaments or coasters. If you plan to use it as a coaster, consider backing it with a sturdy fabric to protect the stitches. Always handle the finished piece with care, and store it in the PVC baggy when not in use to keep it clean.