Start with what the canvas gives you
The Bougie Corgi canvas is a small, hand-painted design, so your fur plan needs to work at that scale rather than covering a full-size dog portrait. Before you pick up a needle, check the painted areas on your canvas and note where the fur reads as light, warm, or shadowed. Those painted cues are your guide for thread placement, not a generic corgi color chart.
Because the canvas is hand-painted, the exact color placement can vary from one canvas to the next. Treat the painted surface in front of you as the reference and adjust your thread choices to match it.
Bougie Corgi canvas details that shape a fur plan
-
Bougie Corgi - Needlepoint Canvas (Wholesale): 8 x 6.75 canvas size with a 4 x 2.75 design size The design area is compact, so fur stitches need to stay small and controlled; large, sweeping stitches will overwhelm the dog rather than describe it.
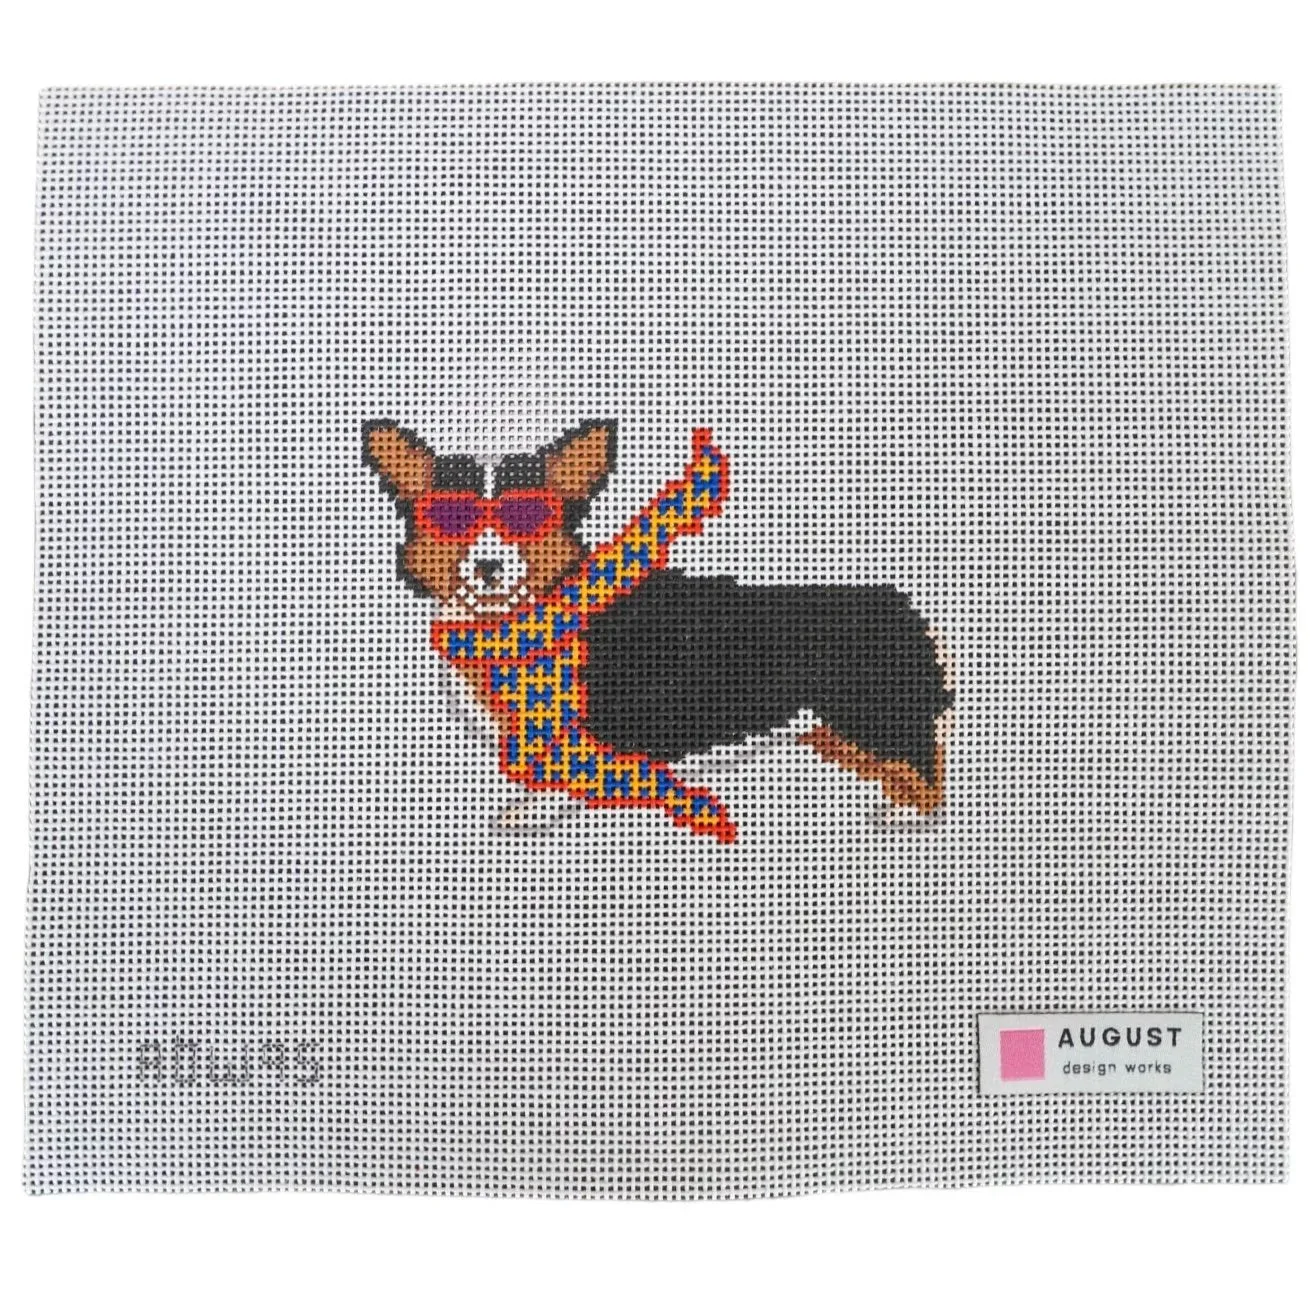
Bougie Corgi - Needlepoint Canvas (Wholesale)
-
Bougie Corgi - Needlepoint Canvas (Wholesale): 18 mesh At 18 mesh, fine thread and small stitches are the practical choice for fur texture; bulky threads will crowd the holes and blur the painted details.
-
Bougie Corgi - Needlepoint Canvas (Wholesale): All canvases are hand-painted and may vary Your painted color placement may differ from another stitcher's canvas, so match your threads to your own canvas instead of copying a photo.
-
Bougie Corgi - Needlepoint Canvas (Wholesale): Canvases do not come with thread You will need to build your own fur palette before you start; the canvas supplies the design, not the materials.
Build a corgi fur palette for 18 mesh
Corgi fur is not one color. Even on a small canvas, you can suggest depth by choosing a few closely related threads: a light warm tone for the brightest fur, a mid-tone for the body, and a deeper shade for the shadowed areas and the edges where the dog meets the background. Keep the jumps between those tones small so the fur reads as soft rather than striped.
For 18 mesh, choose threads that slide through the holes without distorting the canvas. If a thread feels tight or frays as you pull it through, it is probably too heavy for this mesh. Test a short length on a spare corner or an edge area before committing it to the dog's face.
The canvas does not specify a thread brand, fiber, or color number, so the final palette is your decision. Bring your canvas with you when you shop for thread, and hold candidate colors against the painted fur under the same light you will stitch in.
A practical stitching order for corgi fur
There is no single correct order, but working from the structure of the dog outward keeps the fur coherent and makes it easier to correct mistakes before they spread.
- 1. Map the fur zones before threading a needle: Look at the painted canvas and identify the main areas: face and muzzle, ears, body, and any white or lighter markings. Decide which thread goes in each zone so you are not improvising color mid-stitch.
- 2. Stitch the face and muzzle first: The face carries the dog's expression, so it deserves your freshest attention. Use small stitches that follow the direction the fur grows on the painted design, and keep the light and shadow tones separate.
- 3. Work the ears and body in the same direction as the fur: Corgi fur on the body generally flows along the dog's shape. Following that flow with your stitch direction helps the fur look intentional rather than patchy, even when you change colors.
- 4. Add shadow and edge stitches last: Deeper tones around the outline and under the dog help the figure sit forward. Add these after the main fur is in place so you can judge how much contrast the design actually needs.
Dog needlepoint fur stitches that suit a small canvas
The stitch you choose matters as much as the thread color. On a 4 x 2.75 design area, texture should come from small, deliberate stitches rather than large decorative ones.
- Tent stitch for the base fur: A simple tent stitch covers the canvas evenly and keeps the painted design visible. It is a reliable choice for the body and larger fur areas where you want color to do the work.
- Short straight stitches for fur direction: Small straight stitches laid in the direction of fur growth can suggest individual strands on the face, ears, and chest. Keep them short so they do not overpower the scale of the design.
- Basketweave for larger, flatter areas: If you want a smooth, durable surface on the body, basketweave covers ground quickly and wears well. It is less useful for the face, where direction and detail matter more.
What the canvas does not decide for you
The supplied canvas information does not include a stitch guide, a thread list, or a recommended color card. That means the fur plan is yours to build, and two stitchers can produce very different but equally valid corgi portraits from the same design.
It also does not confirm how the painted colors will behave under different lighting, or whether any particular thread will match the paint exactly. Those are judgment calls you make with the canvas in hand. If you are unsure about a color, stitch a small test area on the edge of the design and live with it for a day before continuing.
Finally, the canvas does not come with thread, so there is no supplied palette to fall back on. Buy a little more of each fur color than you think you need, especially if you plan to stitch the body in basketweave, and keep your labels so you can match dye lots if you run short.