Start with the canvas, not the color card
The Bougie Corgi is a small hand-painted canvas: an 8 x 6.75 canvas size with a 4 x 2.75 design size on 18 mesh. That mesh count matters more than any color list. On 18 mesh, each stitch covers a small square, so fine fur shading has to be built from a limited number of thread colors rather than many blended strands.
The canvas does not come with thread. You supply everything, which means the sable-and-white plan below is yours to adjust to the paints in front of you. Hand-painted canvases may vary, so treat the painted areas as your guide and choose threads that sit close to them.
Canvas facts that shape your thread plan
-
Bougie Corgi - Needlepoint Canvas: 8 x 6.75 canvas size with a 4 x 2.75 design size The painted dog occupies only part of the canvas, so most of your thread goes into a compact fur area where color changes need to read clearly.
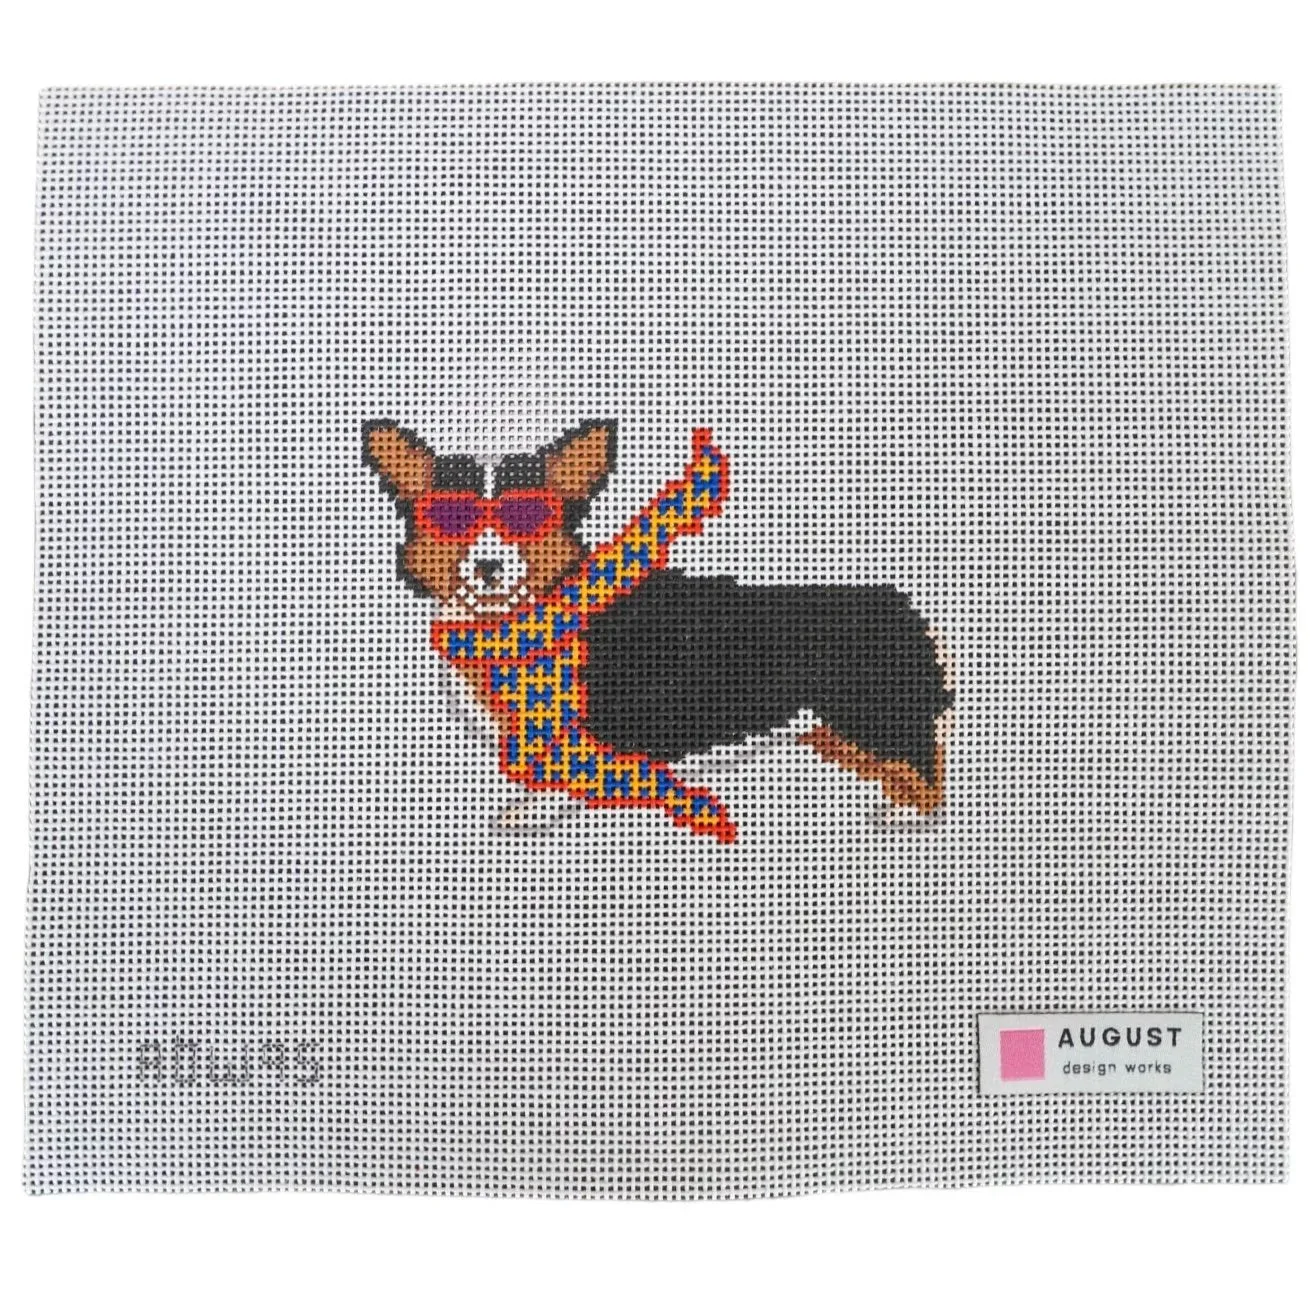
Bougie Corgi - Needlepoint Canvas
-
Bougie Corgi - Needlepoint Canvas: 18 mesh Small stitches reward smooth, well-behaved threads and simple stitch choices over elaborate textures that can swallow the fur detail.
-
Bougie Corgi - Needlepoint Canvas: Canvases do not come with thread. You will need to source sable, white, and accent threads yourself before you begin stitching.
A practical stitching order for the Corgi
Work from the largest, most forgiving areas toward the smallest details. This order keeps you from dragging threads across finished white markings and lets you judge the sable tones against the painted canvas before you commit to the face.
- 1. Stitch the sable back and body first: The broad sable areas give you room to test your color progression. Use this section to confirm that your light, mid, and dark sable threads sit well against the painted canvas before you move to the face.
- 2. Add the white chest and neck: White fur on a Corgi reads as a clean block rather than a shaded gradient. Keep the white area distinct from the sable so the breed's markings stay legible at a glance.
- 3. Stitch the white blaze and muzzle: The face markings are the smallest white areas. Stitch them after the chest so you can match the same white thread and stitch tension across the dog.
- 4. Work the sable ears and face last: Ears and face carry the most color changes in the smallest space. Save them for last so you can use the surrounding stitched fur as a reference for how dark or warm your sable threads should go.
Building a sable palette that reads as fur
Sable fur is not one color. It moves from warm reddish-brown through darker guard hairs, and on a small 18 mesh design you have room for only a few distinct threads. Choose a light, a mid, and a dark sable, then let the painted canvas tell you where each belongs.
- Light sable: Use for the warmer, sunlit edges of the back and the upper cheeks. This thread should sit close to the lightest sable paint on the canvas.
- Mid sable: The workhorse color for most of the body. Pick a thread that matches the dominant painted sable tone rather than a color you wish the canvas were.
- Dark sable: Reserve for the deepest shadows under the ears, along the spine, and where the body meets the white chest. A little goes a long way on 18 mesh.
- Blending thread: If your thread line allows it, a single strand of a lighter or darker neighbor can soften the transition between sable bands. Test the blend on a scrap of canvas before using it on the dog.
White fur stitches that stay crisp on 18 mesh
White thread shows every inconsistency, so the stitch choice matters as much as the color. On 18 mesh, simple stitches with even tension will look cleaner than textured stitches that create shadows.
- Basketweave for the chest: A smooth basketweave keeps the white chest flat and bright, and it resists the diagonal distortion that can make white areas look uneven.
- Tent stitch for the blaze: The narrow white stripe down the face is too small for elaborate stitches. Tent stitch lets you follow the painted shape without adding bulk.
- Keep white thread clean: Wash your hands before stitching white areas and avoid dragging sable threads across them. White picks up everything, including dye from darker threads.
Where the Corgi's markings can go wrong
The breed's charm depends on clear contrast between sable and white. The most common mistake is letting the two colors blur at the chest and neck, which makes the dog look muddy rather than marked. Decide where the white begins and ends before you stitch either side, and keep that boundary sharp.
The second risk is over-shading the white. A Corgi's white fur is not gray. If you add shadow threads to the chest, keep them minimal and place them only where the painted canvas shows a genuine tone change.
What the supplied information does not tell you
The canvas record confirms the size, mesh count, hand-painted variation, and that thread is not included. It does not specify a thread brand, fiber type, stitch diagram, or color list. Those choices are yours, and they should follow the painted canvas in front of you rather than a generic Corgi palette.
Because hand-painted canvases may vary, compare your thread choices to your own canvas rather than to a photograph online. If a painted area looks ambiguous, choose the thread that matches the dominant tone and let the stitching order above carry the fur detail.