Quick answer
Use a Bowens mount lantern softbox when you need a 360-degree wrap of soft light for ambient fill, ceiling bounce, or top light over a dialogue scene. It is not a replacement for a focused key light; instead, it excels at raising the overall light level in a room without creating a hard directional shadow. A 65cm lantern softbox is a practical size for interview lighting and tight spaces, and the quick-release Bowens mount lets you switch modifiers fast.
What a lantern softbox does differently
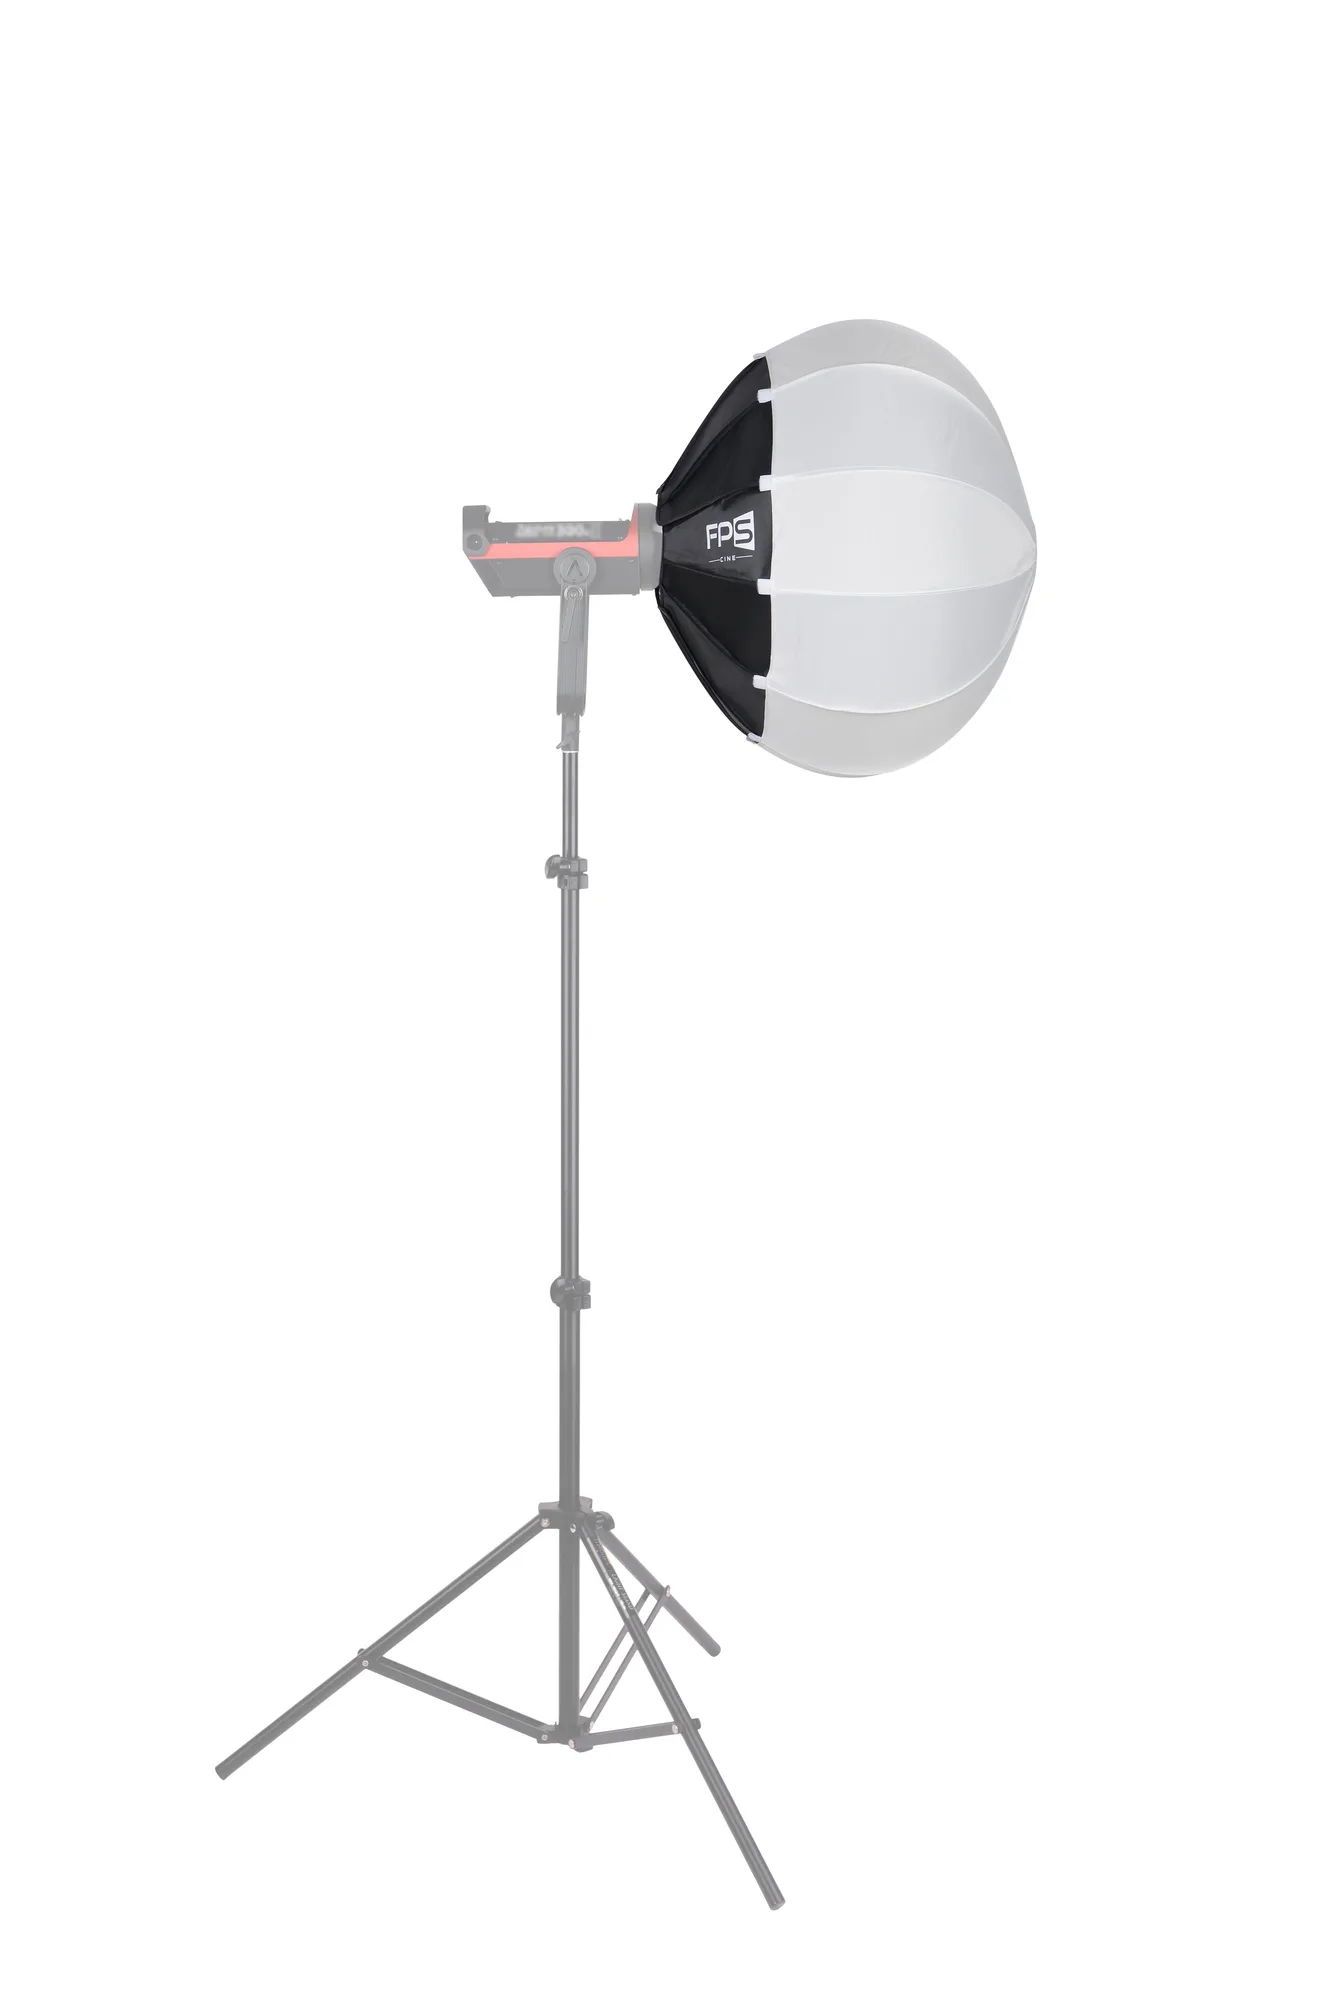
A lantern softbox is built around a spherical or near-spherical shape that pushes light out in all directions. That 360-degree spread is the opposite of a traditional softbox or parabolic, which throws a more controlled beam forward. On set, this makes the lantern a tool for wrapping a room in soft light rather than punching a single directional source. The FPS L65 65cm (26-inch) Lantern Softbox with Quick Release / Bowens Mount is a clear example: its Bowens quick-release ring means you can mount it on a compatible LED fixture and have it ready in seconds. Because the light goes everywhere, you often use it as a fill, a bounce source, or a top light, not as your primary key.
When to choose a lantern over a standard softbox
Reach for a lantern softbox when the scene needs believable ambient light: a cabin interior, a car scene, or a restaurant where the light should feel like it is coming from the space itself, not from a movie light. It is also the right call for interview lighting when you want a soft, even wash that fills shadows without a second fixture. Another common use is top light over a dialogue scene: rig the lantern above the actors and let it spill down, creating a gentle pool that still reads as soft. If you need a crisp, directional key with controlled spill, a standard softbox or fresnel is a better fit.
Step-by-step: setting up a lantern softbox on set
Follow these steps to get a clean, safe, and repeatable lantern softbox lighting setup. Each step includes a checkpoint or a common mistake to avoid.
- Step 1: Mount the lantern on a compatible Bowens-mount fixture. Check that the quick-release ring locks securely. Common mistake: forcing the ring if it does not seat easily; instead, align the tabs and try again.
- Step 2: Position the fixture for the desired effect. For ambient fill, place it near the center of the room or slightly off-camera; for top light, rig it above the subject. Checkpoint: stand at the camera and confirm the lantern is not visible in frame.
- Step 3: Power the light and set a low output level. Lanterns spread light widely, so start at a lower percentage than you would with a focused softbox. Common mistake: blasting full power and losing the soft, ambient quality.
- Step 4: Shape the spill with grids or flags if needed. A lantern throws light everywhere, so use black flags or a skirt to keep light off the background or walls. Checkpoint: check for unwanted shadows or hotspots on the ceiling and walls.
- Step 5: Balance with your key light. Use the lantern as fill or ambient, then set your key light to create contrast. Common mistake: letting the lantern become the key, which flattens the image.
- Step 6: Secure cables and stands. Run power and DMX cables with slack, and use sandbags on the stand. Checkpoint: give the stand a gentle nudge to confirm stability before rolling.
- Step 7: Test with a monitor or meter. Check exposure and color consistency across the scene. Common mistake: trusting the back of the camera only; use a calibrated monitor or meter when possible.
Quick-release Bowens mount: why it matters on set
The Bowens mount is a widely used standard, so a quick-release version lets you swap modifiers without threading or fumbling. On a busy set, that speed matters when you are changing from a lantern to a standard softbox or reflector between setups. The FPS L65 uses a quick-release ring, which means you can attach or remove it from a compatible fixture in seconds. This is especially useful for run-and-gun documentary work or fast-paced interview lighting where every minute counts. Just remember that the quick-release mechanism still requires you to align the mount properly; do not force it.
Quick setup checklist
- Mount and lock: Attach the lantern to a Bowens-mount fixture using the quick-release ring. Ensure it clicks or locks securely. Checkpoint: give the softbox a gentle tug to confirm it is locked before powering on.
- Position for ambient or top light: Place the fixture centrally for ambient fill or above the subject for top light. Keep it out of frame. Common mistake: placing it too close to a wall, causing a hotspot.
- Set low power and shape: Start at a low output and use flags or grids to control spill. Balance with your key light. Checkpoint: verify exposure and color on a monitor before rolling.
Product facts
- FPS L65 65cm (26") Lantern Softbox with Quick Release / Bowens Mount: The FPS L65 is a 26-inch (65cm) lantern softbox with a Bowens quick-release ring. The 65cm size is large enough to wrap a room in soft light but still manageable in tight spaces, and the quick-release ring speeds up modifier changes on set.
- FPS L65 65cm (26") Lantern Softbox with Quick Release / Bowens Mount: Lantern softboxes throw a 360-degree wrap of soft light, useful for ambient fill, top light on dialogue scenes, and ceiling bounces. This makes the lantern a versatile tool for creating believable ambient light, but it also means you need to control spill with flags or grids when necessary.
- FPS L65 65cm (26") Lantern Softbox with Quick Release / Bowens Mount: What it's for: soft top light over a dialogue scene without the focused look of a parabolic; cabin, car-interior, or restaurant-style ambience where light needs to come from a believable practical-looking source. This explains the specific creative situations where a lantern softbox outperforms a standard softbox, helping you decide when to use it.