Quick answer
Assemble the Hands Craft Book Loft 3D wooden puzzle by following the numbered parts, installing the LED lights before sealing the walls, and testing battery placement early to avoid rewiring.
Before You Start: Organize Your Workspace
The Book Loft kit contains many small wooden pieces and electronic components. Spread everything on a flat, well-lit surface. Sort pieces by the numbered sheets — this saves time and prevents confusion later. Have a small screwdriver and two AAA batteries ready (not included). The LED module is delicate, so handle it with care.
Understanding the LED and Music Module
The Book Loft includes a switch-activated LED light that also plays four charming tunes. The module is pre-wired but requires you to connect the battery compartment. A common mistake is to glue the walls together before inserting the LED strip or testing the battery connection. Always test the light and music before final assembly.
Step-by-Step Assembly Guide
- Step 1: Punch out and sort pieces: Carefully punch out all wooden pieces from their sheets. Sort them by number or shape using the instruction manual. Keep the small pieces like bookshelves and railings separate. Missing a piece? Check the sheet again — small parts often stick to the frame.
- Step 2: Assemble the base and lower floor: Fit the floor pieces together according to the manual. Do not glue yet — dry-fit first to ensure alignment. The base must be level for the rest of the structure. Walls that lean now will cause misalignment on upper floors.
- Step 3: Install the LED module and battery box: Place the LED strip into the designated slots on the back wall. Insert the battery box into its compartment. Insert two AAA batteries and flip the switch to test the light and music. If the light doesn't turn on, check battery polarity and wire connections before proceeding.
- Step 4: Build the bookshelves and interior walls: Assemble the tall bookshelves and interior partitions. These add structural support. Use wood glue sparingly — a tiny drop on each joint is enough. Too much glue can seep into visible areas and ruin the finish.
- Step 5: Attach the upper floor and roof: Fit the upper floor onto the lower walls, then add the roof panels. Ensure the LED wire is not pinched between layers. Press firmly but gently to avoid cracking. Check that the roof sits flush — gaps let dust inside and weaken the structure.
- Step 6: Add decorative details and final touches: Attach the miniature books, window frames, and any other decorative pieces. These are the last items to glue. Step back and admire your work. Let all glue dry for at least 2 hours before moving the model.
Product Details
-
Hands Craft | Book Loft: The Book Loft DIY Miniature House Kit includes switch-activated LED lighting and plays 4 charming tunes. Requires 2 AAA batteries (not included). Test the LED and music module before gluing walls to avoid having to disassemble later.
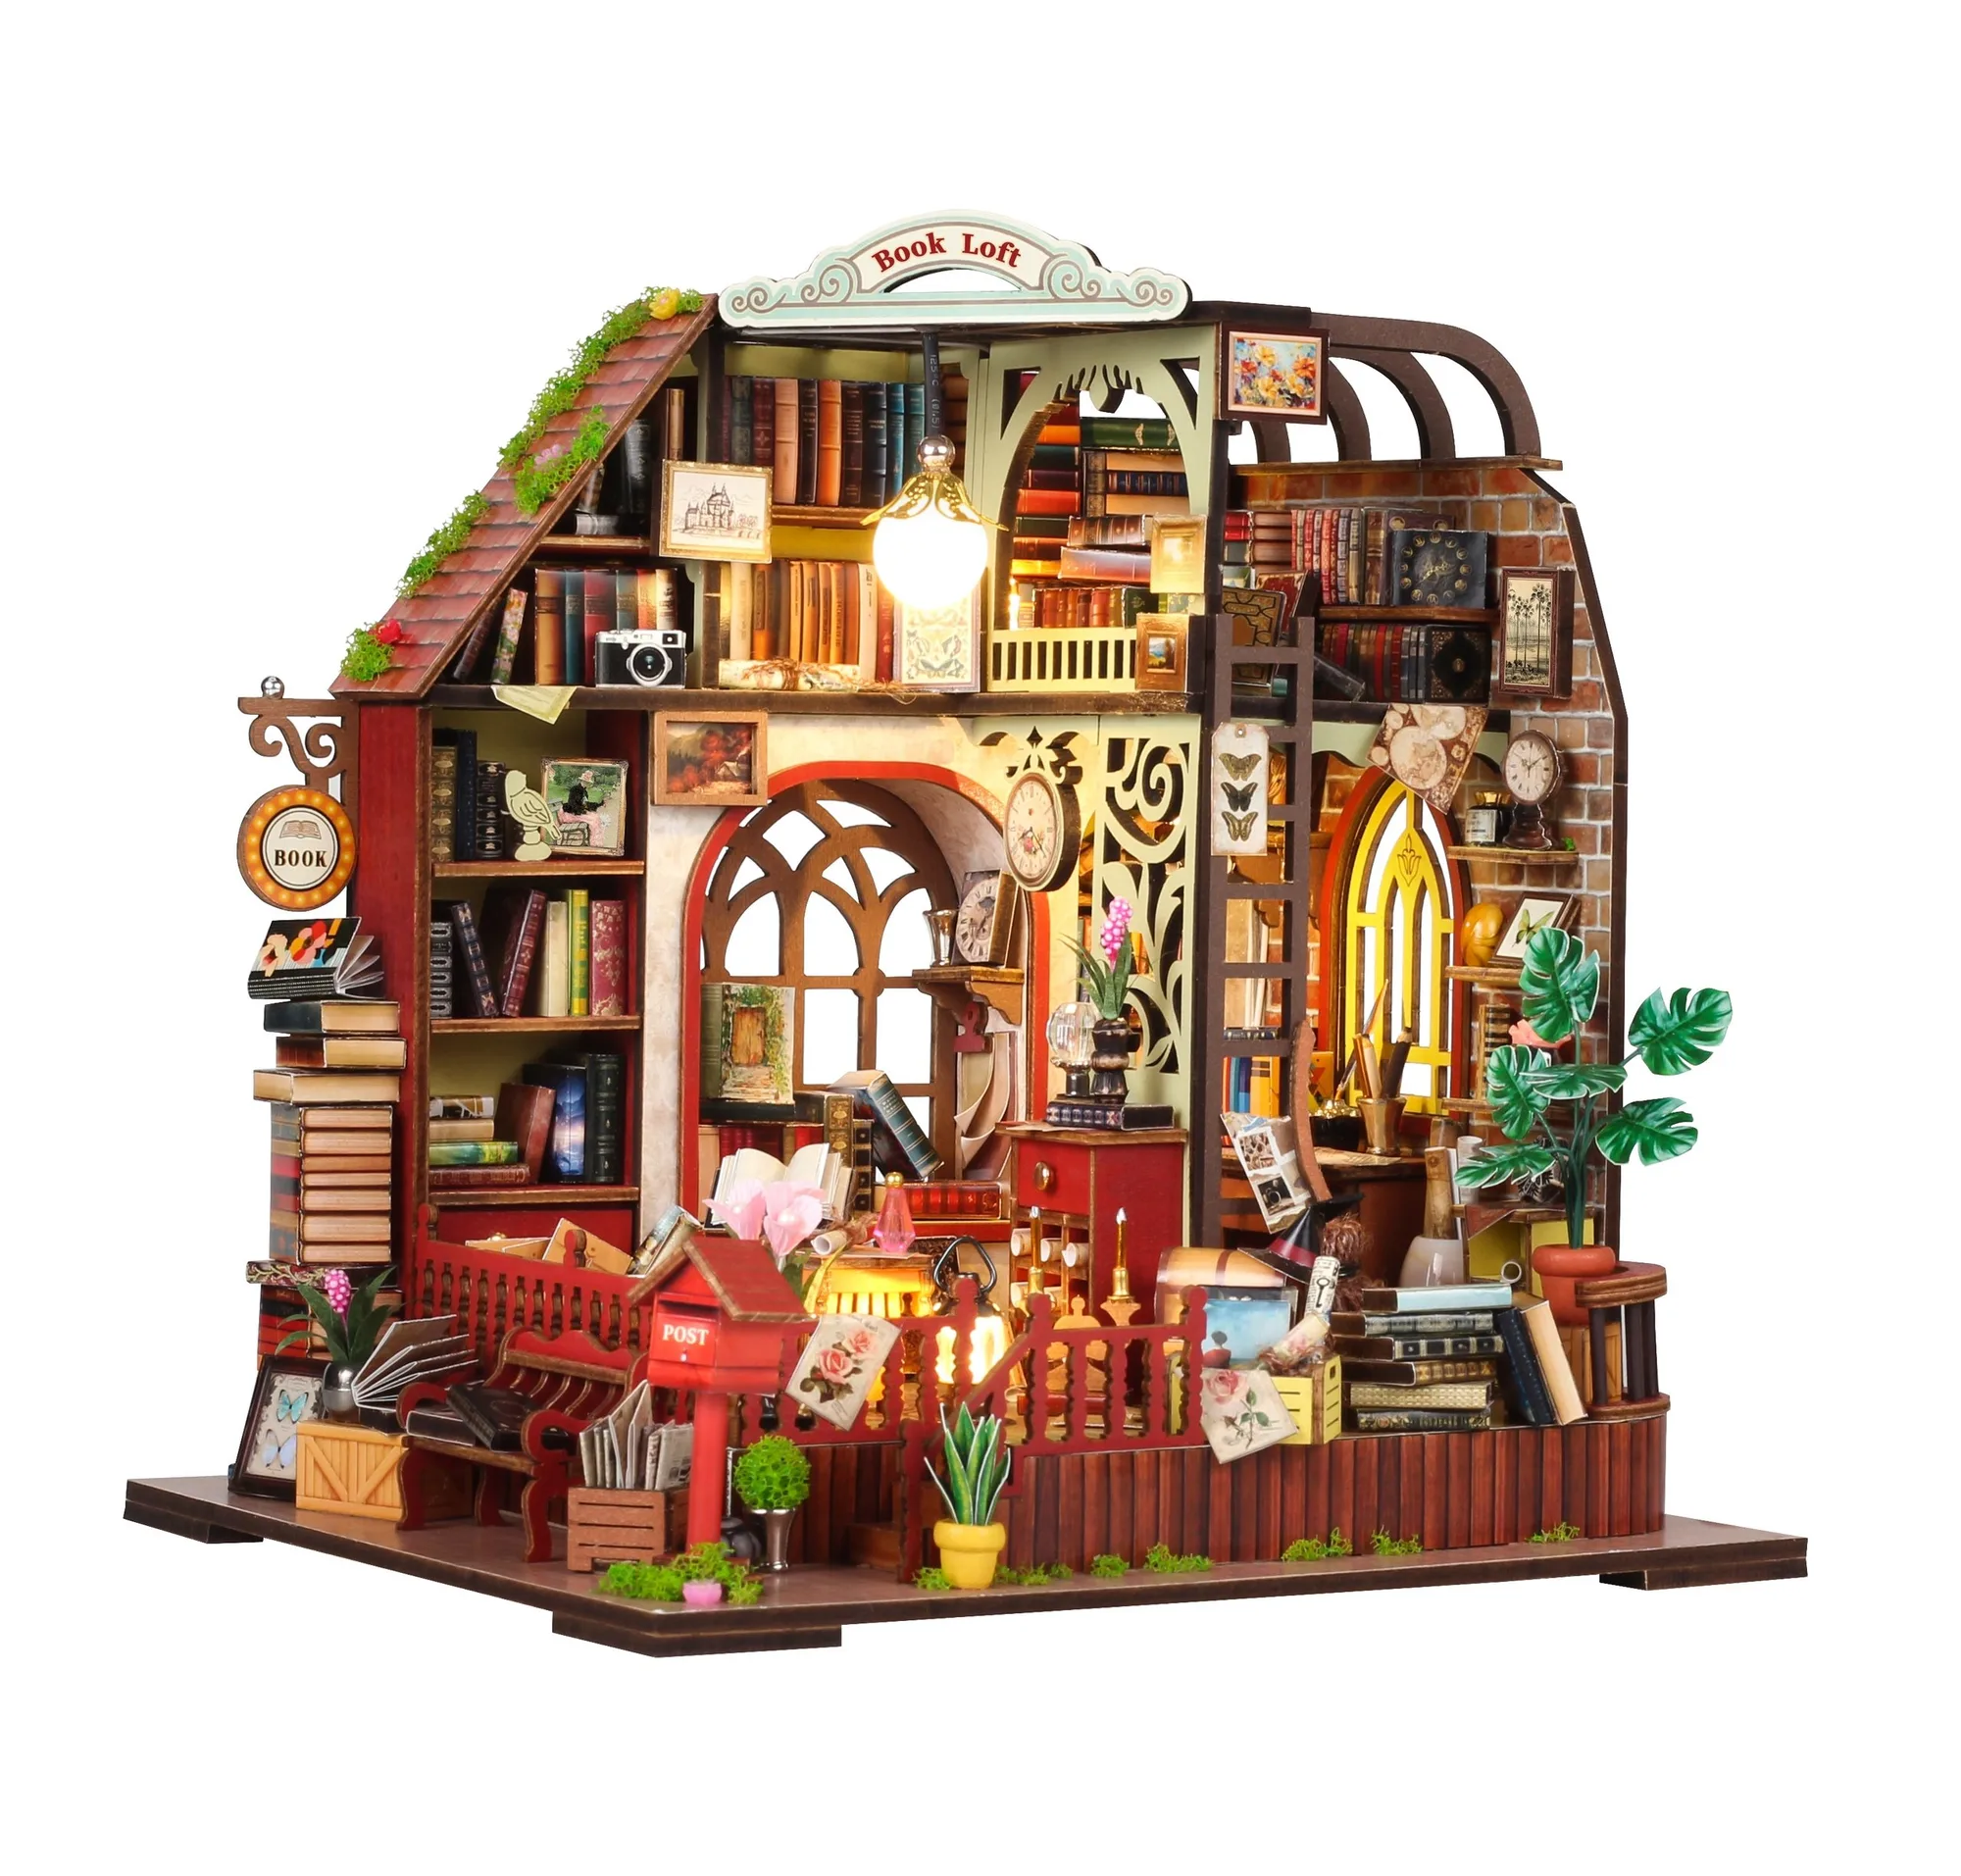
Hands Craft | Book Loft