Quick Answer
To apply a chenille patch, use a household iron on a low-heat, no-steam setting with a pressing cloth, then style it on a sturdy fabric like denim or canvas for best results.
Why Chenille Patches Need Special Handling
Chenille patches have a plush, textured surface that can flatten or melt under high heat. Unlike flat embroidered patches, the raised fibers require a gentler approach when ironing. Always check the backing: most chenille patches have iron-on adhesive, but some may need sewing for extra durability.
The fabric you choose matters too. Thick, heat-resistant materials like denim, canvas, or cotton twill hold the adhesive well. Avoid delicate synthetics like nylon or polyester that can warp under heat.
Styling Ideas That Work
Chenille patches look great on denim jackets, backpacks, tote bags, and baseball caps. Their soft texture adds a tactile, playful element to everyday items. For a balanced look, place patches on areas that don't bend or stretch too much, like the chest, back, or front of a bag.
If you're layering multiple patches, plan the layout first. Arrange them on a flat surface to test spacing before committing to ironing.
Step-by-Step: How to Apply a Chenille Patch
- Prepare your fabric and patch: Wash and dry the garment to remove any residues. Place the patch where you want it and pin it in place from the inside to prevent shifting. Always pre-wash to avoid shrinkage after application.
- Set your iron to low heat, no steam: Turn off the steam function and empty the water tank. Set the iron to a low or wool setting. High heat can melt the chenille fibers or adhesive. If you're unsure, test on an inconspicuous area first.
- Use a pressing cloth: Place a thin cotton cloth or parchment paper over the patch. This protects the plush surface from direct heat and prevents scorching. Never iron directly on the chenille surface.
- Press, don't slide: Hold the iron firmly over the patch for 15-20 seconds without moving it. Lift and repeat on all areas, especially the edges. Sliding can distort the fibers or shift the patch.
- Let it cool and check adhesion: Allow the patch to cool completely, then gently test an edge. If it lifts, repeat the pressing process or consider sewing the edges for extra security. Sewing the edges is recommended for high-wear items like bags.
- Care for your patched item: Turn the garment inside out and wash on a gentle cycle with cold water. Air dry or tumble dry on low. Avoid high heat in the dryer. Ironing the patched area later? Use the same low-heat method with a cloth.
Product Spotlight
-
JC Rivera The Bear Champ "Standing Strong" Chenille Patch: This 6-inch chenille patch by JC Rivera features the artist's signature character and has iron-on backing. Its size and iron-on backing make it a straightforward addition to a jacket or bag, and the artist design adds a collectible touch.
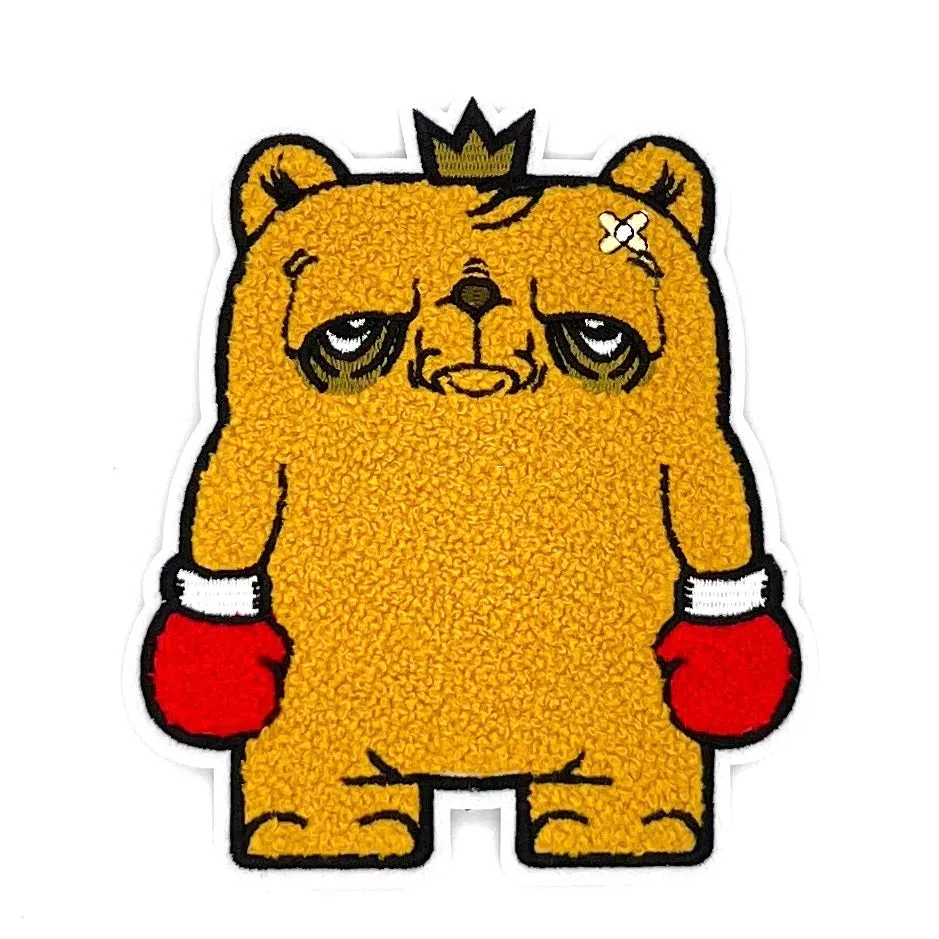
JC Rivera The Bear Champ "Standing Strong" Chenille Patch