Start with what the kit actually puts in your hands
The Christmas Tree Green Needlepoint Kit is built around a 4" x 6" design on 18-mesh mono canvas, postcard size, so the stitching area is small enough to finish in a few sessions rather than a full season. The kit is described as an easy project for beginners and a relaxing one for experienced stitchers, which makes it a sensible choice if you want a holiday needlepoint project for adults without committing to a large canvas.
Before you thread a needle, open the project bag and separate the single-ply Pepperpot Silk threads from the Essentials silk/wool blend. The kit includes two needles and a stitch guide card showing the stitched design with a summary of the stitches used, plus a note that the complete stitch guide is online. Read that card first: it tells you which stitches belong where, and the online guide fills in the detail.
Kit contents that shape your stitch plan
-
Christmas Tree Green Needlepoint Kit: Precision-printed 4" x 6" design on 18-mesh mono canvas, postcard size. The small 18-mesh count means fine stitches and a quick finish; plan your threads for a compact area, not a large wall piece.
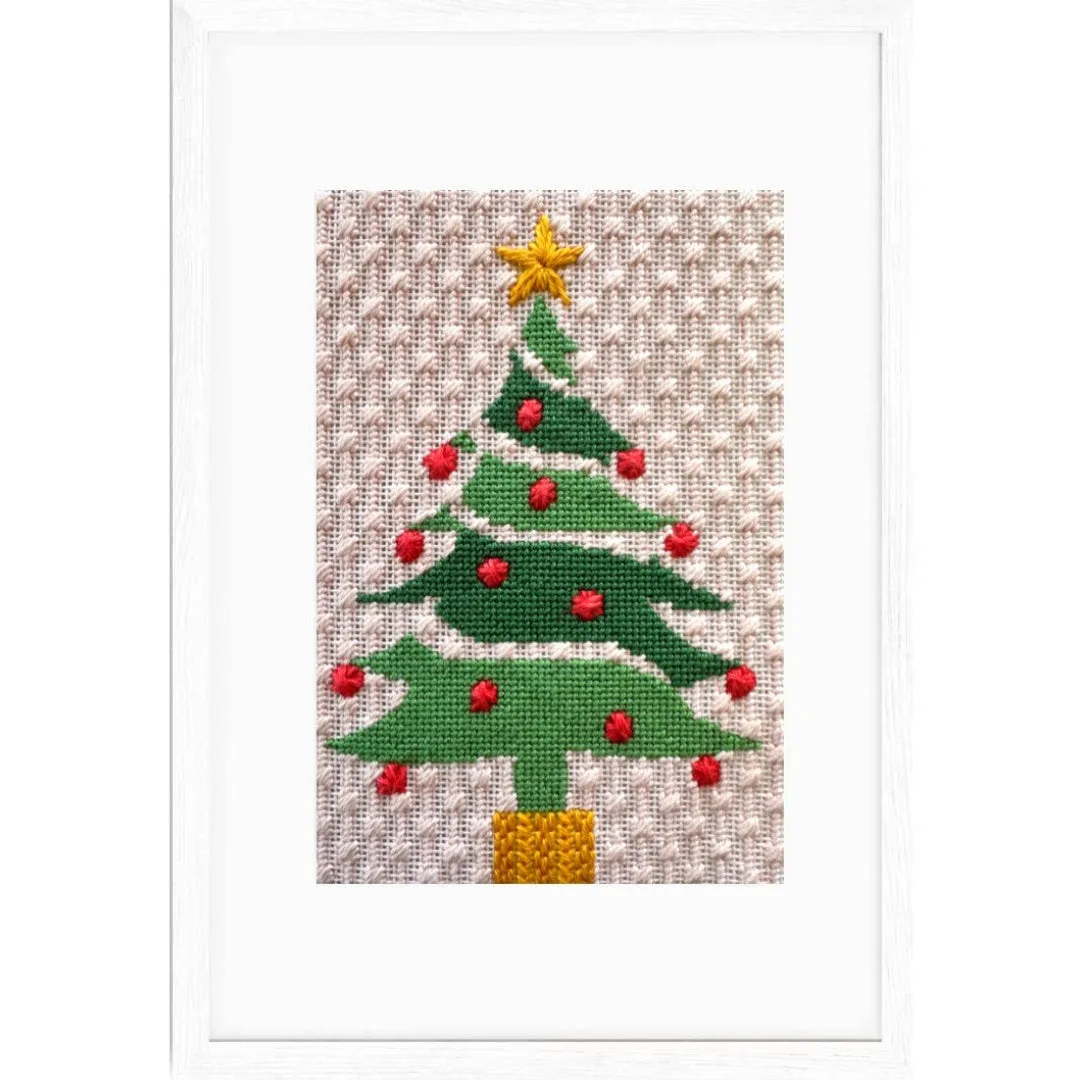
Christmas Tree Green Needlepoint Kit
-
Christmas Tree Green Needlepoint Kit: Single-ply Pepperpot Silk threads and Essentials silk/wool blend in a hand-picked palette. Silk and silk/wool behave differently under tension, so decide early which areas get which thread and keep them separated in the project bag.
-
Christmas Tree Green Needlepoint Kit: Two high-quality needles, a stitch guide card, and a project bag. You have the tools to start immediately; the bag keeps threads organized while you work through the tree section by section.
A practical stitch order for the tree canvas
The kit's stitch guide card and online guide are your authority on which stitches to use. Use this order as a working sequence for managing the canvas, then adjust to match the guide's instructions for each area.
- 1. Read the stitch guide card before the first stitch: The card shows the stitched design with a summary of the stitches used. Identify the tree body, any background, and any accent areas so you know which threads belong to which section.
- 2. Work the tree body first: Starting with the largest green area gives you a feel for the 18-mesh canvas and the silk threads before you reach smaller details. Keep your tension even so the tree reads as one shape.
- 3. Add the trunk and structural details: Once the main green area is established, stitch the trunk and any defined edges. These smaller areas are easier to place when the surrounding tree is already in position.
- 4. Stitch accents and highlights last: Save any decorative or lighter accent areas for the end. That way you can judge contrast against the finished green before committing the final threads.
- 5. Check the online stitch guide before finishing: The complete stitch guide is online, so use it to confirm any stitch you are unsure about rather than guessing. The kit does not supply a finishing method, so plan framing or display separately.
Handling silk and silk/wool on a small 18-mesh canvas
The kit's threads are a real advantage, but they reward a little care. These are general stitching habits, not manufacturer instructions; follow the kit's own guidance where it differs.
- Keep thread lengths manageable: Single-ply silk and silk/wool blend can fray with long lengths. Work with shorter strands and re-thread as needed rather than letting the tail wear thin.
- Separate the two thread types: Pepperpot Silk and the Essentials silk/wool blend have different textures. Keep them in separate areas of the project bag so you do not pick up the wrong strand mid-section.
- Let the needle do the work: On 18-mesh canvas the holes are small. Use the supplied needles and avoid forcing a thick strand through; if a thread feels tight, check you are using the right thread for that area.
- Protect the canvas between sessions: The project bag is there to keep threads and tools organized. Roll or lay the canvas flat when you stop so the printed design and stitches stay undistorted.
What the kit confirms, and what it leaves to you
The supplied information confirms the canvas size and mesh, the thread types, two needles, the stitch guide card, the online full stitch guide, step-by-step instructions for getting started with a basic needlepoint stitch, and the project bag. It also describes the project as easy for beginners, which is useful if this is your first holiday needlepoint kit.
What the kit does not confirm is a finishing method, a frame size, or a recommended number of hours. Those are decisions you make based on how you want to display the finished 4" x 6" piece. Treat the postcard size as a guide: it is small enough to finish quickly, but the exact time depends on your pace and the stitches you choose.