Start with what the kit actually gives you
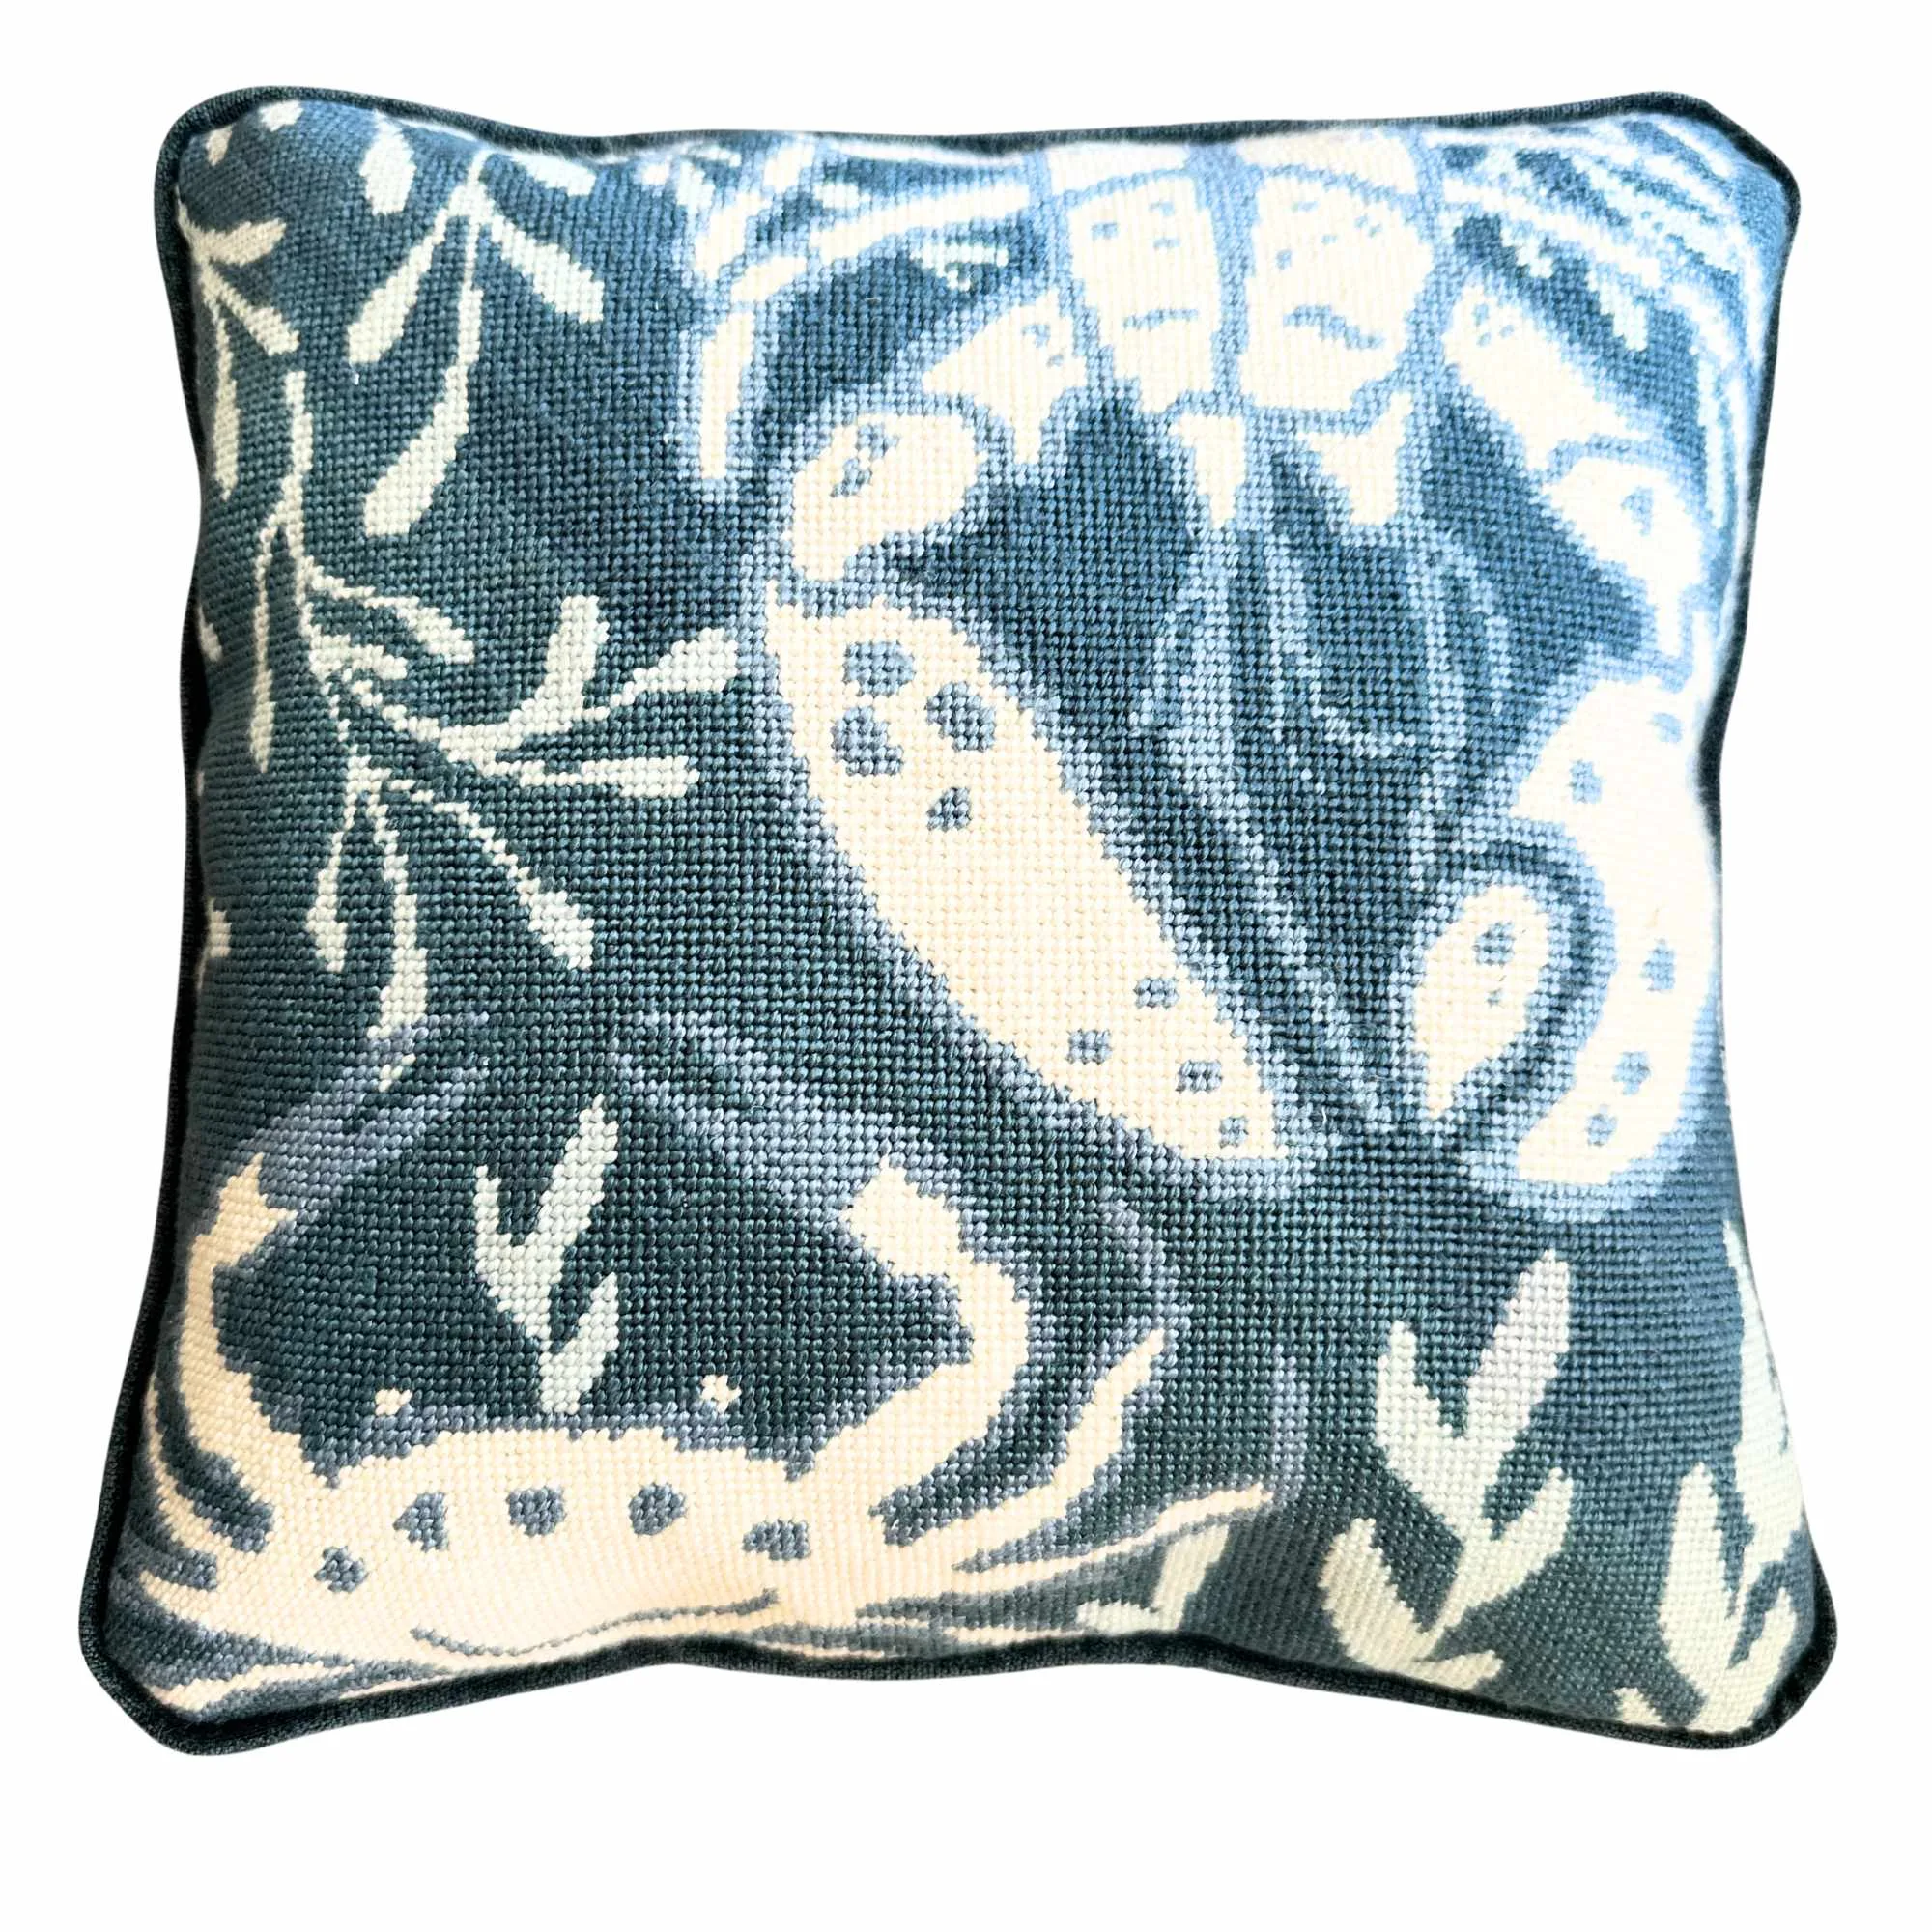
The Coastal Blue Needlepoint Pillow Kit is a complete stitching package built around a blue and white pillow design. Before you thread a needle, it helps to know exactly what is in the bag and what that means for your stitching plan. The kit includes a professionally color-printed 13 holes to the inch mono needlepoint canvas, a generous supply of Planet Earth Silk and Milan (a silk/wool blend) threads, two Bohin Size 20 needles, How to Needlepoint instructions, and a color card of the stitched design shown in Basketweave.
The printed canvas is your primary map. Because the design is color-printed directly onto the canvas, you can stitch without constantly referring to a separate chart. The color card is a useful reference for the finished look, especially if you want to match the original Basketweave stitching or plan your own stitch variations. The design area is 12" x 12", so the finished stitched portion will be a square of that size once complete.
Kit contents that shape your stitching plan
-
Coastal Blue Needlepoint Pillow Kit: Professionally color-printed onto 13 holes to the inch mono needlepoint canvas. The printed canvas lets you stitch directly from the fabric, and the 13-mesh count is a common size for pillow-weight needlepoint.
Coastal Blue Needlepoint Pillow Kit
-
Coastal Blue Needlepoint Pillow Kit: Threads: A generous supply of Planet Earth Silk and Milan (silk/wool blend) threads. You are working with two thread types that behave differently, so plan how you will use each for coverage and sheen.
-
Coastal Blue Needlepoint Pillow Kit: Two Bohin Size 20 needles. Size 20 needles suit 13-mesh canvas and the supplied threads, so you can start stitching without sourcing extra needles.
-
Coastal Blue Needlepoint Pillow Kit: Design area 12" x 12". This is the stitched square you will produce, and it determines the scale of your finished pillow.
Read the printed canvas before your first stitch
The color-printed canvas is not just decoration; it is your stitch guide. Take a few minutes to look over the whole design before you begin. Identify the main color areas and note where the blue and white sections meet. Because the design is printed in color, you can follow the colors directly, but it still helps to understand the overall layout so you do not lose your place in large areas of similar color.
The kit's color card shows the design stitched in Basketweave. That does not mean you must use Basketweave everywhere, but it gives you a reliable reference for how the finished piece is intended to look. If you are new to needlepoint, the included How to Needlepoint instructions will walk you through the basics. If you are experienced, you can use the printed canvas as a starting point and decide where to vary stitches for texture.
A practical stitching order for the Coastal Blue pillow
- Begin with a small, defined area: Start in a corner or a distinct blue or white section to establish your rhythm and tension. This helps you get comfortable with the canvas and threads before tackling larger fields of color.
- Work the main color blocks: Stitch the larger areas of blue and white next, following the printed colors. Keep your stitches consistent in tension so the surface stays even. If you are using Basketweave, work in diagonal steps to avoid distorting the canvas.
- Add any detail or accent areas: Leave smaller details or areas where colors meet until the main blocks are done. This reduces the chance of counting errors and lets you adjust thread placement as needed.
- Check coverage as you go: Periodically hold the canvas up to the light or look at it from a slight angle to make sure the printed design is fully covered. The generous thread supply gives you room to add an extra stitch if a spot looks thin.
Working with silk and silk/wool threads
The kit includes Planet Earth Silk and Milan, a silk/wool blend. These are high-quality threads that can give your pillow a soft sheen and good coverage. Silk threads are smooth and can be slippery, so keep your lengths manageable and avoid over-handling them. Milan, with its wool content, has a bit more grip and can be more forgiving for larger areas. You may find it helpful to separate the two types in your work area and use them according to the effect you want: silk for areas where you want a subtle luster, and Milan where you want a slightly more matte or durable finish.
Because the kit does not specify which thread goes where, you have flexibility. The printed canvas and color card are your guides. If you are unsure, test a small area with each thread type to see how they look next to each other. The key is to keep your tension even so the finished surface is smooth.
Planning the pillow finish: what the kit confirms and what it leaves open
The Coastal Blue Needlepoint Pillow Kit is designed to become a pillow, but the supplied information does not include a specific finishing tutorial, backing fabric, or cording instructions. That means the finishing steps are up to you or your chosen finisher. What the kit does confirm is the stitched design area: 12" x 12". That measurement is your starting point for planning the finished pillow size, but you will need to decide on seam allowances, backing, and whether to add piping or a zipper based on your own preferences or a professional finisher's guidance.
If you plan to block the canvas before finishing, note that the kit does not include blocking instructions or materials. Blocking is a common step to square up needlepoint, but the method and tools are not specified here. You can consult general needlepoint resources or ask a finisher for advice. The important thing is to ensure your stitched canvas is clean and square before assembling the pillow, so the finished piece looks crisp.
Checkpoints before you sew the pillow together
- Confirm the stitched area measures 12" x 12": Use a ruler to check that your stitching covers the full design area. If your canvas has stretched or shrunk slightly, blocking may help, but the kit does not provide blocking instructions.
- Check for any missed stitches or thin coverage: Look over the entire canvas under good light. The printed design should be fully covered by thread. Touch up any spots where the canvas shows through.
- Decide on your finishing method: The kit does not include a pillow form, backing fabric, or finishing supplies. You will need to choose a backing, decide on an insert size, and plan how to join the pieces. A 12" x 12" stitched area typically requires a pillow form slightly larger to account for seam allowances, but confirm with your finisher or pattern.
- Consider professional finishing: If you are not confident sewing the pillow yourself, a professional finisher can block and assemble the piece. The kit's clear design and square format make it a good candidate for finishing services.
Where to leave room for your own judgment
The kit gives you a strong foundation: a printed canvas, quality threads, needles, and basic instructions. It does not dictate every stitch or finishing detail. You can choose to follow the Basketweave reference exactly, or you can introduce decorative stitches in areas where you want more texture. You can also decide how to handle the pillow's edges and backing. Because the supplied information does not include a full finishing tutorial, treat the finishing stage as a separate project that may require additional materials or professional help. The result will be a blue and white pillow that reflects both the kit's design and your own hand.