Quick Answer
The Custom Plug Cutter Drill Guide Kit lets you create custom wood plugs that match your project wood, giving you a nearly invisible patch over pocket holes. Follow these steps to get smooth, consistent plugs every time.
Why Use a Plug Cutter Instead of Buying Pre-Made Plugs?
Pre-made plugs come in a limited range of wood species and may not match your project's grain or color. Cutting your own plugs from scrap or offcuts ensures a perfect match. The Custom Plug Cutter Drill Guide Kit also produces plugs sized to fit standard Kreg pocket holes, so you don't have to sand or trim them down.
What You'll Need
You'll need the Custom Plug Cutter Drill Guide Kit, a Kreg 700-Series Pocket-Hole Jig, a drill, and a piece of wood for the plug (scrap from your project works best). The kit works with XL (HD) and Micro bits, sold separately, if you need plugs for those pocket-hole sizes.
Step-by-Step: How to Make Perfect Wood Plugs
- 1. Set Up the Drill Guide: Insert the drill guide into your Kreg 700-Series Pocket-Hole Jig. Tighten the locking knob to secure it. Make sure the guide is fully seated to prevent wobble. A loose guide will produce off-center or oversized plugs. Double-check the fit before drilling.
- 2. Choose and Prepare Your Plug Wood: Select a piece of wood that matches your project. Cut it to a thickness slightly greater than the plug length you need. Clamp the wood securely to your workbench. Using wood that is too thin can cause the plug to break or the bit to hit the bench. Always allow extra thickness.
- 3. Insert the Plug Cutter Bit: Insert the plug cutter bit into your drill chuck and tighten. The bit has a cutting tip that shears the wood cleanly. Set your drill to a medium speed (around 1500-2000 RPM). Too high a speed can burn the wood; too low can cause tear-out. Test on a scrap piece first.
- 4. Drill the Plug: Align the drill bit with the drill guide and push straight down. Apply steady, even pressure until the bit reaches the desired depth. Do not force the bit or wiggle the drill. Forcing or wiggling can break the bit or produce a rough plug. Let the bit do the work.
- 5. Remove the Plug: Pull the drill straight out. The plug should remain in the guide. Use a small screwdriver or pliers to gently pry it out. If it sticks, twist it slightly while pulling. Never hammer the plug out—this can damage the guide or the plug. A gentle twist usually frees it.
- 6. Sand and Insert the Plug: Lightly sand the top of the plug to remove any fuzz. Apply a small amount of wood glue to the plug and tap it into the pocket hole. Wipe away excess glue immediately. Sanding too aggressively can change the plug diameter. Use fine-grit sandpaper (220) and light pressure.
Product Details
-
Custom Plug Cutter Drill Guide Kit: Creates plugs that fit standard-size Kreg pocket holes. Cutting tip of the bit shears cleanly to produce smooth, consistent plugs. You get plugs that require minimal sanding and fit snugly, reducing the chance of splitting or gaps.
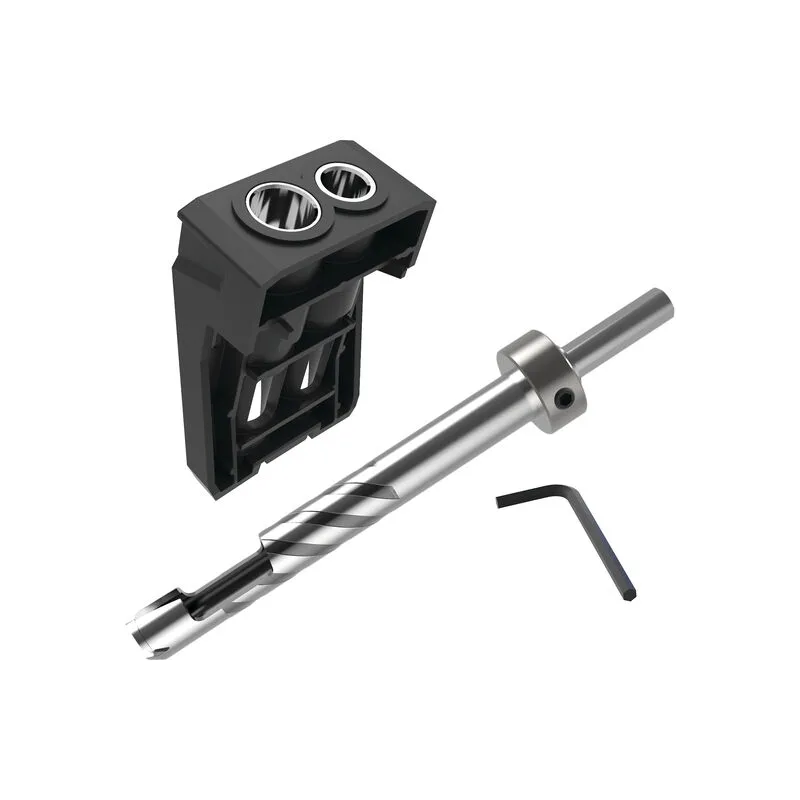
Custom Plug Cutter Drill Guide Kit