Quick Answer
To display uncut sheets, choose a frame with UV-protective glass, use acid-free mounting materials, and hang away from direct sunlight. For a creative twist, consider floating frames or custom shadow boxes that highlight the sheet's unique artwork.
Uncut sheets are more than just collector's items—they're stunning pieces of art that deserve to be shown off. Whether you have a limited edition sheet from The Odd Fellows series or a vibrant sheet from The Eye of the Ocean, proper framing can turn your favorite card designs into a conversation-starting wall display.
In this guide, we'll walk you through the process of framing uncut sheets, from measuring and mounting to hanging and protecting. You'll also discover creative display ideas that go beyond the standard frame, plus common mistakes to avoid at every step.
Why Frame Uncut Sheets?
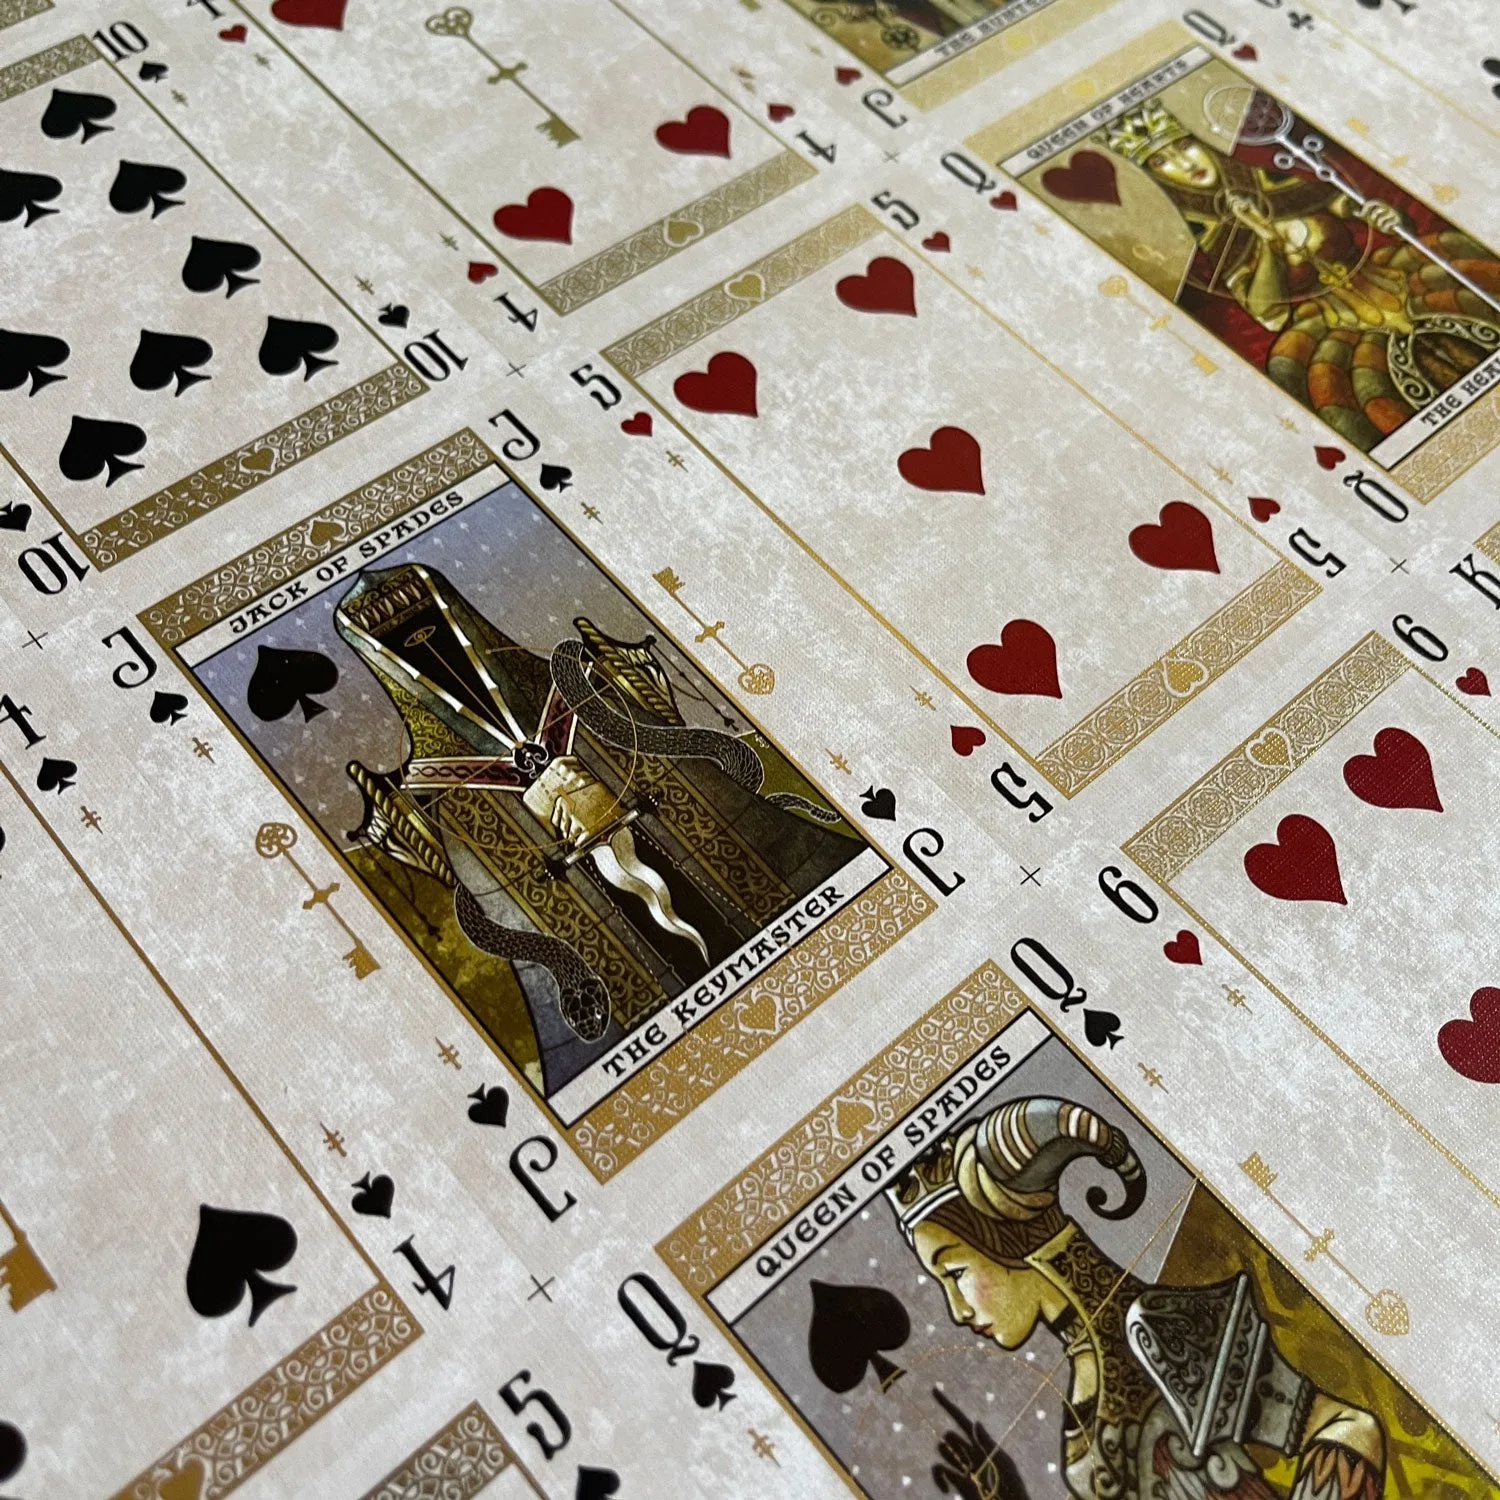
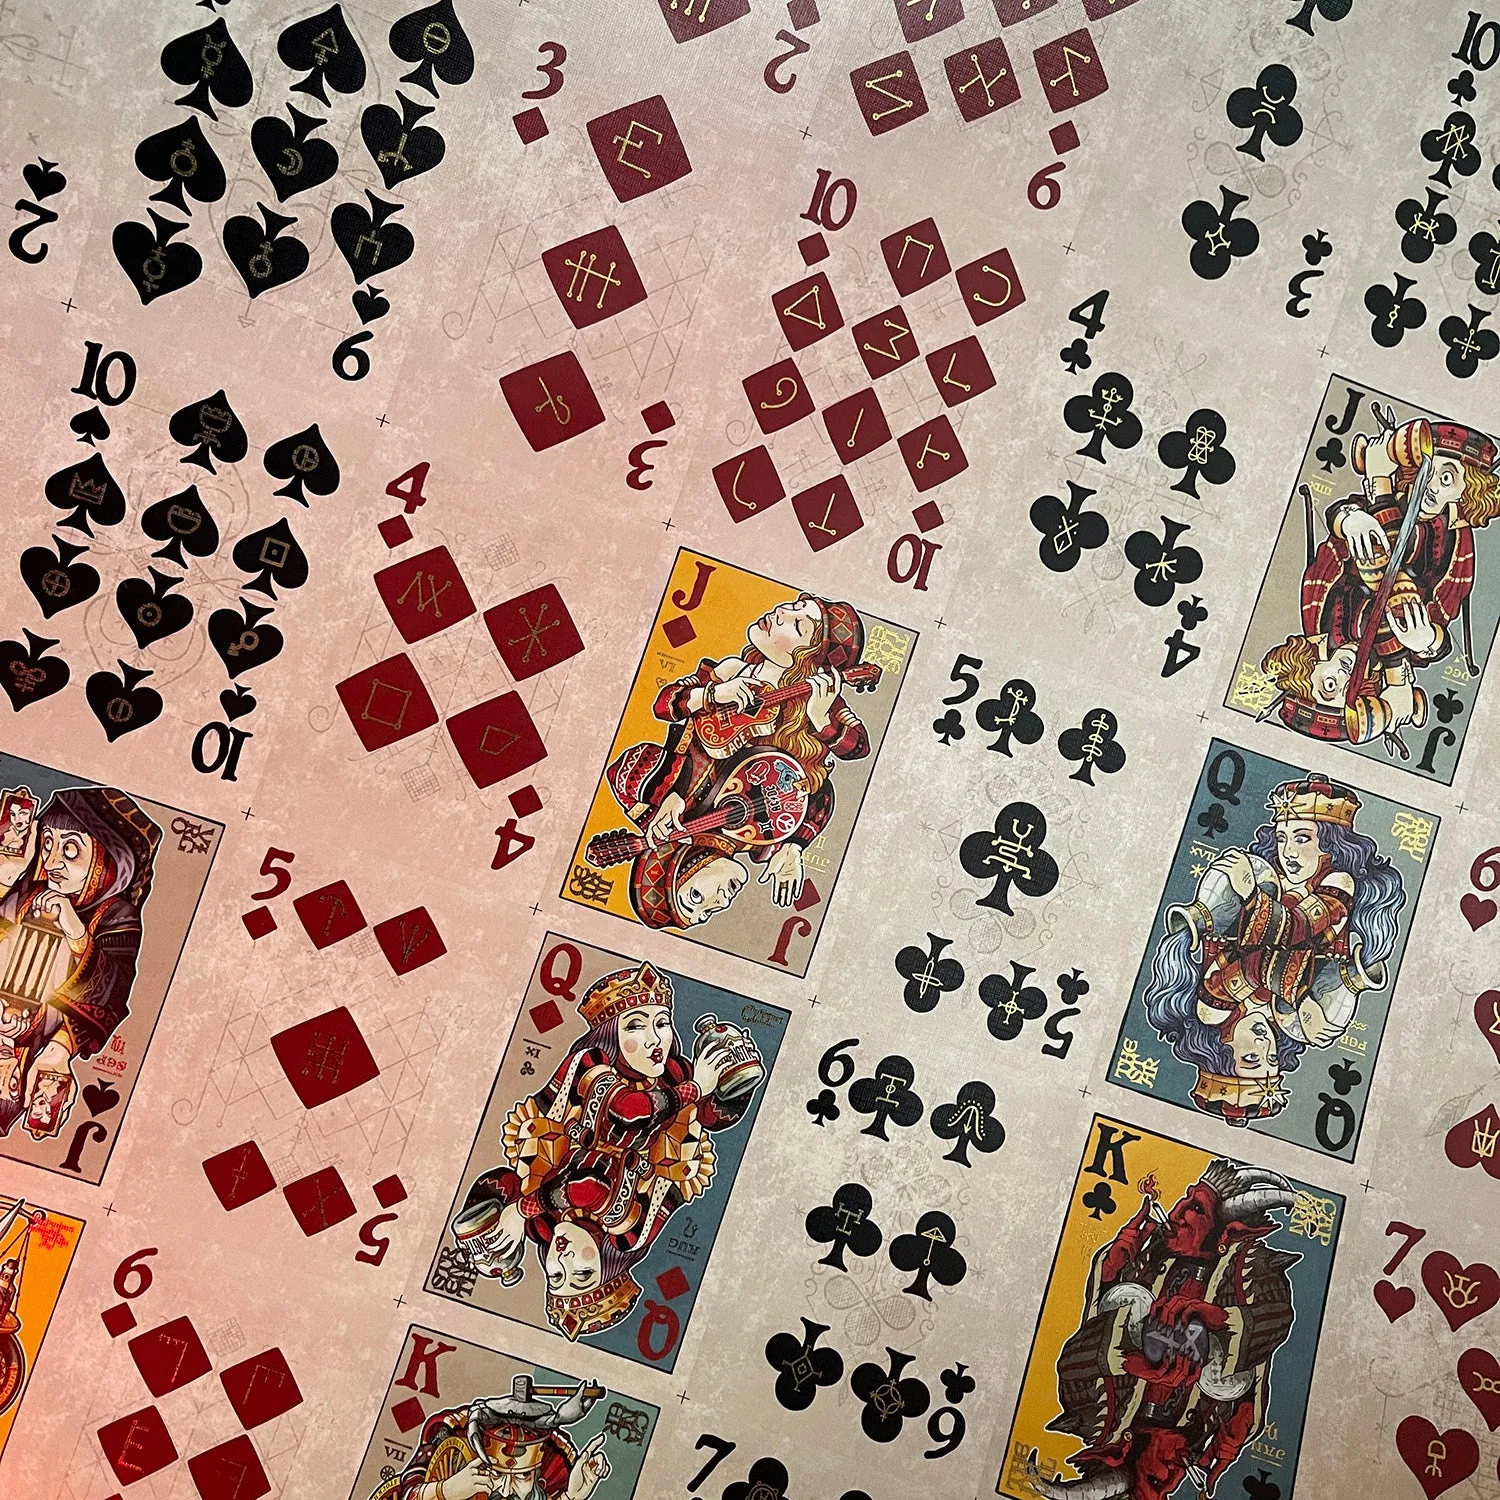
Uncut sheets showcase all 56 cards of a deck in one large, visually striking format. They're printed on both sides, so you can choose which side to display—usually the card faces are more colorful, but the back design can be equally captivating. Framing not only protects the sheet from dust, moisture, and handling damage but also elevates it into a piece of wall art that reflects your passion for playing cards.
Unlike standard framed posters, uncut sheets have specific needs: they're larger than typical prints, they're printed on both sides, and they often feature metallic foils that can be sensitive to heat and light. Understanding these factors will help you choose the right framing approach.
- Uncut sheets are large (e.g., 54.5 x 66 cm) and require custom or oversized frames.
- UV-protective glass prevents fading of inks and foils.
- Acid-free backing prevents yellowing over time.
Measuring and Preparing Your Sheet
Before you buy a frame, measure your uncut sheet accurately. Use a ruler or tape measure to note the exact dimensions, including any white borders. Remember that sheets are often shipped rolled, so you'll need to flatten them before framing. Place the sheet under heavy books or use a gentle weight for a day or two to remove curls—but never iron or apply direct heat, as it can damage the foil.
Once flat, handle the sheet with clean, dry hands or cotton gloves to avoid fingerprints and oils. If the sheet has a glossy or foiled surface, avoid touching it as much as possible. Prepare your workspace with a clean, soft surface to prevent scratches.
- Measure twice, cut once—double-check dimensions before ordering a frame.
- Flatten the sheet gradually; never use heat.
- Wear cotton gloves to protect the surface.
Choosing the Right Frame
The frame you choose should complement your decor and the artwork. For uncut sheets, you have several options: a standard picture frame with a mat, a floating frame that shows the sheet without a mat, or a custom shadow box that adds depth. Each has its pros and cons. Standard frames are affordable but may require custom matting to fit odd sizes. Floating frames give a modern look and allow you to see the sheet's edges, which is great if the design runs to the edge. Shadow boxes offer extra protection and can include space for related memorabilia.
Consider the weight of the frame and the wall material. Uncut sheets are lightweight, but a large frame can be heavy. Use appropriate wall anchors if mounting on drywall. Also, think about the location: avoid areas with direct sunlight, high humidity, or temperature fluctuations, as these can damage the paper and foils.
- Floating frames are ideal for sheets with edge-to-edge designs.
- Custom frames are worth the investment for valuable sheets.
- Avoid hanging in direct sunlight or near heat sources.
Mounting Techniques: Preserve or Not?
One of the biggest decisions is whether to permanently mount the sheet or use a reversible method. Permanent mounting (e.g., dry mounting) will flatten the sheet completely but can reduce its value and make it impossible to remove without damage. For collectors, reversible methods are safer: use archival mounting corners or acid-free tape to secure the sheet to a backing board. This allows you to remove the sheet later if needed.
If you choose to use tape, apply it sparingly on the back edges, not on the front. Make sure the tape is acid-free and archival quality. Alternatively, you can use clear Mylar corners that hold the sheet in place without adhesive. This is especially important if you plan to display both sides of the sheet by having it reversible in a double-sided frame.
- Archival corners are a safe, reversible option.
- Never use regular tape or glue directly on the sheet.
- Consider double-sided frames if you want to alternate sides.
Creative Display Ideas Beyond the Frame
If you're looking for something more unique than a standard frame, consider these creative display ideas: create a gallery wall with multiple uncut sheets from different series, using matching frames for a cohesive look. Or, use a large clip frame that allows you to swap sheets easily—perfect for rotating your collection. For a rustic feel, mount the sheet on a wooden board with clips, or use a magnetic poster hanger for a minimalistic look.
Another idea is to combine uncut sheets with related items, such as the actual deck or a book about the series, in a display case. This turns your collection into a storytelling exhibit. If you're handy, you can build a custom lightbox that backlights the sheet, highlighting the intricate details and foils. Just ensure the light source is LED and emits low heat to avoid damage.
- Gallery walls look great with matching frames.
- Clip frames allow easy rotation of sheets.
- Lightboxes can highlight foils but use cool LEDs.
Step-by-Step Framing Process
- Measure and flatten your sheet: Unroll the sheet and press it flat under heavy books for 24-48 hours. Measure the exact dimensions, including borders. Check that the sheet is completely flat before proceeding; any curls will show in the frame.
- Gather archival materials: Purchase a frame with UV-protective glass, acid-free backing board, and archival mounting corners or tape. Using non-archival materials can cause yellowing or damage over time—don't skimp on quality.
- Mount the sheet reversibly: Attach archival corners to the backing board, then slide the sheet into place. Ensure it's centered and straight. Reversible mounting preserves the sheet's value and allows future removal without damage.
- Assemble the frame: Place the mounted sheet into the frame, add the glass, and secure the backing. Make sure the glass is clean before sealing. Double-check that no dust or fingerprints are trapped between the glass and the sheet.
- Hang and protect: Choose a wall location away from direct sunlight and humidity. Use appropriate hardware for the frame's weight. Periodically dust the frame and check for any signs of fading or moisture—adjust placement if needed.
Uncut Sheets to Consider for Display
- HOTRS Patronium Uncut Sheet: The uncut sheets display all 56 cards, printed on both sides of course. Printed by WJPC. Golden cold-foiled areas on both sides. 100% custom, with one-way court cards and spot cards. Sheet size: 54.5x66cm grid 8x7. The golden cold-foil areas make this sheet a stunning centerpiece; use UV-protective glass to prevent foil tarnishing and highlight the metallic details.
- Madame Laveau Uncut Sheet: The uncut sheet of Madame Laveau The Soothsayer. Sheet size: 54.5x66cm grid 8x7. Displaying 56 cards faces and back. Shipped separately in a tube. Because it ships in a tube, you'll need to flatten it before framing; the 8x7 grid provides a balanced layout that works well in a standard landscape frame.
Framing uncut sheets is a rewarding way to enjoy your favorite card art every day. By following these steps and choosing the right materials, you'll create a display that's both beautiful and protective. Whether you're showcasing a golden-foiled HOTRS sheet or a Madame Laveau masterpiece, your walls will thank you.