Quick Answer
The DSPIAE General Purpose Chuck Hand Drill Set (AT-VHDS) is a versatile pin vise for modelers, and with a few setup steps you can drill clean, accurate holes in plastic kits.
Why a Chuck Hand Drill Beats a Collet-Style Pin Vise
Most budget pin vises use a collet that requires you to swap a dedicated chuck key to change bits. The DSPIAE AT-VHDS uses a three-jaw chuck with an anti-slip knurled ring, letting you tighten or release bits by hand without tools. This saves time when switching between 0.3mm and 3.2mm bits during a single build.
The bearing connection between the handle and chuck reduces friction, making the drilling action smoother than a fixed collet design. This is especially helpful when you need to drill multiple holes in a row, such as for panel lining or adding magnets.
Trade-Off: Manual vs. Electric Drilling
A manual hand drill like the DSPIAE AT-VHDS gives you full tactile feedback, letting you feel when the bit starts to bite into the plastic. This reduces the chance of snapping a thin bit or drilling too deep. However, it requires more wrist motion and is slower than an electric drill for large jobs like drilling out resin parts.
If you mainly work with 1/144 or 1/100 Gunpla kits and need precision for small details, a manual pin vise is the better choice. For heavy-duty or repetitive drilling, consider an electric alternative.
How to Set Up and Use the DSPIAE AT-VHDS Hand Drill
- 1. Insert the Drill Bit: Loosen the knurled chuck ring by turning it counterclockwise. Insert the bit shank as far as it will go—typically about 5mm deep. Tighten the ring clockwise until the bit is secure. Common mistake: inserting the bit too shallow can cause it to wobble or slip out during drilling. Always push the bit fully into the chuck.
- 2. Mark Your Drilling Spot: Use a scriber or a sharp hobby knife to create a small divot at the exact location. This prevents the drill bit from walking across the plastic surface when you start. Checkpoint: if the bit still wanders, deepen the divot slightly with a few light turns of the drill before applying forward pressure.
- 3. Start Drilling Slowly: Hold the drill perpendicular to the surface. Turn the handle clockwise with steady, even pressure. Let the bit cut—don't push hard. For small bits (0.3–0.5mm), use light pressure to avoid snapping. Common mistake: pushing too hard forces the bit to bend and break. If you feel resistance, back out and clear plastic chips from the flutes.
- 4. Drill Through or to Depth: If drilling through a part, place a scrap piece of plastic behind it to prevent blowout. If drilling to a specific depth, wrap a piece of tape around the bit at the desired depth as a visual stop. Checkpoint: for through-holes, stop as soon as the bit exits the back side to avoid damaging the part underneath.
- 5. Clean and Switch Bits: After drilling, remove plastic dust with compressed air or a brush. To change bits, loosen the chuck ring, remove the old bit, and insert the new one. Clean the chuck threads occasionally to keep the action smooth. Common mistake: leaving plastic dust in the chuck can cause the ring to bind. A quick blast of air after each use keeps the mechanism free-spinning.
Product Facts
-
Dspiae General Purpose Chuck Hand Drill Set (AT-VHDS): Three-jaw chuck holds drill bits from 0.3mm to 3.2mm securely. You can use a wide range of bits without needing separate collets, making this one tool suitable for everything from scribing panel lines to drilling holes for metal parts.
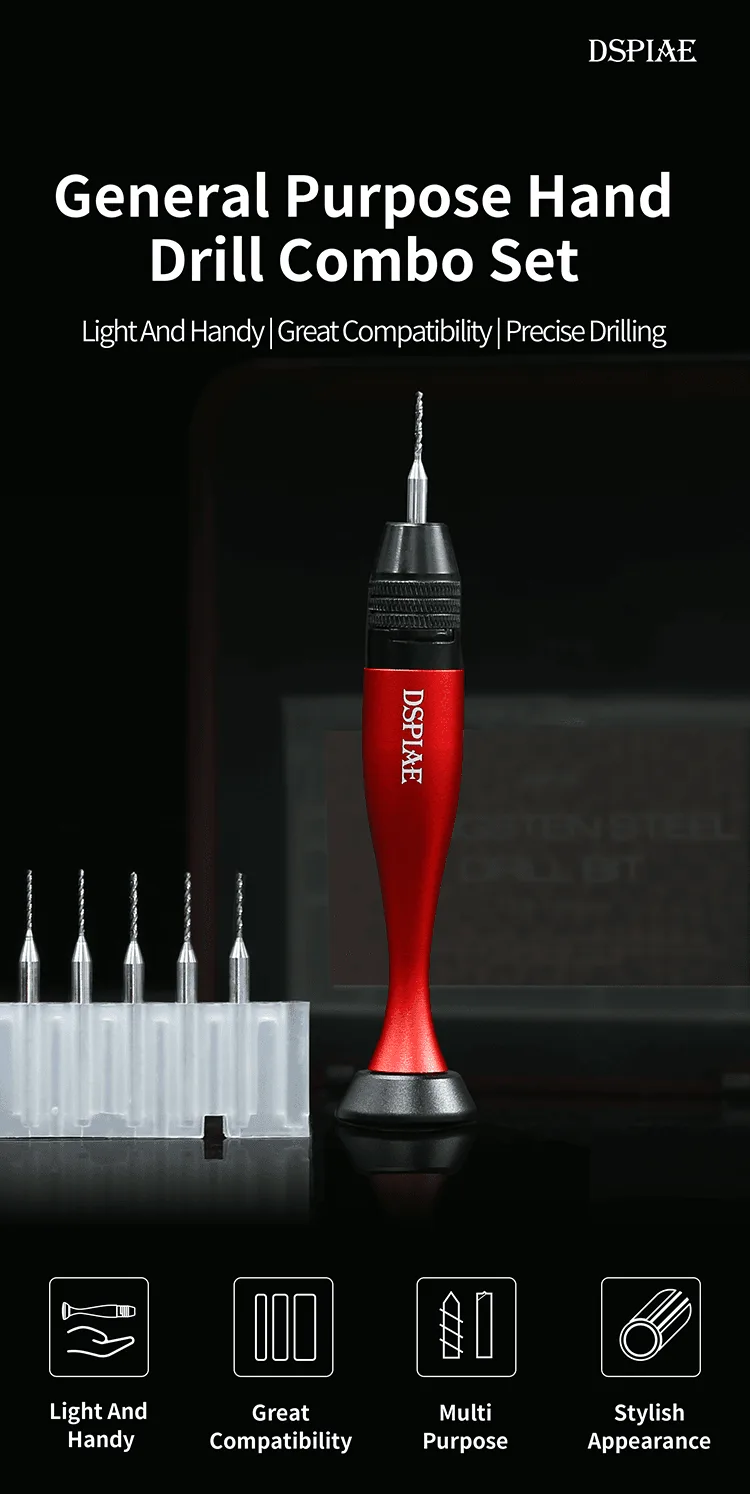
Dspiae General Purpose Chuck Hand Drill Set (AT-VHDS)
-
Dspiae General Purpose Chuck Hand Drill Set (AT-VHDS): Anti-slip knurling design effectively prevents finger slip when adjusting the chuck. Even with oily or sweaty fingers from handling plastic parts, you can tighten or loosen the chuck without dropping the tool or losing grip.
-
Dspiae General Purpose Chuck Hand Drill Set (AT-VHDS): Tungsten steel drill bits provide extra sharpness, quicker chip removal, and lower drag. These bits cut through plastic cleaner and with less pressure, reducing the risk of cracking thin parts or leaving burrs around the hole.