Quick answer
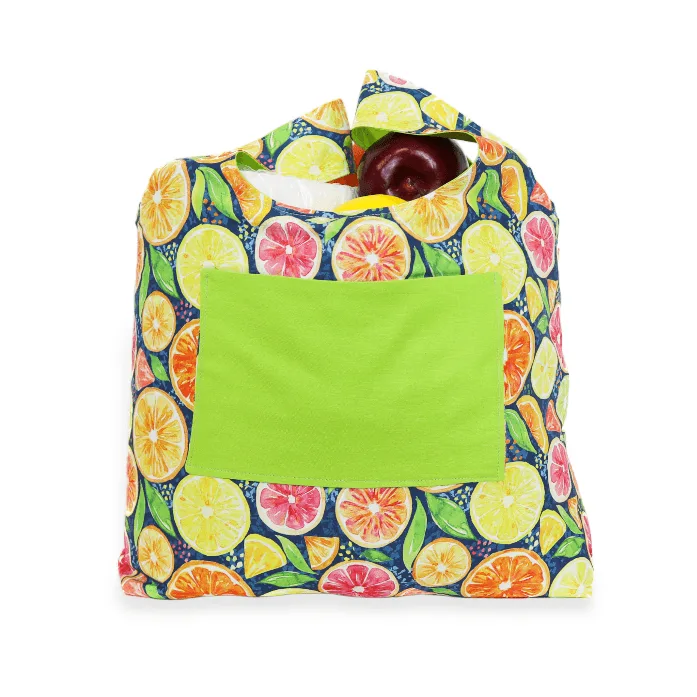
Open the Foldable Shopping Tote Sewing Kit, follow its illustrated instructions and video, and sew the lined tote in about an hour. The kit includes pre-cut fabric, so you can skip pattern prep and focus on straight seams, boxed corners, and the fold-into-pocket finish. Use a 2.5–3 mm stitch length and a universal needle; no serger is needed.
What you need before you start
The kit provides the fabric and instructions, but you'll need a few basic tools: a sewing machine, thread that matches or blends with your fabric, a pair of scissors or snips, and pins or clips. An iron is strongly recommended—pressing as you go makes the lined layers lie flat and the foldable pocket line up cleanly. If you're new to the machine, practice on a scrap of the kit fabric first to check tension and stitch length.
Sew the outer bag and lining
The tote is fully lined, which hides seams and makes the bag reversible. You'll sew the outer bag and the lining separately, then join them. Keep right sides together and use a consistent seam allowance—usually 1/2 inch unless the kit instructions say otherwise. Trim any loose threads as you go so they don't get caught in later seams.
Box the corners for a flat bottom
Boxed corners give the tote a flat base so groceries sit upright. The kit fabric is pre-cut, but you'll still need to align the side and bottom seams and stitch across the corner. Measure and mark the same distance from the point on all four corners; if they're uneven, the bag will wobble. Backstitch at each end for strength.
Create the fold-away pocket
The foldable feature comes from a pocket sewn into the lining. You'll leave a gap in the lining seam, turn the bag right side out through it, and then stitch the pocket in place. Follow the kit's markings or instructions for pocket placement—if you guess, the bag may not fold neatly. Press the pocket edges before topstitching so it sits flat.
Finish and fold
After turning the bag, press the top edge and topstitch around the opening for a crisp finish. Then fold the bag into its own pocket: tuck the sides in, fold the bottom up, and flip the pocket over the bundle. It should stay closed on its own. If it pops open, the pocket may be too small or the folds too bulky—re-press and try again.
Step-by-step tote sewing tutorial
- Prep your machine and fabric: Install a universal needle, wind a bobbin with matching thread, and set stitch length to 2.5–3 mm. Press the pre-cut fabric pieces to remove creases. Checkpoint: sew a test seam on a scrap to confirm tension before starting.
- Sew the outer bag: With right sides together, stitch the side and bottom seams of the outer fabric. Backstitch at the start and end. Press seams open. Mistake to avoid: sewing over pins—remove them as you go so the needle doesn't hit metal.
- Sew the lining: Repeat for the lining, but leave a 3–4 inch gap in the bottom seam for turning. Backstitch on both sides of the gap. Checkpoint: the gap should be wide enough to pull the whole bag through.
- Box the corners: On both outer and lining, pinch each bottom corner so side and bottom seams align. Measure the same distance from the point (kit instructions may specify), draw a line, and stitch across. Trim excess fabric to 1/4 inch. Mistake to avoid: cutting too close to the stitching—leave a seam allowance to prevent fraying.
- Join outer and lining: Turn the outer bag right side out and slip it inside the lining (lining wrong side out). Match side seams and pin the top edges together. Stitch around the top with a 1/2 inch seam allowance. Checkpoint: go slowly around the bulky side seams to avoid skipped stitches.
- Turn and press: Pull the entire bag through the gap in the lining. Push out corners with a point turner or chopstick. Press the top edge flat, then topstitch around the opening if desired. Mistake to avoid: ironing directly over the fold-away pocket—press around it to keep the shape.
- Sew the fold-away pocket: Follow the kit instructions to stitch the pocket to the lining. Typically you'll fold the pocket piece, press, and topstitch close to the edge, leaving the opening free. Checkpoint: the pocket should lie flat and be large enough to hold the folded bag.
Kit facts
- Foldable Shopping Tote Sewing Kit: The Foldable Shopping Tote Sewing Kit includes pre-cut fabric, step-by-step illustrated instructions, and access to a full video tutorial. You don't need to print or cut a pattern, so you can start sewing right away and check the video if a step is unclear.
- Foldable Shopping Tote Sewing Kit: The finished tote is fully lined, reversible, and folds neatly into its own pocket. The lining hides seams and adds strength, while the fold-away pocket makes the bag easy to stash in a car or purse.
- Foldable Shopping Tote Sewing Kit: The kit is available in multiple color options. You can pick a fabric color that matches your style or makes a thoughtful gift.