You’ve just finished assembling your latest Frame Arms kit, and the satisfaction of a completed build is unmatched. But the real journey begins after the build: maintaining those intricate joints to ensure your model stays poseable and durable for years to come. Whether you’re a seasoned builder or new to the Frame Arms line, proper joint care is essential to prevent sagging, breakage, and loss of articulation.
In this guide, we’ll cover the best practices for maintaining your Frame Arms kit’s joints after assembly. From cleaning and lubrication to tightening loose connections, these tips will keep your 1/100 scale masterpiece in top condition. Plus, we’ll touch on how to care for other model kits, like Gundam, using similar techniques.
Why Joint Care Matters for Frame Arms Kits
Frame Arms kits are known for their complex articulation and customizable nature. The joints are the core of this flexibility, but they’re also the most vulnerable part of the model. Over time, repeated posing can cause wear, leading to loose joints that can’t hold a stance. Dust and debris can also accumulate, making movements stiff or gritty. Regular maintenance not only preserves the kit’s appearance but also extends its lifespan, ensuring you can enjoy dynamic poses without fear of breakage.
Unlike some simpler model kits, Frame Arms features numerous polycaps and ball joints that require careful handling. Without proper care, these parts can wear out quickly, resulting in a frustrating experience. By implementing a simple maintenance routine, you can keep your Frame Arms kit’s joints smooth and responsive, just like the day you built it.
- Prevent loose joints that ruin poses
- Avoid stiffness caused by dust and dirt
- Extend the life of polycaps and ball joints
Cleaning Your Joints: The First Step
Before you can address any joint issues, you need to ensure they’re clean. Dust, grease, and tiny plastic shavings from the build process can accumulate in the joint sockets, causing friction and wear. Start by disassembling the affected joints if possible, but if that’s too risky, use a soft brush or compressed air to remove loose debris from the crevices.
For stubborn dirt, a cotton swab lightly dampened with isopropyl alcohol can work wonders. Gently wipe the joint surfaces, avoiding any painted areas to prevent damage. Once clean, let the parts dry completely before reassembling. This simple step can dramatically improve joint movement and prevent premature wear.
- Use a soft brush or compressed air for dust
- Dampen a cotton swab with isopropyl alcohol for stubborn grime
- Allow parts to dry fully before reassembly
Tightening Loose Joints: Proven Techniques
Loose joints are a common issue in model kits, especially after frequent posing. The good news is that there are several effective methods to tighten them without damaging the parts. One of the most popular techniques is applying a thin layer of super glue (cyanoacrylate) to the joint peg or socket, letting it dry completely before reinserting. This adds a microscopic layer of material, creating a snugger fit. However, be cautious: too much glue can seize the joint entirely.
Another approach is using a small piece of tissue paper or Teflon tape as a shim. Cut a tiny strip and wrap it around the peg before inserting it into the socket. This provides friction without permanent alteration. For polycap joints, you can also try coating the cap with a layer of clear nail polish, which dries to a slightly thicker surface. Each method has its pros and cons, so test on a less visible area first.
- Super glue method: apply thin layer, let dry, then reassemble
- Tissue paper or Teflon tape shim for temporary tightening
- Clear nail polish on polycaps for a subtle increase in friction
Lubrication: The Secret to Smooth Articulation
While cleaning and tightening are essential, lubrication can take your kit’s articulation to the next level. A tiny amount of silicone-based lubricant or even a drop of sewing machine oil can reduce friction, making movements feel buttery smooth. Apply it sparingly with a toothpick or pin to the joint’s contact points, then work the joint back and forth to distribute the lubricant evenly.
Avoid using petroleum-based products like WD-40, as they can degrade plastics over time. Also, be careful not to over-lubricate, as excess can attract dust and create a mess. A little goes a long way, and the result is a kit that poses effortlessly, holding dynamic stances without strain.
- Use silicone-based lubricant or sewing machine oil
- Apply with a toothpick for precision
- Avoid petroleum-based products to prevent plastic damage
Long-Term Storage and Display Tips
How you store and display your Frame Arms kit can significantly impact joint health. Avoid leaving your model in extreme temperatures or direct sunlight, which can warp or weaken plastic. When displaying, choose a stable shelf away from high-traffic areas to prevent accidental knocks. If you’re not posing it frequently, consider placing it in a less dynamic but stable stance to reduce stress on the joints.
For long-term storage, disassemble the kit into major sections (arms, legs, torso) and wrap them in soft cloth or bubble wrap. This prevents pressure on joints and reduces the risk of breakage. Store in a cool, dry place away from humidity. Regular dusting with a soft brush will also keep the kit looking fresh without needing to disturb the joints.
- Keep away from direct sunlight and heat sources
- Disassemble major sections for long-term storage
- Dust regularly with a soft brush
When to Consider Replacement Parts
Even with meticulous care, some joints may eventually fail. If a joint becomes too loose to hold any pose, or if a peg breaks, it might be time to consider replacement parts. Many Frame Arms kits have interchangeable parts, so you can often source spares from other kits or aftermarket sellers. Alternatively, you can use the damaged joint as a base for custom modifications, such as adding a metal pin for reinforcement.
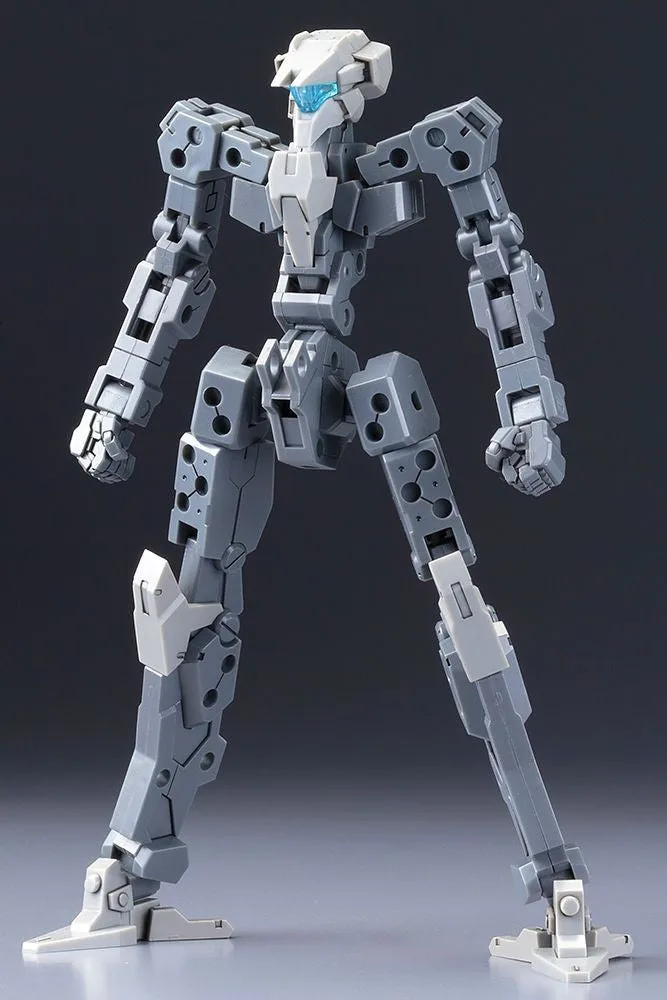
If you’re looking to upgrade your kit, consider the Frame Arms Frame Architect Renewal (Gray) 1/100, which offers enhanced articulation and durability out of the box. For those who enjoy painting, using high-quality paints like Acrysion N39 - Purple (Gloss/Primary) can add a protective layer to joints, reducing wear. And for detailed panel lining, the RCM028 Real Colors Markers - RAF Cockpit Grey-Green is an excellent choice to enhance your kit’s appearance without compromising joint integrity.
- Source replacement parts from other kits or aftermarket
- Consider metal pin reinforcement for broken pegs
- Upgrade to a kit with improved articulation like Frame Architect Renewal
Maintaining your Frame Arms kit’s joints is a rewarding part of the hobby that ensures your model remains a centerpiece of your collection. By incorporating these cleaning, tightening, and lubrication techniques into your routine, you’ll enjoy smooth articulation and lasting durability. And if you’re ever in need of replacement parts or looking to expand your collection, explore the Frame Arms Frame Architect Renewal (Gray) 1/100 for a new building experience.