Quick answer
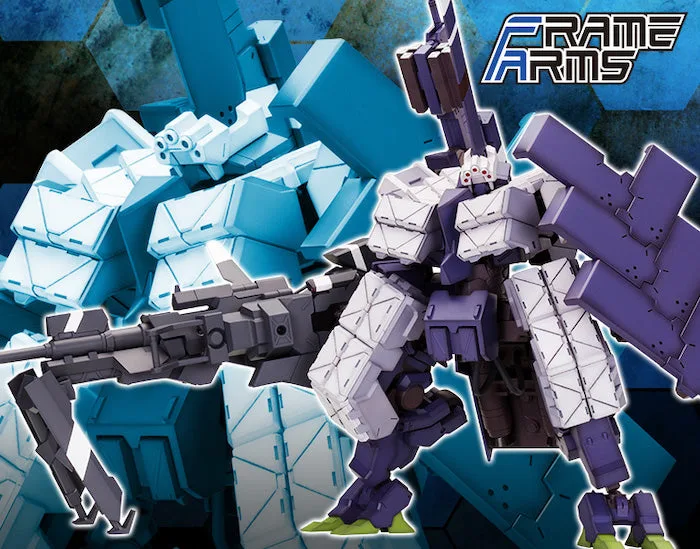
Build the Frame Arms #029 Type 48 Model I Kagutsuchi-Otsu Sniper:RE2 in this order: clean nubs, dry-fit the sniper assembly before gluing anything, tighten the shoulder and hip joints, then pose the rifle last with the support arm taking the weight. The long barrel is the part most likely to droop or sag, so treat the arms and the rifle mount as one unit rather than finishing the body first.
Prep the runners before you snap anything together
The Kagutsuchi-Otsu is a refurbished base-defense frame rebuilt for ground counter-offensive work, and the kit reflects that: extra armament means extra parts on the runner. Lay out the runners in frame order and clip only the pieces for the current step. Sniper-type 1/100 kits have small optic and muzzle parts that disappear into carpet easily, so keep a tray under your cut area.
Use flush cutters and leave a sliver of nub, then shave it flat with a hobby knife. On dark or red-molded parts, scraping instead of sanding keeps the surface from turning chalky.
- Checkpoint: every nub is flush before you test-fit, not after.
Dry-fit the sniper assembly as a separate unit
Assemble the rifle and its mount off the body first. This lets you see how the barrel sits relative to the shoulder and whether the stock clears the backpack. If you build the torso first and then attach the rifle, you will be fighting the pose instead of adjusting the mount.
Keep the rifle sub-assembly loose until you have confirmed the arm can reach the grip without the elbow binding.
- Common mistake: gluing the rifle halves before checking that the barrel is straight.
Reinforce the joints that carry the barrel weight
A long sniper rifle puts leverage on the shoulder, elbow, and wrist. If the joints feel loose out of the box, add a thin layer of clear nail polish or a small strip of tape to the ball joint, let it dry, then reinsert. Do not force a tight joint; work it in gradually so you do not crack the socket.
The hip and ankle also matter, because a kneeling or braced sniper pose shifts weight to one leg. Tighten those before you commit to a stance.
- Checkpoint: the arm holds the rifle level for a full minute without sagging.
Pose the sniper stance from the ground up
Set the feet first, then the knees, then the hips, then the torso. Sniper posing fails most often when the upper body is posed first and the legs are forced to follow. If you want a braced pose, use the rifle's support point against a knee or a display base rather than relying on the wrist alone.
Rotate the head slightly toward the scope rather than straight ahead; it reads as aiming instead of standing.
- Common mistake: posing the arms last, which twists the shoulder and pops the rifle out of the hand.
Add detail without overworking the kit
Panel lining the rifle and shoulder armor gives the sniper silhouette definition, but keep it thin. A flat or semi-gloss topcoat over the whole kit evens out the plastic sheen and protects the joints from repeated posing.
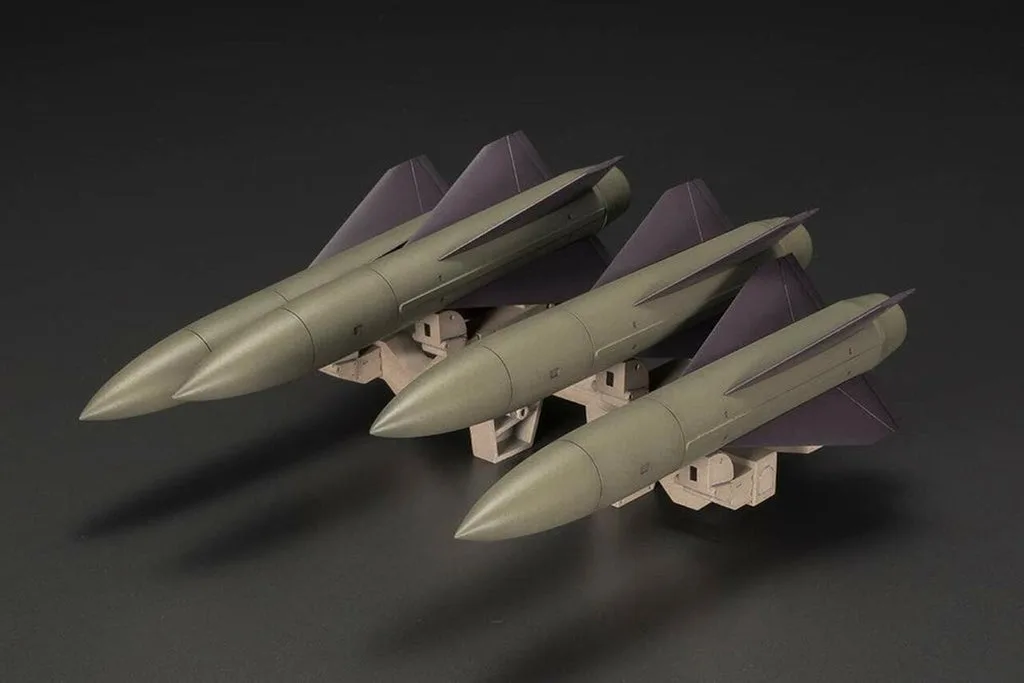
If you want extra armament options later, the Frame Arms Extend Arms 07 - Improved HAWK adds a missile pad with 3mm joints that fits many Frame Arms models, so you can expand the loadout without modifying the Kagutsuchi-Otsu itself.
Kagutsuchi-Otsu build steps
- Step 1: Clip and clean by runner order: Cut parts for one step at a time and shave nubs flush before test-fitting. Checkpoint: no nub marks on visible armor edges.
- Step 2: Build the rifle as a sub-assembly: Assemble the sniper rifle and mount off the body, checking barrel straightness before gluing. Common mistake: gluing the rifle halves before confirming alignment.
- Step 3: Tighten shoulder, elbow, and wrist joints: Add a thin layer of clear polish or tape to loose ball joints and let it dry before reinserting. Checkpoint: the arm holds the rifle level without sagging.
- Step 4: Pose from feet to torso: Set the stance bottom-up, then bring the rifle to the hand and rest the barrel on a support point. Common mistake: posing arms first and twisting the shoulder.
- Step 5: Line, topcoat, and display: Apply thin panel lines and a flat or semi-gloss topcoat, then place the kit on a stable base. Next step: add optional armament such as Extend Arms 07 if you want a heavier loadout.
Kit facts that affect your build
- Frame Arms #029 Type 48 Model I Kagutsuchi-Otsu Sniper:RE2 1/100: Frame Arms #029 Type 48 Model I Kagutsuchi-Otsu Sniper:RE2 1/100 is a refurbished base-defense frame rebuilt for ground counter-offensive operations with heavy armament and sniper specifications. The added armament is the reason the shoulder and rifle mount need reinforcement before posing.
- Frame Arms Extend Arms 07 - Improved HAWK: Frame Arms Extend Arms 07 - Improved HAWK has a missile launching pad with 3mm joints and back missiles that can be removed or attached to reproduce Equip or Discharge mode. It is a low-cost way to add armament to a Frame Arms sniper build without altering the base kit.