Quick answer
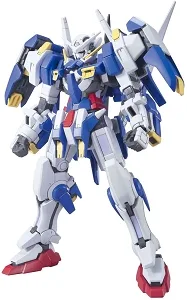
To get a clean finish on the Gundam Avalanche Exia HG, build in subassemblies, remove nubs with a sharp hobby knife and progressively finer sanding, apply panel lining before topcoat, and seal with a matte or gloss coat. Work slowly on the Avalanche armor to avoid stress marks.
Why the Avalanche Exia Needs a Different Approach
The Avalanche Exia's bulky armor and numerous protruding parts create more opportunities for visible nub marks and seam lines than a standard HG. Unlike simpler kits, the added armor pieces mean you should plan your build order to keep fragile sections from getting in the way. This guide assumes you have basic tools: nippers, hobby knife, sanding sticks (400–1000 grit), panel line accent color, and topcoat.
Step 1: Prep and Organize Your Parts
Open the runners and sort parts by color or section (head, torso, arms, legs, Avalanche units). Keep the manual handy but don't follow it page by page yet. Wash runners in lukewarm water with a drop of dish soap to remove mold release agent, which can affect paint and topcoat adhesion.
Step 2: Remove Parts with Minimal Stress
Use sharp nippers and cut on the runner gate, leaving a small nub. Then trim the nub with a hobby knife in thin slices. For the Avalanche armor, avoid cutting too close to the part—stress marks show easily on dark plastic. Sand progressively: start with 400 grit, then 600, then 1000 until the surface is even.
Step 3: Build in Subassemblies
Assemble the head, torso, arms, legs, and Avalanche units separately before joining. This makes it easier to sand and panel line without awkward angles. Test-fit joints; if they are too tight, sand the peg slightly rather than forcing, which can crack the part.
Step 4: Panel Lining Before Assembly
Apply panel line accent color to the recessed lines on each subassembly. Use a fine-tip applicator or a thinned enamel wash. Let it dry for 10–15 minutes, then clean excess with a cotton swab lightly dampened with enamel thinner. Avoid flooding the Avalanche armor's raised edges, as cleanup can smear.
Step 5: Topcoat for a Unified Finish
After assembly, apply a thin topcoat in light passes. Matte (flat) hides minor scratches and gives a realistic military look; gloss adds shine but highlights imperfections. Spray in a well-ventilated area, 6–8 inches away, and let it cure for at least 24 hours. Do not topcoat clear parts if you want to keep them transparent.
Build steps at a glance
- Prep and wash runners: Wash runners in lukewarm soapy water to remove mold release agent. Checkpoint: let parts dry completely before sanding.
- Remove nubs carefully: Cut on the gate, trim with a knife, and sand progressively from 400 to 1000 grit. Common mistake: cutting too close causes stress marks.
- Build subassemblies: Assemble head, torso, arms, legs, and Avalanche units separately. Checkpoint: test-fit joints and sand pegs if tight.
- Panel line before final assembly: Apply panel line accent to recessed lines on each subassembly, then clean excess. Common mistake: flooding lines leads to smearing.
- Topcoat after assembly: Apply thin coats of matte or gloss topcoat; let cure 24 hours. Checkpoint: avoid topcoating clear parts if you want them transparent.
Product facts
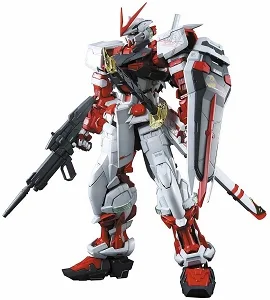
- Gundam Avalanche Exia HG: High Grade (HG) scale model kit of the Gundam Avalanche Exia, featuring the distinctive Avalanche unit with its bold, armored appearance. The added armor means more parts and potential nub marks, so the clean-finish steps above are especially important.