Quick Answer
Buy three things first: a single-blade or thin-blade nipper, a small sanding set (400–1000 grit plus a polishing stick), and a hobby knife with spare blades. That covers clean removal and surface cleanup on nearly any snap-fit kit, including the RX-78GP01FB Full Burnern HG 1:144 and the MS-07B Gouf Custom HG 1:144. Add panel line tools, topcoat, or a glass file only after you have built two or three kits.
Why the Nippers Matter More Than Anything Else
Nippers decide how much cleanup work you create. A dull or cheap pair crushes the plastic runner gate instead of slicing it, leaving stress marks and torn nubs that take longer to sand out than the cut itself took. For Gunpla, look for a nipper described as single-blade or thin-blade with a short, sharp cutting edge. Two nippers is the honest ideal: a cheaper pair for cutting parts off the runner, and a sharp pair for the final flush cut near the part. If you only buy one, buy the sharp one and cut gates slightly long, then trim with a hobby knife.
- Two-cut method: cut the part off with a 2–3 mm stub left on the gate, then make a second flush cut.
- Never twist or rock the nipper to snap a part free — that is where stress marks come from.
- Replace or reserve nippers once they start leaving white marks on clean cuts.
Sanding Tools: Match Grit to the Job
Sanding removes the nub left by the nipper and blends the surface. You do not need a full abrasive library. A practical starter set runs from about 400 grit for shaping a stubborn nub, through 600 and 800 for blending, to 1000 for a smooth finish before topcoat. A sanding stick or sponge-backed file follows curved surfaces better than a flat sheet and is less likely to flatten a rounded shoulder or knee. Glass files cut fast and last a long time, but they can leave a polished, slightly different sheen than the surrounding plastic — which matters most on bare, uncoated kits.
- Wet-sanding with a drop of water keeps dust down and reduces clogged paper.
- Sand in one direction, then switch direction at the next grit so you can see when the previous scratches are gone.
- Wipe dust off with a soft brush before painting or topcoating.
The Small Tools People Forget
A hobby knife with a fresh blade handles tight spots the nipper cannot reach and trims remaining nubs flush. Tweezers help place small parts and decals. A parts separator or a thin plastic card helps pry apart a joint you snapped together by mistake — much safer than a knife tip. A shallow tray with a lip keeps tiny polycaps and v-fins from rolling off the table, which is the most common way beginners lose a part. None of these are expensive, and each one prevents a specific problem rather than just adding to the pile.
Where to Stop Spending
Skip an airbrush, compressor, and full paint line until you know you want to paint. Snap-fit kits are designed to look complete out of the box, and many builders never paint at all. A topcoat spray is the cheapest single upgrade if you want a finished look, but it is a finishing step, not a building tool. Also skip oversized 'everything' tool bundles: they usually pair one usable nipper with filler items you will not touch. Buy the three core tools, build a kit, then let the kit tell you what you were missing.
Decision Rules for Buying Gunpla Tools
- If you have never built a kit: Buy a thin-blade nipper, 600/800/1000 grit sanding sticks, and a hobby knife. Build the EX Standard Barbatos SD kit first because its low cost and compact size make mistakes cheap. Three tools, one kit, then reassess.
- If you already build High Grade kits: Add a second, sharper nipper for flush cuts and a glass file for fast nub removal. Keep the older pair for rough cuts off the runner. Two nippers beat one expensive nipper.
- If you plan to paint or topcoat: Finish the sanding sequence to 1000 grit before any coating, and add a soft dust brush. Skip paint until the build is fully assembled and cleaned up. Surface prep first, paint second.
- If you are buying for a gift: A nipper plus a sanding stick set is a safer gift than a large bundle, because it works for every grade. Pair it with a kit the recipient actually wants. Tools are universal; kits are personal.
Matching Tools to Kits in the Catalog
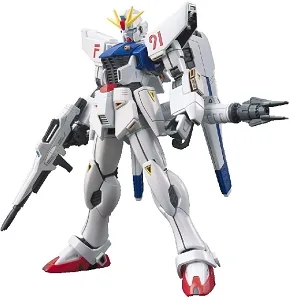
- Gundam RX-78GP01FB Full Burnern Stardust Memory HG 1:144 Model Kit: The RX-78GP01FB Gundam Full Burnern from Mobile Suit Gundam 0083: Stardust Memory is an HGUC 1:144 snap-fit kit with articulated joints, detailed panel lines, and beam rifle, shield, and beam saber accessories; no glue required. Because it is snap-fit and needs no glue, your tool budget goes to nippers and sanding rather than adhesives. Its panel lines reward a panel line tool later, and its accessories mean more small parts to handle with tweezers.
- Gundam MS-07B Gouf Custom HG 1:144 Model Kit: The MS-07B Gouf Custom from Mobile Suit Gundam: The 08th MS Team is a High Grade 1:144 kit that becomes a fully articulated figure with a powerful silhouette and sharp detailing, armed with signature weapons and built for dynamic posing. Sharp detailing and a close-combat silhouette show every nub and stress mark, so a clean flush cut and a 600–1000 grit sanding sequence matter more here than on a chunky, simple kit.
- Gundam EX Standard Barbatos SD Model Kit: The Gundam EX Standard Barbatos SD Model Kit is a compact kit from the SD Gundam EX-Standard lineup that balances affordability, articulation, and improved proportions, emphasizing dynamic movement and expressive posing in the stylized SD format. Small SD parts are easy to lose and easy to over-sand, so this is a good kit for practicing light passes with a fine grit and a sanding stick rather than aggressive filing.
Who This Tool Approach Fits
Best for
- First-time Gunpla builders who want clean results without a big upfront spend
- Builders working on HG 1:144 kits like the RX-78GP01FB Full Burnern or MS-07B Gouf Custom
- Anyone who wants to buy tools once and add only what a specific kit requires
Not for
- Builders who already own a sharp nipper and a full sanding progression — you need finishing supplies, not starter tools
- Anyone planning a full custom paint job from day one, who should budget for an airbrush and paint line instead