Quick answer
To install a hanging rail like the Grove Hanging Rail, start by marking the wall positions, using a level, and drilling pilot holes into wall studs or using toggle bolts for hollow walls. Then secure the brackets, hang the rail, and tighten all fasteners.
What you need before you start
A straightforward hanging rail project requires a few common tools: a tape measure, a spirit level, a pencil, a drill with masonry or wood bits, appropriate wall anchors (toggle bolts for drywall, expanding anchors for masonry), a screwdriver, and a stud finder. If you are mounting a brass rail like the Grove Hanging Rail, note that solid brass is weighty, so sturdy wall anchors are essential.
The biggest decision is whether to mount into wall studs or into hollow drywall. Stud mounting provides the most secure hold for heavy items, while toggle bolts (or similar) work well for lighter loads. Avoid plastic expansion plugs for heavy hanging rails—they can pull out over time.
Choosing the right height and hardware
Standard towel rail height is about 48 inches (122 cm) from the floor, but adjust based on your use and the rail length. For a rail used to hang pots and pans in a kitchen, mount it low enough for easy access but high enough to clear countertops.
The Grove Hanging Rail is made of solid brass and may be combined with coordinating S-hooks for draping towels or hanging kitchen items. Because brass is heavy, do not rely on adhesive hooks or small plastic anchors. Use wall anchors rated for at least 50 pounds or screw directly into studs.
Step-by-step hanging rail installation
- Mark bracket positions: Hold the rail or its brackets against the wall and mark the screw holes with a pencil. Use a spirit level to keep marks perfectly horizontal—an uneven rail will look sloppy and may slip off S-hooks. Check your marks twice before drilling. Even a small tilt becomes obvious over 36 inches or more. If possible, mark both brackets simultaneously using a long level.
- Drill pilot holes and insert anchors: Using a drill bit slightly smaller than your anchor, drill holes at each marked spot. For stud mounting, skip the anchors and drill into the stud. For hollow walls, insert toggle bolts—do not use plastic expansion plugs for a brass rail. Once anchors are in, screw in the bracket screws hand-tight but leave a 1/8-inch gap to slide the rail into the brackets later. If you hit a stud, you do not need an anchor—that is the most secure mounting. If you miss and the hole is in drywall, remove the screw and insert a toggle bolt before continuing.
- Attach brackets and hang the rail: Screw the brackets onto the wall using the prepared anchors or stud screws. Make sure the brackets are level with each other (re-measure). Slide one bracket onto the rail, then slide the other bracket onto the opposite end. Firmly tighten all screws—it is tempting to leave them loose to rotate the rail, but this leads to sagging. For the Grove Hanging Rail, the rail is a simple straight cylinder, so both brackets must be aligned precisely to avoid binding or twisting.
- Test load and add S-hooks: Before hanging towels or cookware, give the rail a gentle tug to confirm it is secure. If it feels solid, add the S-hooks and hang your items. If you hear creaking or feel movement, check that all screws are tight and that the toggle bolts have fully expanded behind the drywall. Wait 24 hours before loading the rail fully, especially if you used toggle bolts—they compress the drywall slightly overnight and may require a final re-tighten.
Product facts
-
Grove Hanging Rail, Matt Nickel: A simple, straight hanging rail crafted from solid brass—pleasingly weighty. The rail's substantial weight means you must use robust wall anchors (toggle bolts or stud mounting) to keep it secure; lightweight plastic plugs are not sufficient.
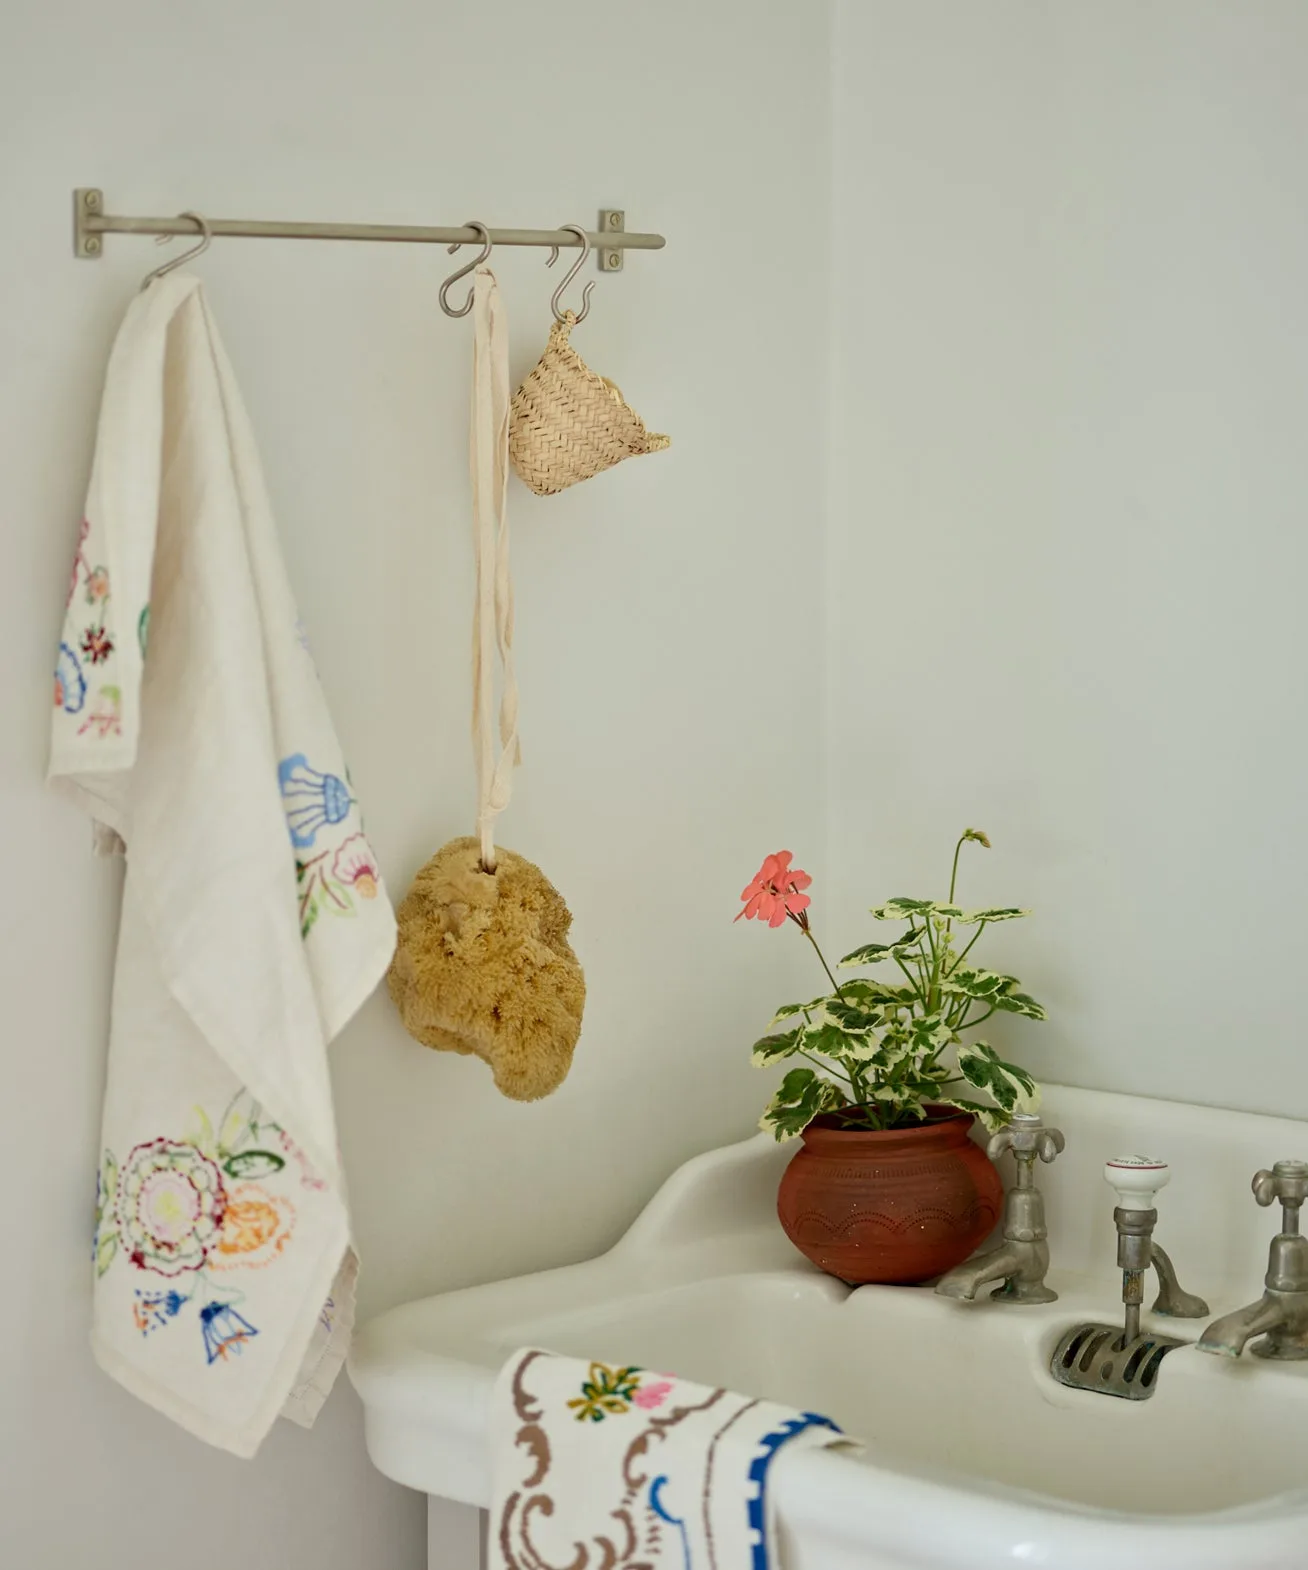
Grove Hanging Rail, Matt Nickel
-
Grove Hanging Rail, Matt Nickel: May be combined with the co-ordinating S-hooks for draping towels or hanging pots, pans and beyond. If you plan to hang heavy cookware or multiple towels, the overall load increases, so plan for anchors or stud placement that can handle the combined weight.