Quick Answer
Start by organizing the runners and pre-fitting the Big Gun's main barrel, then assemble the Zaku II in sub-assemblies before combining them. This approach reduces stress marks and ensures the artillery piece aligns correctly.
Why the Big Gun Set Needs a Different Approach
The HG Zaku II + Big Gun Set includes a large artillery piece that adds bulk and weight, so the build order matters more than with a standard HG kit. If you attach the Big Gun to the Zaku II before finishing the mobile suit's joints, the extra weight can stress the connection points and cause misalignment.
Because the kit is a High Grade, it offers a detailed build experience but relies on polycaps and snap-fit parts rather than screws or glue. That means careful nub removal and dry-fitting are essential for a clean result.
Step-by-Step Assembly Guide
- Step 1: Sort and Prep Runners: Lay out all runners and check the instruction manual for part numbers. Use a glass file or fine sandpaper to remove nubs cleanly, especially on visible armor pieces. Avoid cutting parts directly from the runner with nippers; leave a small margin and sand down to prevent stress marks.
- Step 2: Dry-Fit the Big Gun's Main Barrel: Before gluing or final assembly, test-fit the barrel sections together. Ensure the alignment tabs click firmly and the barrel is straight. If the barrel feels loose, check for leftover nubs on the connection surfaces; do not force it.
- Step 3: Assemble the Zaku II in Sub-Assemblies: Build the torso, arms, legs, and head separately. This makes it easier to reach inner frame details and apply panel lining before joining everything. Keep the polycaps in their designated slots; verify each joint moves freely before moving to the next section.
- Step 4: Attach the Big Gun to the Zaku II: After completing the mobile suit, attach the Big Gun's mounting arm to the backpack or designated connector. Support the gun with your hand while pressing the joint to avoid bending pegs. If the joint feels tight, sand the peg slightly rather than forcing it, to prevent cracking.
- Step 5: Final Pose and Display: Pose the Zaku II with the Big Gun aimed forward, and adjust the balance by spreading the legs. Use a display stand if needed to reduce strain on the joints. Check that the gun's weight doesn't cause the kit to tilt; adjust the center of gravity before leaving it on a shelf.
Kit Facts
-
HG Zaku II + Big Gun Set [Gundam Thunderbolt ver.] 1/144: This Bandai Hobby model kit brings the HG Zaku II + Big Gun Set from the Gundam Thunderbolt series to your collection in 1/144 scale. The 1/144 scale is compact enough to display the Big Gun without taking up too much shelf space, making it a good centerpiece for a Thunderbolt-themed collection.
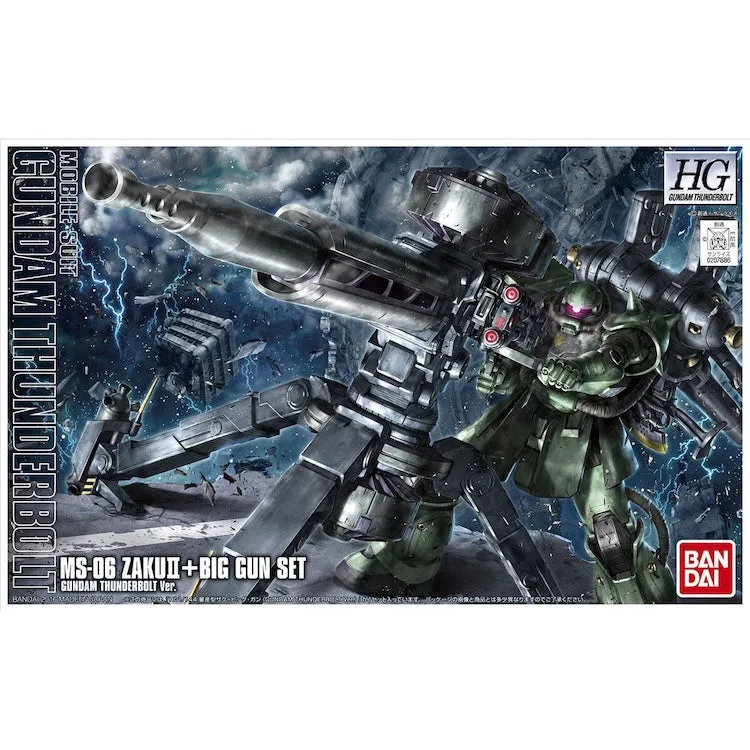
HG Zaku II + Big Gun Set [Gundam Thunderbolt ver.] 1/144