Quick Answer
To get a smooth, bubble-free application of your Hillsboro Hops decal, clean the surface, use the wet method, and press from the center outward. Follow the steps below to avoid peeling or misalignment.
Choosing the Right Surface and Placement
Where you put your decal matters as much as how you apply it. For cars, the rear window or bumper are popular spots, but avoid areas that flex or get heavy sun exposure, like the hood or roof, to prevent premature wear. In a home office, a laptop lid, a smooth wall, or a desk drawer front works well—just make sure the surface is clean and non-porous.
Consider visibility: on a car, a decal on the rear window is easy for others to see but can obstruct your view if placed too low. For an office, a spot near your monitor or on a notebook keeps your team spirit visible without being distracting.
Wet vs. Dry Application: Which Is Better?
The wet method—spraying a light mist of soapy water on the surface before applying—is ideal for larger decals like the Hops Decals 2-pack, because it lets you slide the decal into the perfect position before it sticks. The dry method works for tiny decals like the Bat Barley Decal, but any mistake means starting over.
For car windows, the wet method reduces air bubbles and makes it easier to squeegee out water. For indoor surfaces like a laptop or wall, dry application is usually fine if you're confident in your placement, but wet is still safer for a flawless finish.
Step-by-Step Decal Application
- Clean the surface thoroughly: Wipe the area with rubbing alcohol or a mild soap solution and let it dry completely. Any dust or oil will prevent the decal from adhering, so don't skip this step. Check for lint or residue with a lint-free cloth before applying.
- Prepare the decal and surface: Peel the backing paper slowly and, for larger decals, spray a light mist of soapy water on the surface. This lets you slide the decal into position without sticking immediately. If you're applying dry, position the decal with painter's tape to hold it in place before pressing.
- Apply and squeegee from the center: Place the decal on the surface and use a credit card or squeegee wrapped in a soft cloth to press from the center outward. This pushes out air bubbles and ensures full contact. Work slowly; if you see a bubble, lift the nearest edge and re-smooth.
- Remove the transfer tape: Peel the clear transfer tape back at a 45-degree angle, pulling it away from the decal. If any part lifts, press it back down and re-smooth before continuing. Wait a few minutes after application before removing tape to let the adhesive set.
- Let it cure and care for it: Allow the decal to cure for at least 24 hours before washing the car or touching the surface. When cleaning, use a soft cloth and mild soap; avoid pressure washers and harsh chemicals. For car decals, avoid automatic car washes with stiff brushes for the first week.
Products That Work Well for This Project
-
Hops Decals - 2 pack, Hillsboro Hops: This pack includes two decals: the full primary Hops logo and the Hops home cap logo, both made from high-clarity 3M film. The high-clarity film helps the decal blend smoothly on car windows or glossy office surfaces, and you get two designs to place in different spots.
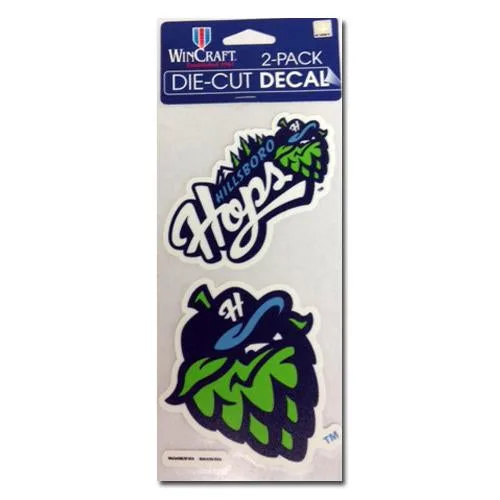
Hops Decals - 2 pack, Hillsboro Hops
-
Bat Barley Decal, Hillsboro Hops: This 4x4 inch decal features a distinctive Bat Barley design and is made from high-clarity 3M film for a clean, professional look. Its compact size is perfect for a laptop or a small office wall, and the 3M film ensures it sticks well without leaving residue when removed.

Bat Barley Decal, Hillsboro Hops