Quick Answer
Start with clean, dry skin, warm the adhesive briefly between your palms, and press firmly from center outward. This method works for both everyday nipple covers and festive nipple stickers.
Why Preparation Matters More Than You Think
Skin oils, lotions, and moisture are the main reasons nipple stickers peel off early. Even a trace of residue from deodorant or body cream can break the adhesive bond. Washing with mild soap and water and patting dry completely gives the sticker a clean surface to grip.
If you have sensitive skin, do a small test patch on your inner arm before wearing the sticker on your nipple area. Most nipple covers use medical-grade adhesive, but individual reactions vary. Skipping this step can lead to irritation that ruins the experience.
When Festive Stickers Need Extra Care
Festive nipple stickers often have glitter, metallic foil, or raised patterns that add weight to the edges. The same application rules apply, but you should pay extra attention to pressing down the decorative parts so they don't curl up. Avoid stretching the sticker during placement—it can distort the design and weaken adhesion.
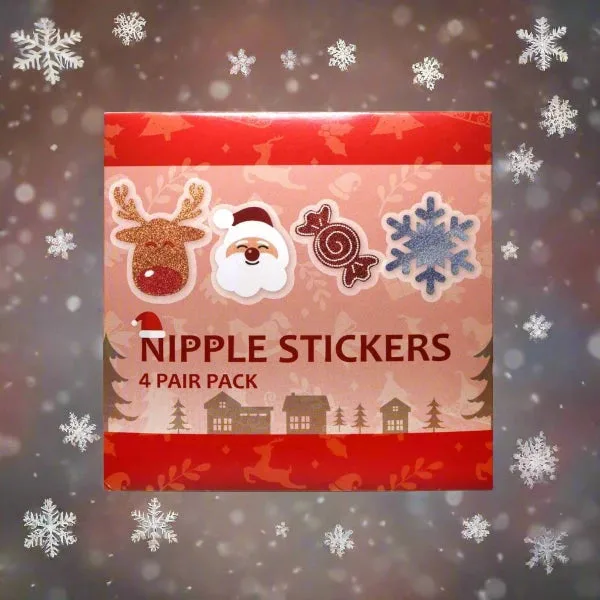
The Festive Christmas Nipple Sticker Set of 4 Pairs is a good example: each pair has a playful holiday motif. Because the glitter layer sits on top of the adhesive, handling the sticker by the edges only will keep the design intact and the glue layer undisturbed.
Step-by-Step Application Guide
- Clean and Dry the Area: Wash your chest with mild soap and water, then pat dry with a lint-free towel. Avoid moisturizers, oils, or deodorant on the area. Wait 2 minutes to ensure skin is fully dry. Sweat or dampness is the #1 cause of early peeling.
- Warm the Adhesive: Hold the sticker between your palms for 10–15 seconds. Body heat softens the glue so it conforms better to your skin curves. Cold adhesive is stiff and won't stick as well—don't skip this step.
- Position and Press from Center Out: Peel the backing off one sticker. Place the center over your nipple, then smooth outward toward the edges in a firm, even motion. Use your fingertips to press the entire surface for 10 seconds. Pressing from the center prevents air bubbles and edge lifting.
- Check and Adjust Before Final Press: Look in a mirror to confirm placement is even and symmetrical. If it's off, peel gently and reposition immediately—don't wait until the glue sets. Repositioning is only possible within the first 30 seconds.
- Remove Gently with Oil: To take off the sticker, apply a few drops of baby oil or coconut oil around the edge and let it soak in for 20 seconds. Peel slowly from top to bottom, supporting your skin with your other hand. Never yank off a dry sticker—it can irritate skin and ruin the sticker for reuse.
Product Facts
-
Festive Christmas Nipple Sticker Set of 4 Pairs: Festive Nipple Sticker Set – 4 Pairs of Naughty Holiday Cheer. Easy to apply and remove. The set gives you multiple options for different outfits, and the easy-remove feature means you can reapply a fresh pair for a second event without worry.
Festive Christmas Nipple Sticker Set of 4 Pairs