Quick answer
Apply reflective glitter nail polish over a smooth base coat in two to three thin coats, then seal it with a glossy quick-dry top coat. Reflective glitter needs a shiny, flat surface to bounce light back, so avoid matte top coats and thick, goopy layers. Finish with a top coat like Glitter Whisperer or Quick Dry Top Coat to lock in the sparkle.
Reflective glitter nail polish is built to flash when light hits it, but it only performs that way when the layers underneath are smooth and the top coat stays glossy. If you have ever painted on a reflective shade and watched it look flat or gritty, the polish is not the problem — the application is.
This guide walks through the exact order of steps, the coat counts that work for reflective formulas, and the small checkpoints that keep the finish even. It also covers why some reflective polishes need a different approach than standard glitter.
Prep your nails and cuticles first
Reflective glitter shows every ridge and dry patch, so prep matters more than it does with a creme polish. Start by pushing back cuticles and lightly buffing the nail plate. Wipe each nail with nail polish remover to remove oils, then let them dry completely. If you skip this step, the polish can lift at the edges within a day and the reflective particles will not sit flat.
A ridge-filling base coat is the single biggest upgrade for reflective finishes. It creates the smooth, glassy surface that lets the glitter catch light instead of scattering it. Apply one thin coat and let it dry fully before moving on. Do not use a matte base coat; the finish underneath affects how bright the reflective layer looks.
- Checkpoint: run a clean finger across the nail — it should feel smooth, not tacky, before you start color.
- Mistake to avoid: painting over still-damp base coat, which drags the product and creates streaks.
Apply thin coats of reflective polish
Reflective glitter polishes like Take That Risk - Yellow Gold Shimmer - Silver Reflective Nail Polish - Glitter Nail Polish - Life is Short Collection are formulated to be built in layers. Load the brush lightly, wipe one side against the neck of the bottle, and float the polish on in a thin coat. Two to three thin coats give better reflective payoff than one thick coat, because thick layers dry unevenly and dull the sparkle.
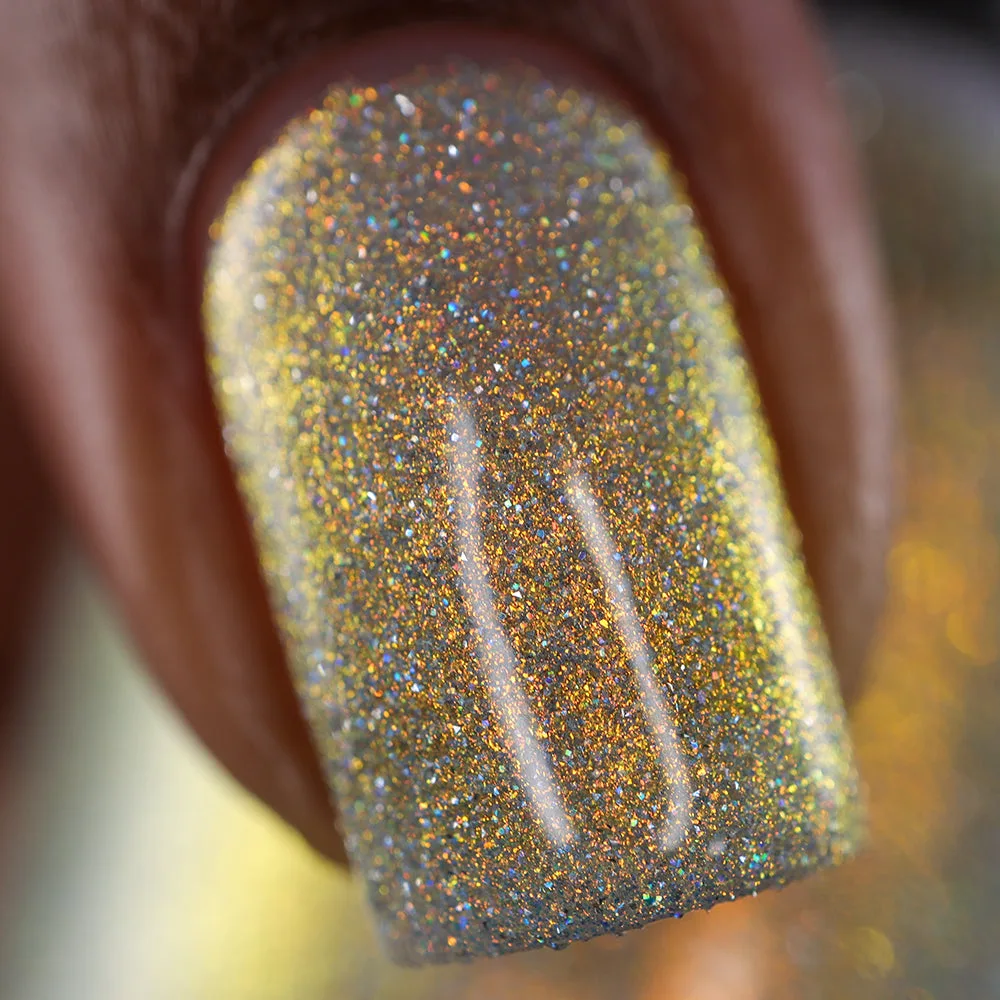
Take That Risk - Yellow Gold Shimmer - Silver Reflective Nail Polish - Glitter Nail Polish - Life is Short Collection
Let each coat dry to the touch before adding the next. If the polish feels tacky, wait longer. Rushing causes bald spots and pulls the glitter to the center of the nail. For polishes with a jelly base, like Strawberry Compote - Pink Reflective Glitter Nail Polish - Jams & Jellies Collection, two coats are usually enough to build color while keeping the reflective particles visible.
- Checkpoint: hold your hand under a bright light after each coat — you should see the reflective flash building, not just color.
- Mistake to avoid: overworking the brush. Two or three passes per nail is plenty; more than that disturbs the glitter.
Seal with a glossy top coat
Reflective glitter needs a high-gloss top coat to do its job. A matte top coat will scatter light and kill the reflective effect entirely. Use a quick-dry glossy top coat and wrap the tip of each nail to seal the edge. This also smooths any glitter that sits above the surface, which is common with reflective and flakie formulas.
If your polish has larger reflective particles, a glitter-smoothing top coat is worth the extra step. Apply one coat, let it dry, then add a second thin coat if the surface still feels textured. Glossy top coats also protect the reflective layer from chipping, which keeps the sparkle intact for longer.
- Checkpoint: the finished nail should look wet and mirror-like, not cloudy.
- Mistake to avoid: using a matte top coat or skipping top coat entirely — both flatten the reflective finish.
Fix common reflective polish problems
If your reflective polish looks dull after drying, the most likely cause is a matte or satin top coat, or too many thick layers that trapped air. Remove the top coat with non-acetone remover, smooth the surface, and reapply a glossy quick-dry top coat. If the glitter looks patchy, you likely applied coats too quickly or used too much polish at once.
For polishes with a crelly or jelly base, like Shimmer Storm - White Crelly - Pink Glitter Nail Polish - Stormy Siblings Collection, some texture is normal because the base is designed to show layers of glitter and flakes. In that case, use a smoothing top coat rather than adding more color. If the reflective effect still looks weak, check your lighting — reflective glitter is designed to flash under bright, direct light and can look subtle in dim rooms.
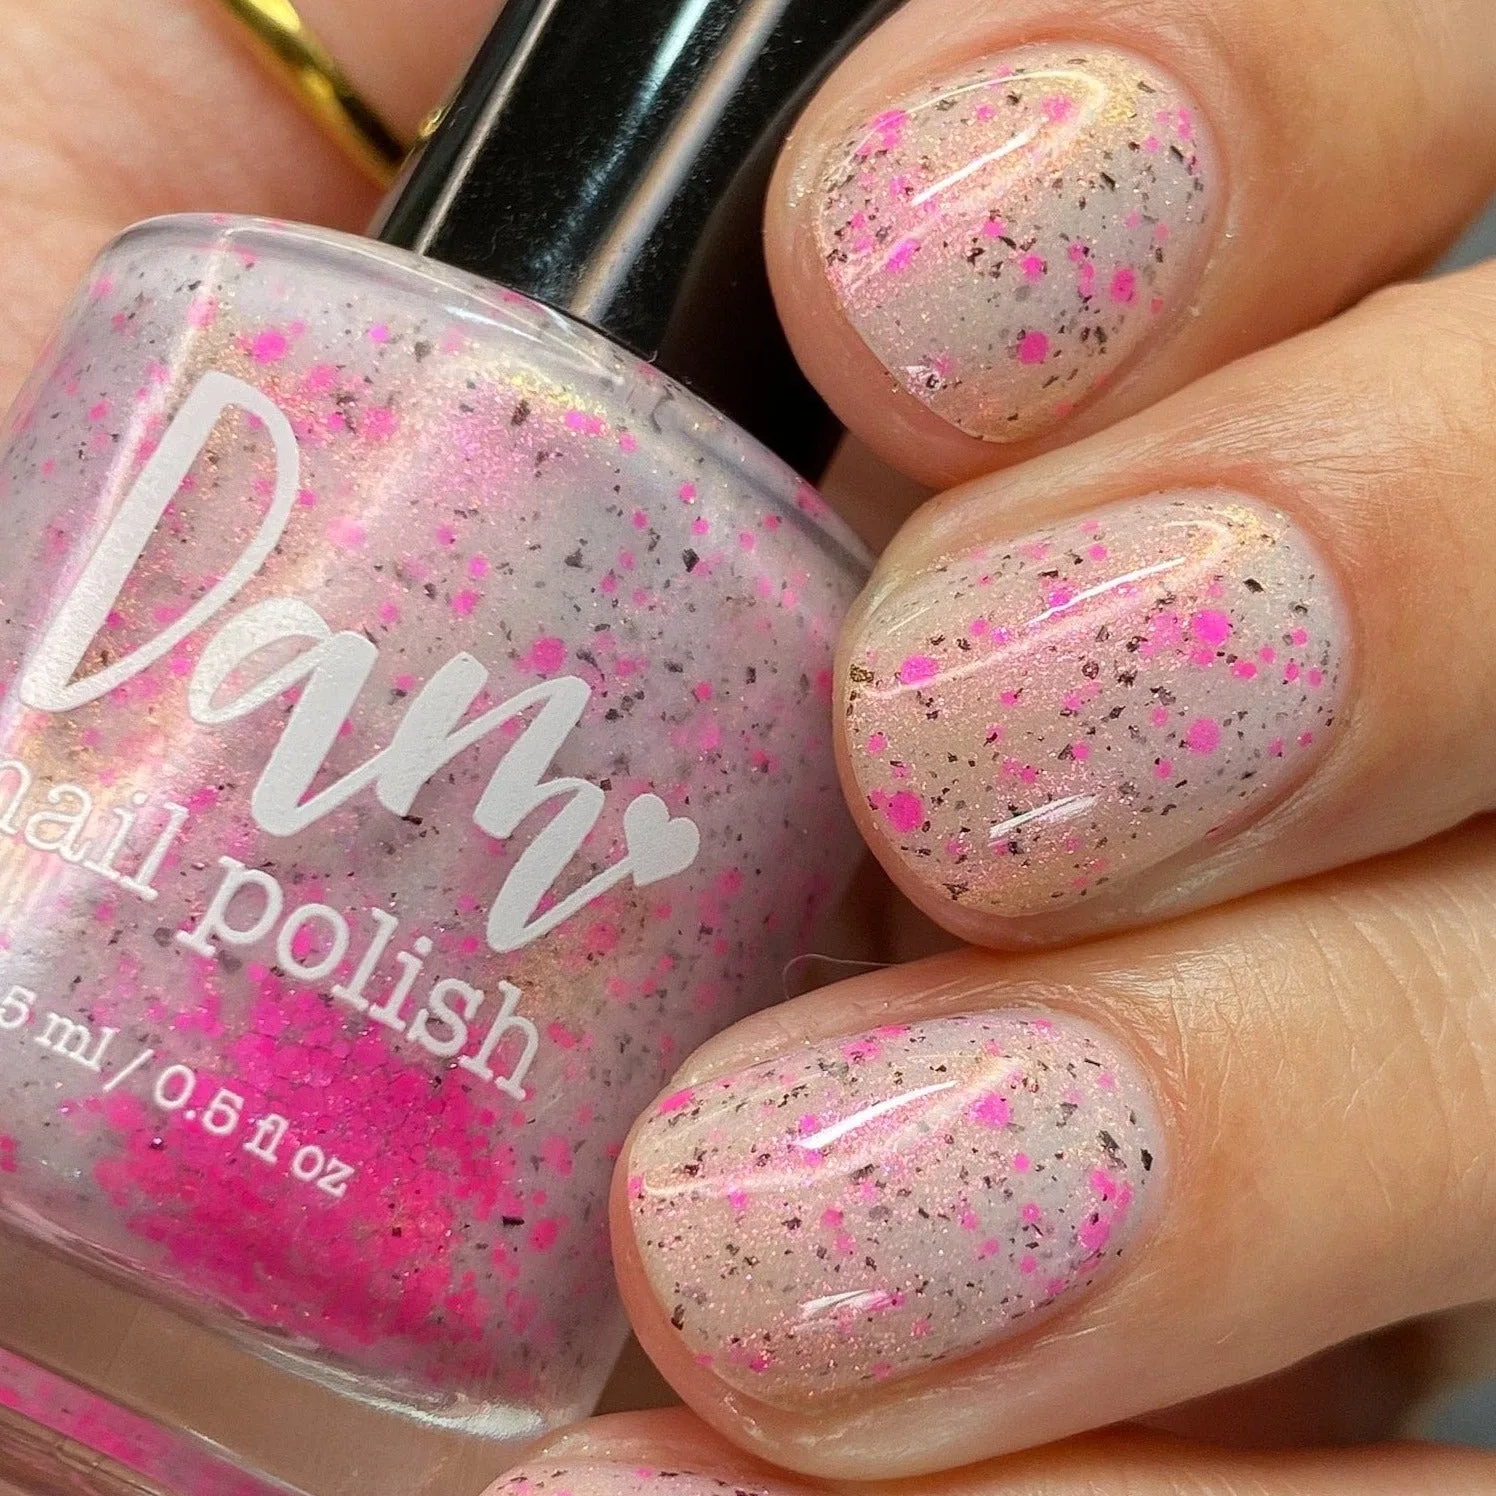
Shimmer Storm - White Crelly - Pink Glitter Nail Polish - Stormy Siblings Collection
- Checkpoint: test the finish under a phone flash or bright lamp before deciding it looks wrong.
- Mistake to avoid: adding more polish to fix texture. Fix texture with top coat, not more color.
Reflective glitter application steps
- Step 1: Prep and smooth the nail: Push back cuticles, buff ridges lightly, and wipe with remover. Apply one thin ridge-filling base coat and let it dry completely. Checkpoint: the nail should feel smooth and dry before color goes on.
- Step 2: Apply thin color coats: Float on two to three thin coats of reflective glitter polish, letting each coat dry to the touch before adding the next. Checkpoint: you should see the reflective flash building under bright light after each coat.
- Step 3: Seal with glossy top coat: Apply a quick-dry glossy top coat and wrap the tip. Add a second coat if the surface still feels textured. Checkpoint: the finish should look wet and mirror-like, never matte or cloudy.
- Step 4: Test and troubleshoot: Check the finish under direct light. If it looks dull, remove the top coat and reapply gloss. If it looks patchy, redo with thinner coats. Next step: keep a glossy top coat on hand for touch-ups, since reflective polish dulls as top coat wears.
Reflective polishes and how they apply
- Take That Risk - Yellow Gold Shimmer - Silver Reflective Nail Polish - Glitter Nail Polish - Life is Short Collection: This is a yellow/gold shimmer polish with silver reflective glitters that become incredibly flashy under bright lights, plus micro ultra holographic glitters. Recommended coats: 2-3. The silver reflective particles need a glossy top coat and bright light to flash, so apply 2-3 thin coats and finish with a quick-dry gloss.
- Strawberry Compote - Pink Reflective Glitter Nail Polish - Jams & Jellies Collection: A pink jelly packed with ultra holographic glitters and pink reflective glitters. Recommended coats: 2. Size: 15ml. Because the base is a jelly, two coats build color while keeping the reflective glitter visible; more coats can mute the flash.
- Shimmer Storm - White Crelly - Pink Glitter Nail Polish - Stormy Siblings Collection: This polish has a crelly white base with pink and gold shimmer, black flakes, and assorted pink glitters. Recommended coats: 2-3. Size: 15ml. The crelly base and flakes create some surface texture, so a smoothing top coat helps the shimmer read clearly without hiding the glitter.
Reflective glitter polish rewards patience more than any other finish. Thin coats, full drying time, and a glossy top coat are the three habits that make the sparkle flash the way it should. Start with a smooth base, build slowly, and always finish with gloss — then check your work under bright light before deciding it needs fixing.