Quick answer
Assemble the metal frame first, then attach the wood shelves and crossbars. The angled frame design keeps clothes off the wall, but you must tighten all bolts fully before loading any weight.
Why assembly order matters
The metal garment rack with wood shelf uses an angled frame that provides stability without needing wall anchors. If you attach the shelves before the frame is fully tightened, the rack may wobble or the wood shelf may not align with the pre-drilled holes.
The included hardware is standard, but you will need a Phillips-head screwdriver (not included). The rack does not require a power drill, but using one can speed up the process if you are careful not to overtighten.
Common assembly mistakes to avoid
Do not skip the step of checking that all bolts are threaded straight before tightening. Cross-threading can strip the metal holes and make the rack unusable.
Do not tighten the angled frame bolts completely until all four frame legs are connected. Leave them slightly loose, then tighten once the frame is square.
Step-by-step assembly instructions
- Step 1: Lay out all parts and hardware: Unpack the box and separate the metal frame tubes, wood shelves, bolts, washers, and Allen key (if included). Confirm you have all pieces by checking the instruction sheet. If any part is missing, stop and contact the retailer before starting. Missing hardware is the most common cause of assembly failure. Do not substitute with random bolts from your toolbox.
- Step 2: Assemble the main frame legs: Connect the two side frame sections by inserting the crossbars into the pre-drilled holes. Do not tighten the bolts yet. Ensure the angled feet point outward so the rack will lean slightly away from the wall. A common mistake is assembling the frame backwards. The angled feet must face the wall side to create the lean.
- Step 3: Attach the wood shelf brackets: Slide the wood shelf support brackets onto the lower crossbars. The brackets have a lip that faces upward. Position them evenly so the shelf sits level. Hand-tighten the screws but leave them loose enough to adjust. If the shelf wobbles later, the brackets are probably not level. Use a small bubble level to check before final tightening.
- Step 4: Install the wood shelf: Place the wood shelf onto the brackets. Align the pre-drilled holes with the bracket holes and insert the screws. Tighten all screws firmly, but do not overtighten or you may crack the wood. The wood shelf is particleboard, not solid wood. Overtightening can strip the screw holes.
- Step 5: Tighten all frame bolts: Go back to every bolt on the metal frame and tighten them fully using the included Allen key or a screwdriver. Start from the bottom and work upward. The rack should feel rigid and not wobble when you push it gently. If the rack still wobbles, one or more bolts are not fully seated. Check each connection again.
- Step 6: Test stability before loading: Place the rack in its final location (on a flat, level floor). Hang a few lightweight items first and check for any movement. The angled frame should keep the rack stable without wall contact. Do not overload the top bar with heavy coats or bags. The rack is designed for everyday clothing, not bulk storage.
Product details
-
Metal Garment Rack with Wood Shelf - 5 Shelf: Angled frame keeps clothes from hitting the wall, and provides a sturdy base so rack will not fall over. You do not need to anchor the rack to a wall, but you must assemble the frame exactly as shown to maintain the angle and stability.
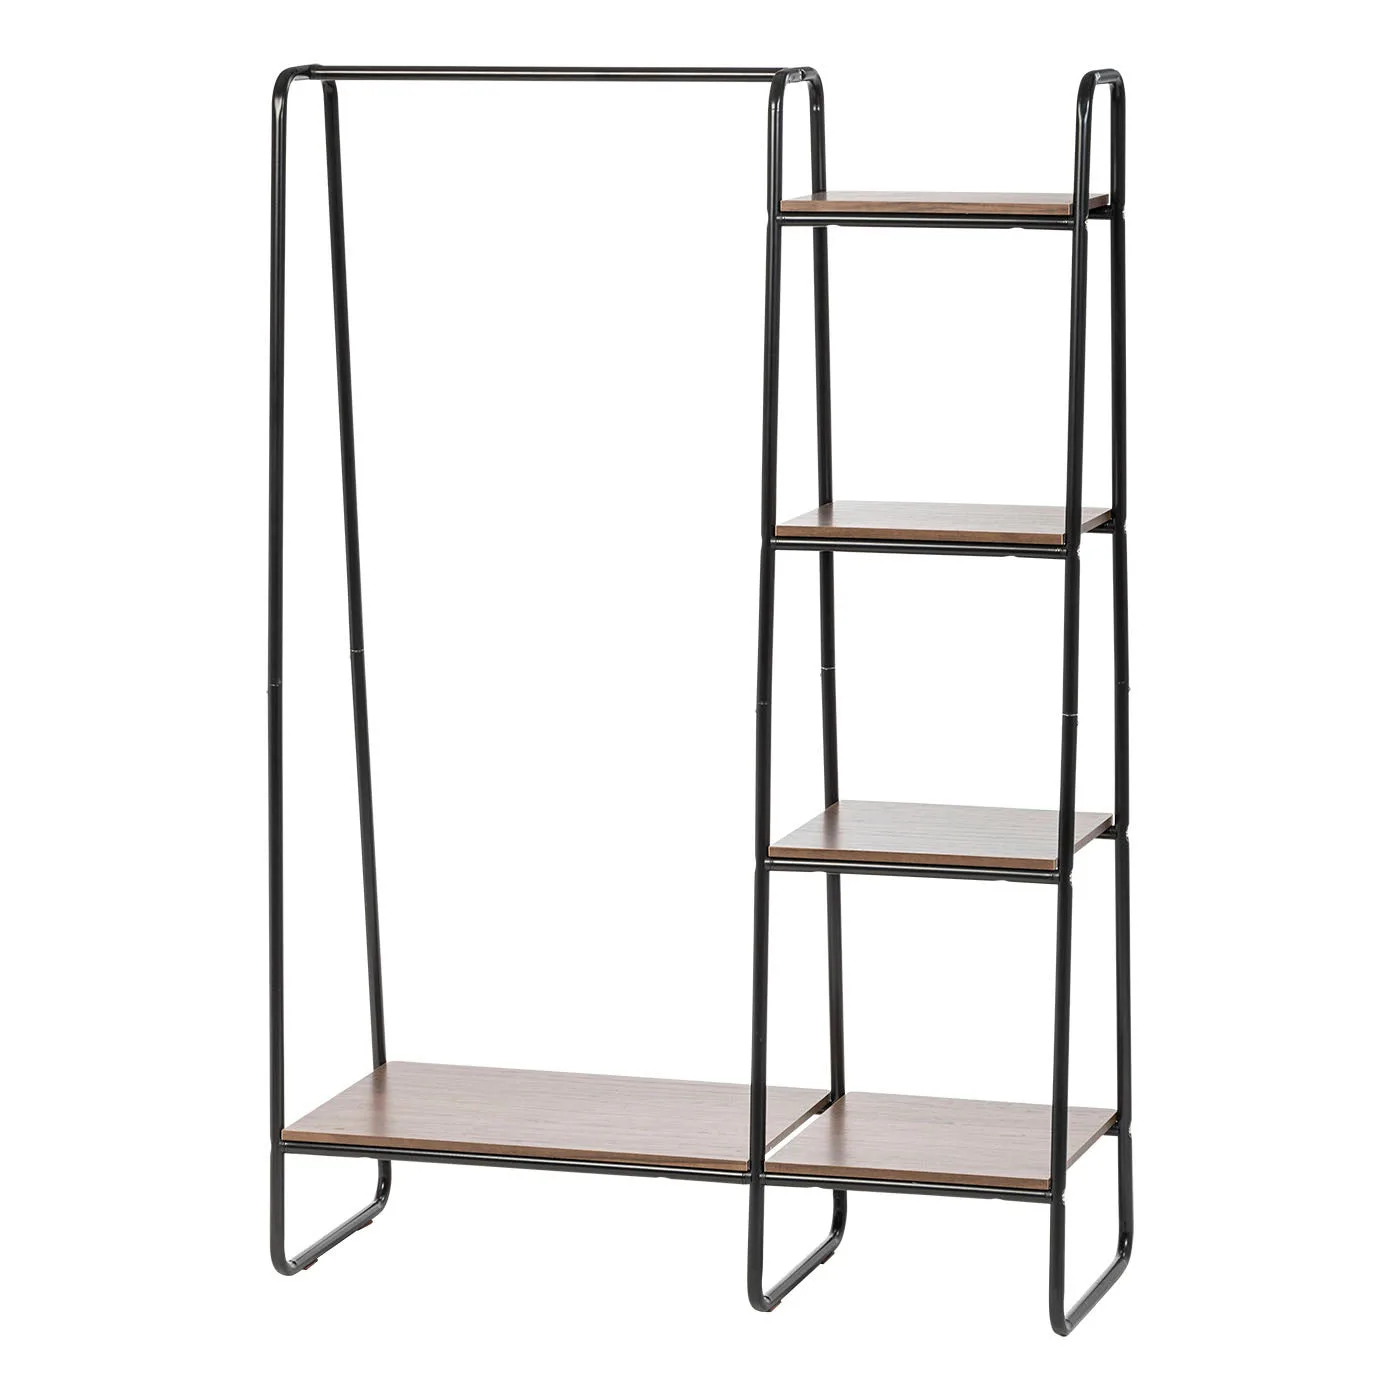
Metal Garment Rack with Wood Shelf - 5 Shelf