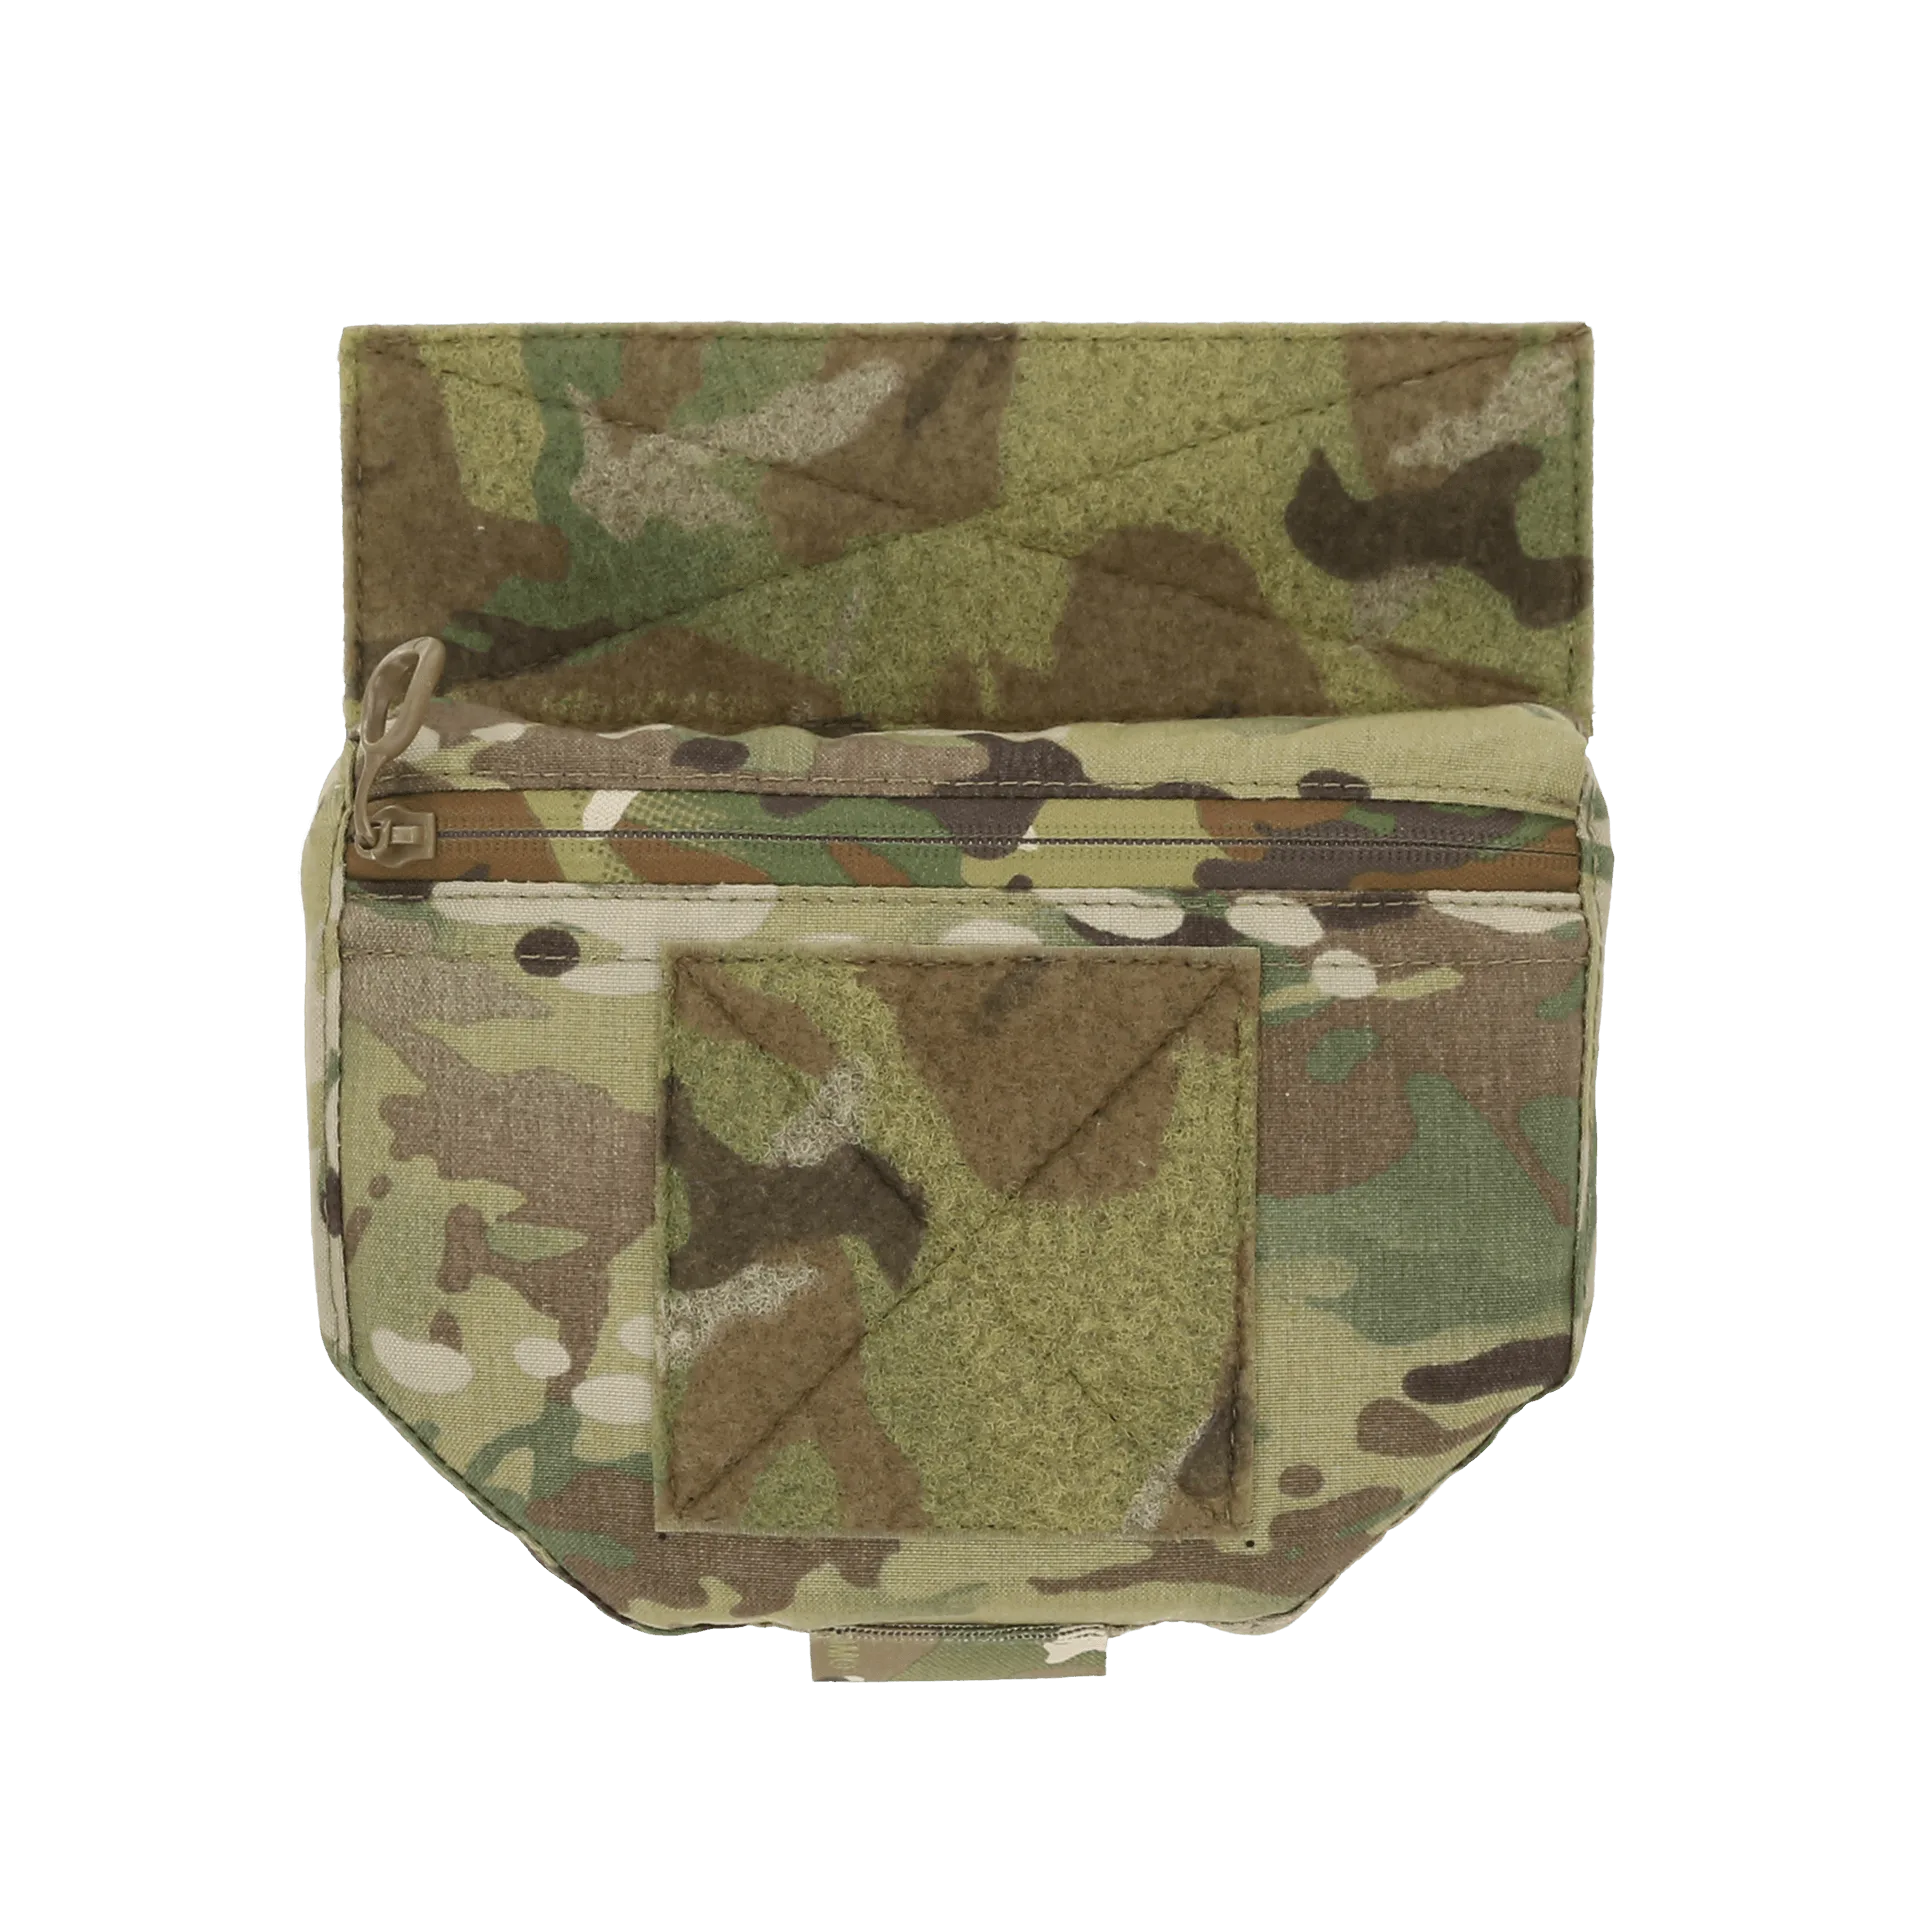
Quick Answer
To attach a Dangler pouch to your plate carrier, first identify the front flap or cummerbund attachment points, then secure the pouch using the included hook-and-loop panels or MOLLE straps. For the best quick-access setup, mount it on the front of your carrier, centered on your chest, and test the placement to ensure it doesn't interfere with your movement or weapon manipulation.
A Dangler pouch is one of the most versatile add-ons you can put on a plate carrier. It gives you a low-profile, easily accessible storage area for medical gear, spare magazines, or small tools—all within arm's reach. In this guide, we'll walk you through the process of attaching a Dangler pouch to your plate carrier or chest rig, step by step, so you can set it up correctly the first time.
Whether you're using the original The Dangler® or the lower-profile The Mini Dangler®, the installation process is similar. We'll cover the key considerations, common mistakes, and how to get the most out of your new pouch.
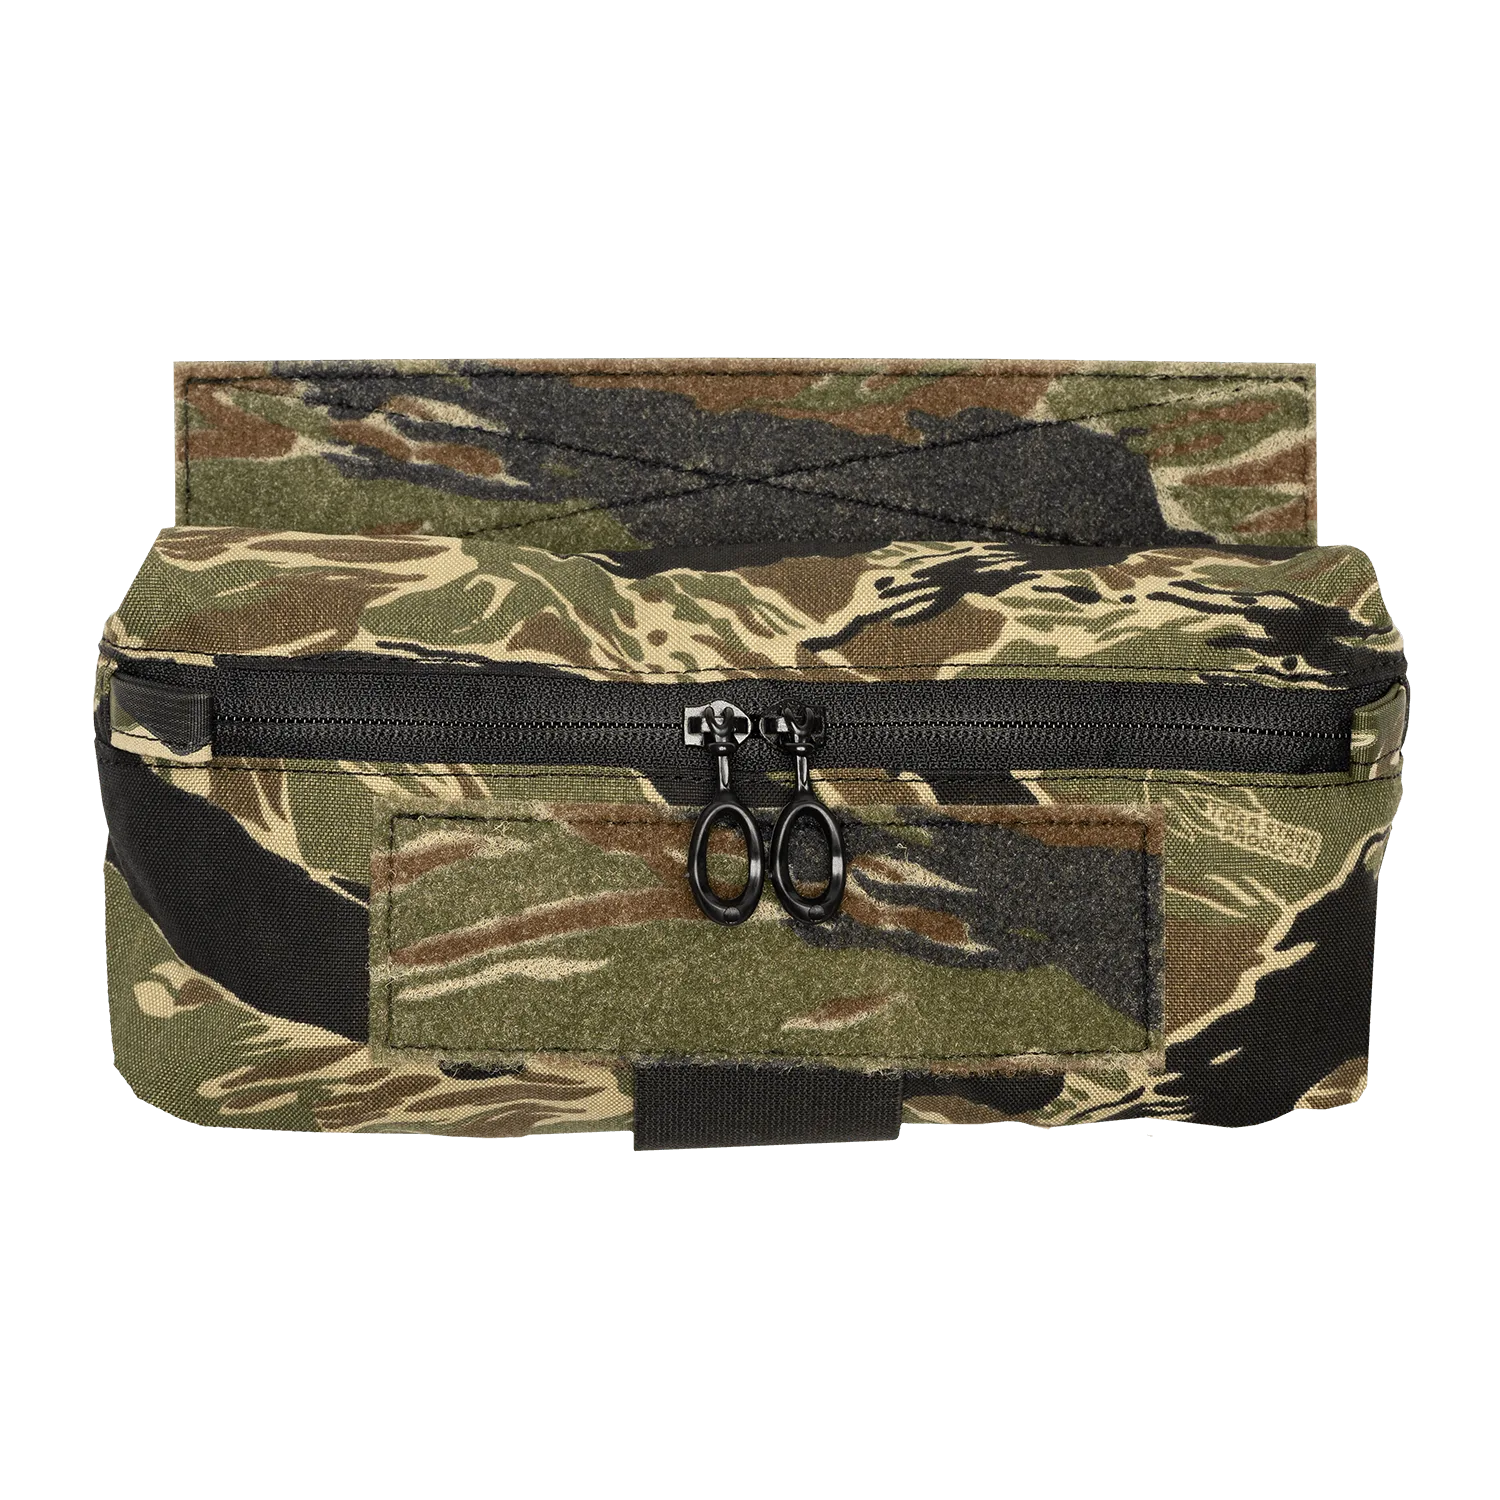
The Mini Dangler®
Understanding Dangler Pouch Attachment Methods
Dangler pouches are designed to attach to the front of a plate carrier or chest rig, typically using hook-and-loop (Velcro) panels or MOLLE straps. The most common attachment points are the front flap of a plate carrier, the cummerbund, or a dedicated kangaroo pouch. The Dangler® and The Mini Dangler® both use a combination of hook-and-loop and MOLLE compatibility to secure the pouch.
Before you start, check your carrier's front panel. Most modern plate carriers, like the Ferro Concepts Slickster, have a loop-lined front flap that allows you to attach accessories directly. If your carrier doesn't have a loop surface, you may need to use a MOLLE adapter or a chest rig with a compatible front panel.
- Always check the compatibility of your carrier's front panel before purchasing a Dangler pouch.
- If your carrier has a kangaroo pocket, you can insert the Dangler pouch into it for a more integrated look.
Step-by-Step Installation Guide
Installing a Dangler pouch is a straightforward process, but doing it correctly ensures that the pouch stays secure during movement and doesn't shift when you draw items from it. Follow these steps to attach your Dangler pouch to your plate carrier.
First, position the pouch on the front of your carrier. The ideal placement is centered on your chest, just below the top edge of the carrier. This keeps the pouch out of the way of your arms and allows for easy access with either hand. Once you've found the right spot, press the hook-and-loop panels together firmly, ensuring full contact.
If your carrier has MOLLE webbing on the front flap, you can also thread the MOLLE straps on the back of the pouch through the webbing for additional security. This is especially recommended if you plan to carry heavier items in the pouch.
- Test the placement by simulating a draw: reach for the pouch with both hands to ensure it's not too high or too low.
- Use MOLLE straps in addition to hook-and-loop if your carrier supports it, for extra security.
Common Mistakes to Avoid
One common mistake is attaching the Dangler pouch too high or too low. If it's too high, it can interfere with your chin when you're prone or cause discomfort when you're wearing a backpack. If it's too low, it can get in the way of your belt or leg movement. Take the time to adjust the placement to your body type and gear setup.
Another mistake is not securing the pouch tightly enough. Over time, the hook-and-loop can loosen, especially if you're carrying heavy items. Make sure you press the panels together firmly and consider using the MOLLE straps for a more permanent attachment.
- Avoid mounting the pouch directly over the center of your chest if you're right-handed and use a shoulder stock—it may interfere with your cheek weld.
- If you're using a chest rig, ensure the Dangler pouch doesn't block access to your magazine pouches.
Step-by-Step Dangler Pouch Installation
- Step 1: Gather Your Gear: You'll need your plate carrier or chest rig, your Dangler pouch (e.g., The Dangler® or The Mini Dangler®), and optionally a MOLLE adapter if your carrier lacks a loop surface. Check that all hook-and-loop panels are clear of debris and that the pouch is free of any packaging.
- Step 2: Position the Pouch: Place the pouch on the front of your carrier, centered on your chest, just below the top edge. Adjust for your body height and arm length. Test the position by simulating a draw and a low crawl to ensure it doesn't impede movement.
- Step 3: Secure with Hook-and-Loop: Press the pouch firmly onto the loop surface of your carrier, ensuring full contact. Apply pressure for a few seconds to maximize adhesion. If the pouch feels loose, reposition and press again. Avoid placing it over thick Velcro patches that could reduce contact.
- Step 4: Add MOLLE Straps (Optional): If your carrier has MOLLE webbing on the front flap, thread the pouch's MOLLE straps through the webbing and secure them. This provides extra stability for heavier loads. Make sure the straps are tightened evenly to prevent the pouch from sagging.
- Step 5: Test and Adjust: Load the pouch with your essential gear and practice accessing it. Adjust the placement if needed, and ensure all zippers or closures work smoothly. A well-placed Dangler pouch should allow you to access items without breaking your shooting stance or line of sight.
Dangler Pouch Options
- The Dangler®: The Dangler® drop pouch was designed to provide a ‘fanny pack’ add-on to your armor carrier. With help from LEO and Military professionals, we have created a lightweight, durable and flexible tool organizer to ensure you always have what you need for the job at hand. This is the original Dangler pouch, offering a balance of capacity and convenience. It's ideal for carrying medical supplies, spare batteries, or a small admin kit.
- The Mini Dangler®: The Mini Dangler® drop pouch is a lower profile version of the original and popular Dangler® pouch. Like the original, it was designed to provide a ‘fanny pack’ add-on to your armor carrier. The Mini Dangler® hang height is less but is also wider than the original Dangler®. If you prefer a more streamlined setup that doesn't add bulk, the Mini Dangler is a great choice. It still provides quick access while keeping a lower profile under a backpack or when moving through tight spaces.
Attaching a Dangler pouch to your plate carrier is a simple upgrade that significantly improves your quick-access capabilities. Whether you choose the original The Dangler® or the more compact The Mini Dangler®, proper placement and secure attachment are key. Take the time to set it up correctly, and you'll have a reliable, hands-free storage solution for your next mission or range day.