Quick answer
To base and paint a Goblin Warband, first clean and assemble the plastic miniatures, then prime them and paint the skin in thin layers before adding cloth, leather, and metal details. Finish by decorating the bases with texture and sealing the models with a protective varnish. The whole process rewards batch painting, so work in groups of five to ten goblins at a time.
Prepping and assembling your goblins
Before any paint touches the plastic, wash the sprues in warm soapy water to remove mold release agent, then rinse and let them dry completely. Clip the parts free with side cutters, trim remaining sprue nubs with a hobby knife, and smooth the cut points with fine sandpaper or a file. Test-fit each goblin before gluing; if the join is tight, a little scraping now saves you from a visible gap later. Assemble the bodies, heads, and arms with plastic cement, which melts the plastic together for a strong bond. If you plan to paint sub-assemblies, leave the shields or weapons off until after the main body is painted.
Priming for paint adhesion
Choose a primer that matches your intended skin tone: a light grey or white primer makes bright greens and yellows easier to build up, while a black primer gives you deep shadows and faster coverage for dark schemes. Spray in short bursts from about 20-30 cm away, rotating the model to reach the underside. Humidity above 70% or temperatures below 10°C can cause a chalky finish, so prime indoors in a well-ventilated area or wait for better conditions. One or two thin coats are enough; heavy coats will clog detail.
Painting goblin skin
For classic goblin skin, start with a mid-green base coat thinned to a skim-milk consistency and apply two thin layers, letting each dry before the next. Then mix a darker green or add a drop of black to your base colour and paint the recesses—under the eyes, between fingers, and along muscle creases. Next, highlight with a lighter green, focusing on raised areas like the nose, knuckles, and brow. If you prefer a different look, olive, grey-green, or even pale blue-grey skin all work well. A final thin glaze of green wash can tie the layers together, but avoid letting it pool on flat areas.
Blocking in cloth, leather, and metal
Once the skin is dry, paint the clothing and equipment. Common goblin schemes use muted earth tones: browns, dull reds, and dark greys for cloth, with black or dark brown for leather straps and scabbards. Paint metal parts like blades and armour with a dark silver, then add a brown wash to suggest rust and grime. Keep your palette limited to three or four main colours across the whole warband; this speeds up painting and makes the unit look cohesive on the tabletop. If you are painting multiple goblins, complete one colour across all models before moving to the next.
Basing your goblin miniatures
After the paint is fully dry, prepare the bases. If your goblins are on slotted bases, fill any gaps around the tab with epoxy putty or a textured paste. For a simple earth look, spread a thin layer of texture paste over the base top, avoiding the feet. While it is still wet, press in small stones, sand, or flock. Once dry, paint the base with a dark brown, drybrush with a lighter brown, and add static grass or tufts. For a swamp or cave theme, use darker greys and add a few resin water effects. Keep basing consistent across the warband to reinforce the army's theme.
Sealing and finishing
Protect your paint job with a varnish. A gloss varnish is the most durable, but it leaves a shiny finish; if you prefer a matte look, apply a matte varnish over the gloss once it has cured. Spray varnish in thin coats, again avoiding high humidity. Let the models dry completely for 24 hours before handling them for gaming. If you used any water effects on the bases, apply them after varnishing to keep them clear. Finally, check for any missed spots or touch-ups, and your Goblin Warband is ready to hunt.
Step-by-step goblin painting and basing
- Clean and assemble: Wash sprues, trim parts, and glue the goblins together with plastic cement. Leave off shields or weapons if you want to paint them separately. Check for gaps and mold lines before priming.
- Prime the models: Spray a thin coat of primer in good weather conditions. Choose a primer colour that suits your planned skin tone. Avoid spraying in high humidity or extreme cold.
- Paint the skin: Apply a base coat of thinned green, then shade the recesses and highlight the raised areas. Use a wash or glaze to blend if needed. Keep layers thin to preserve detail.
- Paint clothes and gear: Block in cloth, leather, and metal with muted earth tones. Add a wash to metal for a rusty look. Stick to a limited palette for speed and unit coherency.
- Base the miniatures: Texture the base, add rocks and sand, paint it, and finish with static grass or tufts. Match the theme of your army. Ensure the base is fully dry before adding grass.
- Varnish and finish: Seal with gloss varnish for durability, then matte varnish for appearance. Let dry completely before gaming. Apply water effects after varnishing to keep them clear.
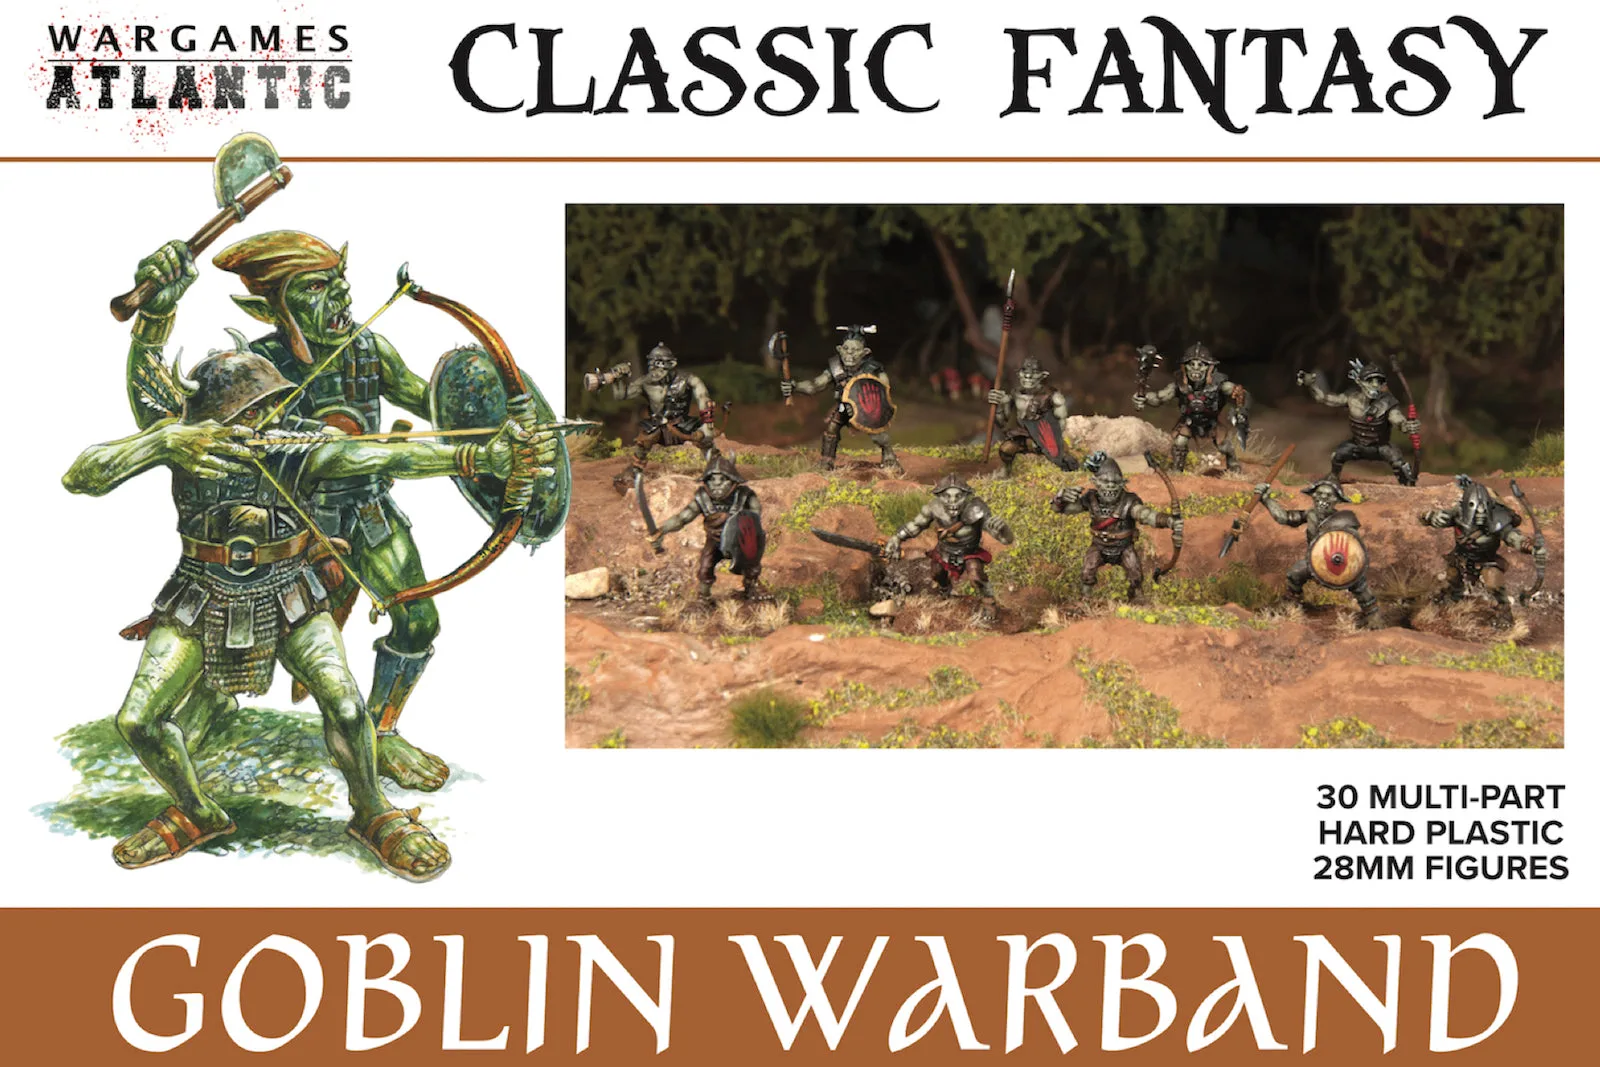
The Goblin Warband box
- Goblin Warband: The Goblin Warband contains plastic miniatures that represent the ancient enemy of the Free Kingdoms, with tribes that are a constant threat. This gives you a themed force to paint and base as a cohesive unit, ideal for fantasy wargames.