Quick Answer
Build a sturdy wine rack in an afternoon using the Kreg Woodworking Kit – Wine Rack. The pre-cut plywood pieces and pocket-hole jig make assembly straightforward, even for first-time woodworkers.
Why This Kit Works for Beginners
The Kreg Woodworking Kit – Wine Rack includes pre-cut ¾" plywood pieces and detailed instructions, so you don't need to measure or cut lumber. The pocket-hole jig lets you create strong joints quickly—just drill, drive, and you're done. This approach minimizes errors and gives you a functional wine rack that can hold multiple bottles securely.
What You'll Need Beyond the Kit
Besides the kit, you'll need a drill (cordless works best), a square, clamps, and wood glue. A level and stud finder are helpful if you plan to hang the rack. The kit itself includes all the plywood pieces and screws, but having these tools on hand will make assembly smoother.
Step-by-Step Assembly Guide
- Organize and Identify Pieces: Lay out all pre-cut plywood pieces and compare them with the instruction sheet. Label each piece with a pencil to avoid confusion during assembly. Check that you have all parts before starting; missing pieces can stall the build.
- Dry-Fit the Main Frame: Assemble the side panels, shelves, and dividers without glue or screws. Use clamps to hold pieces together and verify that all joints align. Adjust any pieces that don't fit snugly. A dry-fit reveals fit issues early—correct them now, not after glue is applied.
- Drill Pocket Holes: Following the instructions, use your pocket-hole jig to drill holes on the marked sides of the plywood. Typically, you'll drill two holes per joint. Clamp the jig securely to prevent slipping. Drill on the side that won't be visible in the finished rack to keep the exterior clean.
- Apply Glue and Assemble: Spread a thin, even layer of wood glue on each joint surface. Then drive the pocket-hole screws to connect the pieces. Work in order: first the side panels to the shelves, then add dividers. Wipe off excess glue immediately with a damp cloth—dried glue is hard to remove and can ruin the finish.
- Square and Clamp the Assembly: After driving all screws, check that the rack is square by measuring diagonally from corner to corner. Adjust if needed, then clamp the assembly and let the glue cure for at least 30 minutes. An out-of-square rack won't hang level and may wobble; take the extra minute to check.
- Sand and Finish (Optional): Lightly sand all exposed edges and surfaces with 220-grit sandpaper. Apply a stain, paint, or clear coat if desired. Let the finish dry completely before handling. Sanding only the edges is enough—the plywood faces are already smooth from the factory.
- Mount the Rack (If Hanging): Use a stud finder to locate wall studs, then mark and drill pilot holes. Secure the rack with screws long enough to reach the studs (at least 1.5"). Use a level to ensure the rack is straight. Never rely on drywall anchors alone for a wine rack filled with bottles—stud mounting is essential for safety.
Product Details
-
Woodworking Kit - Wine Rack: Pre-cut ¾" plywood pieces with detailed assembly instructions. No need for power saws or measuring—just follow the guide and assemble.
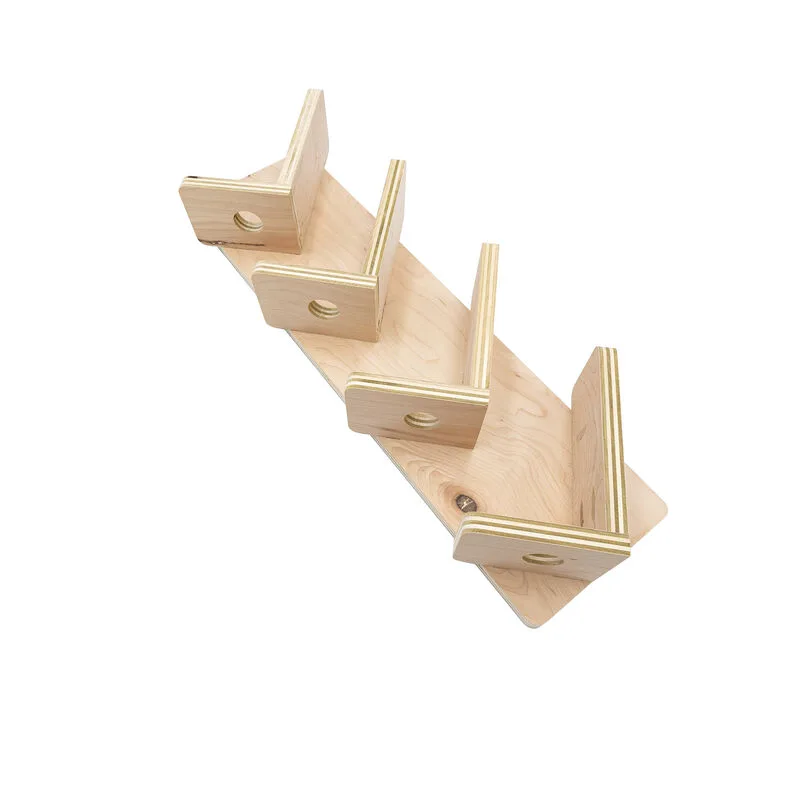
Woodworking Kit - Wine Rack