Quick Answer
To get a clean finish on the Gelgoog Jager HG, focus on careful nub removal, panel lining, and a topcoat. This guide walks you through each step.
Why the Gelgoog Jager HG Rewards Careful Prep
The Gelgoog Jager HG features a distinctive design with sharp lines and large surface areas. These surfaces show every seam and nub mark, so taking time on preparation makes a noticeable difference in the final look.
Because it's a High Grade kit, the assembly is straightforward, but the finish depends on how well you handle the details. Panel lining and decals add depth without requiring advanced techniques.
Tools You'll Need for a Clean Build
You don't need expensive equipment. A pair of nippers, a hobby knife, sanding sticks or fine-grit sandpaper, and a panel line marker or Tamiya panel line accent are enough to get started.
For the topcoat, choose a matte spray for a flat, realistic look or a gloss coat if you plan to apply waterslide decals and want a shiny finish.
Step-by-Step Build for a Clean Finish
- Prepare Your Workspace and Tools: Gather your nippers, hobby knife, sanding sticks, and panel line supplies. Work in a well-lit area with a cutting mat to protect your table. A clean workspace prevents losing small parts and keeps tools within reach.
- Cut Parts Carefully: Use your nippers to cut parts from the runners, leaving a small margin of plastic at the gate. Then trim closer with a hobby knife to avoid stress marks. Cutting too close to the part can gouge the plastic – leave a bit of nub and trim it down.
- Sand Nubs and Seams: Sand the trimmed nubs with fine-grit sandpaper (400 to 1000 grit) until smooth. For visible seams, use a seam line remover or carefully sand along the seam to blend it. Sanding in one direction prevents scratches and gives a uniform surface.
- Dry-Fit Before Gluing (If Needed): Test fit parts without glue to check alignment. If you plan to glue seams, apply cement sparingly and press parts together, wiping away excess. Dry-fitting prevents misaligned parts and allows you to adjust before the glue sets.
- Panel Line the Details: Use a fine-tip panel line marker or panel line accent on the engraved lines. Let it dry, then clean up smudges with a cotton swab dipped in lighter fluid or rubbing alcohol. Work on one section at a time to avoid smearing the ink before it dries.
- Apply Decals: If using stickers or dry transfers, place them carefully with tweezers. For waterslides, soak in water, slide onto the surface, and position with a cotton swab. Use a setting solution for waterslides to help them adhere to curved surfaces.
- Topcoat for Protection and Finish: Spray a thin, even coat of matte or gloss topcoat in a well-ventilated area. Hold the can about 15–20 cm away and apply in light passes to avoid drips. A matte topcoat hides minor imperfections, while gloss enhances decals and gives a shiny look.
Kit Highlights
-
Gelgoog Jager HG: The Gelgoog Jager HG is a High Grade scale model kit from The Gundam Galaxy, ready for assembly with a straightforward building experience. Its straightforward assembly lets you focus on the finishing details that make the kit stand out.
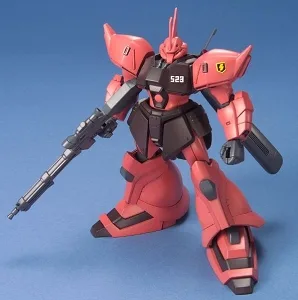
Gelgoog Jager HG