Quick Answer
Assemble the HG Alteisen Riese by following the Bandai instruction sheet, but prep your pre-order early and watch for tight polycap joints. This guide walks through each phase with common mistakes to avoid.
Pre-Order Planning Matters
The HG Alteisen Riese is a Bandai pre-order item with an estimated arrival in Q2 2027. Because pre-orders are limited and first-come-first-served, ordering early ensures you secure a kit. Also note that pre-order items ship separately from in-stock products, so place a dedicated order to avoid delays.
Once your kit arrives, open the box and verify all runners against the manual. The kit uses standard 1/144 scale parts, but the large frame sections require extra care during assembly.
Tools You Will Need
For a clean build, gather side cutters, a hobby knife, sanding sticks or files, and tweezers for small parts. Polycap joints on this kit can be stiff, so consider a small amount of silicone lubricant if needed. No paint is required for the molded colors, but panel lining with a fine-tip marker can enhance the mechanical details.
Step-by-Step Assembly
- 1. Sort and Identify Runners: Lay out all runners and match each part number to the manual. The HG Alteisen Riese has several large frame pieces; group them by section (torso, arms, legs) to stay organized. Mixing up left and right arm parts is a common mistake—label them with a sticky note.
- 2. Cut and Clean Each Part: Use side cutters to snip parts away from the runner, leaving a small nub. Trim the nub flush with a hobby knife, then sand smooth with 600-1000 grit sandpaper. Avoid cutting too close to the part surface to prevent stress marks. Stress marks are permanent on colored plastic; cut a little away from the part and sand down.
- 3. Assemble the Torso and Core Frame: Fit the polycap joints into the torso first, then attach the chest armor and back pack. The Alteisen Riese has a bulky upper body; press joints firmly but check alignment before seating fully. If a polycap feels too tight, apply a tiny drop of silicone lubricant—do not force it or the plastic may crack.
- 4. Build the Arms and Shoulder Weapons: Assemble each arm section, including the shoulder-mounted weapons. The shoulder joints are designed to hold heavy parts; ensure the polycaps are fully inserted to avoid sagging later. Test the arm range of motion before attaching the shoulder armor—once glued, it is hard to adjust.
- 5. Build the Legs and Hip Joint: Construct the legs from the hip down, paying attention to the knee joint orientation. The hip polycap connects the legs to the torso; snap it in place before adding the leg armor. The hip joint is the most stressed point—double-check that both sides click evenly to prevent a wobbly stance.
- 6. Final Assembly and Pose: Attach the head, then connect the arms and legs to the torso. Add any optional weapons or effect parts. Pose the kit gently, supporting heavy sections like the shoulder weapons. Avoid leaving the kit in a dynamic pose for weeks—polycaps can deform under constant tension. Store it in a neutral standing pose.
Kit Details
-
[Preorder][ETA Q2 2027] HG Alteisen Riese - Super Robot Wars OG: Estimated arrival period is Q2 2027; pre-order is limited and first-come-first-serve. Plan your build timeline and order early to avoid missing the release window.
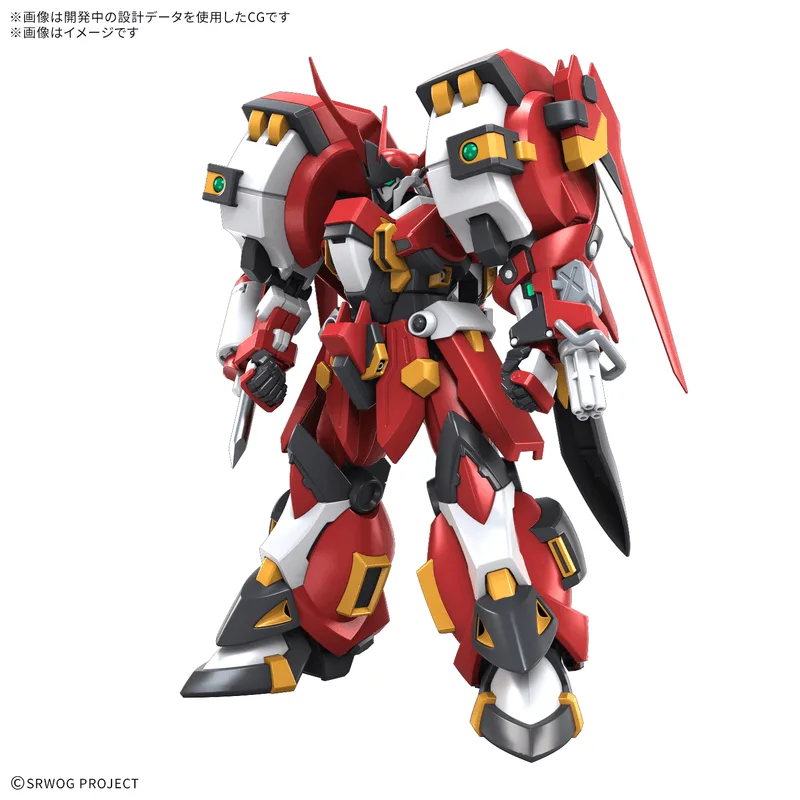
[Preorder][ETA Q2 2027] HG Alteisen Riese - Super Robot Wars OG