Quick answer
Build the MGSD Barbatos in this order: prep and clean the inner frame, assemble the body and limbs, attach armor, panel line, then topcoat. The biggest quality jumps come from trimming nubs flush on the inner frame and panel lining before you topcoat, not after.
Prep the inner frame before anything else
The MGSD Barbatos is a small, dense kit, and its inner frame is the foundation for every armor piece you add later. Work on a clean mat with good light, and keep the runners organized by letter so you are not hunting for parts mid-build. Trim parts from the runner with nippers, leaving a small nub, then remove the nub with a sharp hobby knife or a second nip pass. On the inner frame, flush cuts matter more than on outer armor because the frame sits close to the surface and a raised nub can block armor panels from seating fully.
If you plan to panel line the inner frame, do it now while the parts are separate and easy to rotate. Use a fine-tip panel line marker or a thin wash, and wipe excess with a dry cotton swab before it fully cures. This is also the time to test-fit joints. If a joint feels tight, gently work it back and forth rather than forcing it, because forcing a small SD-scale joint can stress the plastic.
Assemble in sub-units, not one long chain
Build the torso, head, arms, and legs as separate sub-units, then join them. This makes it easier to check symmetry and to fix a mistake without disassembling the whole kit. The MGSD Barbatos has an aggressive silhouette, so small alignment errors in the shoulders and hips are visible once the armor goes on. After each sub-unit, set it on a flat surface and check that it sits level.
Keep the instruction manual open and follow the part numbers exactly. MGSD kits use layered construction, and skipping ahead to attach armor before the frame is complete often means you have to pull parts apart later, which risks scratching the finish.
Attach armor and check clearances
Once the frame is solid, add the armor panels from the inside out. Press parts in until they click or seat flush, but stop if you feel resistance; a misaligned peg is the usual cause. Check that the shoulders, skirt, and backpack can move through their intended range without scraping. If a panel pops off when you move a limb, the frame joint underneath is probably not fully seated.
This is the stage where a clean build starts to show. Wipe fingerprints off glossy armor with a soft cloth as you go, because handling the kit repeatedly after assembly is what dulls a finish.
Panel line and clean up before topcoat
Panel line the armor after assembly so the lines follow the actual seams and edges of the finished kit. Use a fine-tip marker or a thin wash, let it settle into the groove, then wipe the surface with a dry swab. On small SD-scale parts, less is more: a few well-placed lines read better than lines on every panel.
If you used a wash, let it dry completely before handling. Any wet panel line product can smear when you apply topcoat, and smears are much harder to fix than to prevent.
Topcoat for a consistent finish
Topcoat unifies the plastic sheen and protects your panel lines. Work in thin, even passes from about 8 to 12 inches away, and let each pass flash off before the next. Matte hides small surface scratches and gives the Barbatos a more military look; gloss makes colors pop but shows every handling mark. If you are unsure, test on a spare runner first.
Do not topcoat in high humidity or extreme cold, and do not spray so heavily that the coat pools in panel lines. Two or three light passes beat one wet pass every time.
MGSD Barbatos build steps
- 1. Trim and clean the inner frame: Cut parts from the runner with nippers, then remove remaining nubs with a sharp knife or a second nip pass. Keep cuts flush on the inner frame so armor panels seat properly. Checkpoint: run your finger along each frame edge. If you feel a bump, trim it before moving on.
- 2. Panel line the frame while it is separate: Use a fine-tip marker or thin wash on the inner frame parts, then wipe excess with a dry swab. Let it cure fully before assembly. Common mistake: lining after assembly makes it hard to reach interior grooves and easy to smear lines on finished armor.
- 3. Build sub-units and test-fit joints: Assemble torso, head, arms, and legs separately. Work tight joints gently rather than forcing them, and check each sub-unit sits level. Checkpoint: if a joint squeaks or resists, stop and inspect for a misaligned peg.
- 4. Attach armor from the inside out: Seat armor panels until flush, checking that shoulders, skirt, and backpack move freely. Wipe fingerprints off as you handle the kit. Common mistake: forcing a panel over an unseated frame joint, which can crack the peg or leave a gap.
- 5. Panel line the assembled armor: Follow the actual seams and edges of the finished kit. Keep lines minimal on small SD-scale parts and wipe the surface clean with a dry swab. Checkpoint: let wash-type products dry completely before handling or topcoating.
- 6. Topcoat in thin passes: Spray from 8 to 12 inches in light, even passes, letting each pass flash off. Choose matte to hide scratches or gloss for stronger color. Common mistake: one heavy wet coat, which pools in panel lines and can dull or smear your lining work.
Product facts
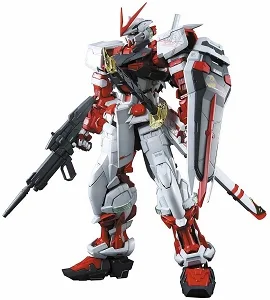
- MGSD Barbatos Gundam: The MGSD Barbatos Gundam is a standard edition model kit from The Gundam Galaxy, designed for display and assembly, and it captures the mobile suit's aggressive silhouette. Because it is built for display, the finish work you do on the frame and armor is what the kit is judged on, so the prep and topcoat steps pay off directly.
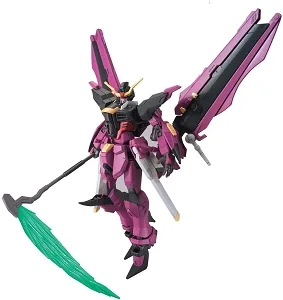
- Love Phantom Build Divers HG: The Love Phantom Build Divers HG is a High Grade kit from the Build Divers series with a sleek, aggressive appearance. If you want a second kit to practice panel lining and topcoat on before committing to the MGSD Barbatos, a lower-cost HG is a sensible warm-up.