An all-purpose cleaner is a workhorse in any home, tackling everything from kitchen counters to bathroom tiles. But the bottle and spray nozzle that deliver the cleaning power often get overlooked. Over time, residue can build up, nozzles can clog, and labels can become sticky or faded. Proper care for your cleaner bottle not only extends its life but also ensures you get the most out of every drop of cleaner.
In this guide, we’ll walk you through the best practices for cleaning, maintaining, and storing your all-purpose cleaner bottle and nozzle. Whether you use a commercial cleaner or a DIY solution, these tips will keep your sprayer working smoothly, prevent clogs, and maintain hygiene. Let’s dive in.
Why Cleaner Bottle Maintenance Matters
Your all-purpose cleaner bottle works hard, but it also gets dirty. Residue from the cleaner itself can dry and crystallize, especially around the nozzle and the dip tube. This can lead to a weak spray, uneven distribution, or even a completely clogged nozzle. Additionally, the outside of the bottle can accumulate grime, sticky fingerprints, and dust, which can transfer to surfaces you're trying to clean.
Regular maintenance ensures that your cleaner is dispensed efficiently, saving you time and product. It also prevents the growth of bacteria or mold inside the bottle, especially if you use natural or homemade cleaners. A well-maintained bottle is more hygienic and pleasant to use, and it can last for years, reducing waste.
- Prevents nozzle clogs and ensures a consistent spray pattern.
- Extends the life of the bottle and reduces plastic waste.
- Maintains hygiene by preventing microbial buildup.
- Keeps labels readable and the bottle looking presentable.
How to Clean the Spray Nozzle
The spray nozzle is the most delicate part of the bottle. To clean it, first remove the nozzle from the bottle. Most sprayers twist off or can be pulled straight up. Rinse the nozzle under warm running water to remove loose debris. If you notice buildup, soak the nozzle in a solution of warm water and white vinegar for about 15-20 minutes. Vinegar dissolves mineral deposits and soap scum effectively.
For stubborn clogs, use a pin or a needle to gently clear the tiny orifice where the spray comes out. Be careful not to enlarge the hole. You can also use a small brush, like a pipe cleaner, to clean the inside of the nozzle. After soaking, rinse thoroughly and allow it to air dry completely before reassembling. This simple routine can keep your nozzle working like new.
- Soak the nozzle in vinegar solution to dissolve residue.
- Use a pin to clear the spray hole if clogged.
- Rinse and dry completely before reattaching.
Cleaning the Inside of the Bottle
The inside of the bottle can also accumulate residue, especially if you refill it with different cleaners. To clean, empty any remaining cleaner and rinse the bottle with warm water. Add a small amount of dish soap and warm water, then swirl to create suds. Use a bottle brush to scrub the interior, reaching the bottom and corners. Rinse thoroughly with clean water.
If you notice a lingering odor or residue, you can use a mixture of baking soda and water to scrub, followed by a vinegar rinse. For deep cleaning, let a solution of water and vinegar sit in the bottle for a few hours before rinsing. Always ensure the bottle is completely dry before adding new cleaner to prevent dilution or contamination.
- Use a bottle brush to scrub hard-to-reach areas.
- Baking soda and vinegar work well for tough residue.
- Dry the bottle completely before refilling.
Unclogging a Stubborn Spray Nozzle
If your nozzle is still clogged after a soak, try a more aggressive approach. Remove the nozzle and place it in a small bowl of hot water (not boiling) with a few drops of dish soap. Let it sit for 30 minutes. Then, use a toothpick or a paper clip to gently poke the opening. You can also try running the nozzle under hot water while pressing the trigger to force water through the mechanism.
Another trick is to use a small syringe to flush water through the nozzle from the bottom. If the nozzle is beyond repair, consider replacing it. Many spray bottles have interchangeable nozzles, so you can often find a replacement at a hardware store. Regular cleaning prevents most clogs, so make it a habit to rinse the nozzle after each use, especially if you use thick or concentrated cleaners.
- Soak in hot soapy water to loosen stubborn residue.
- Use a syringe to flush the nozzle from the inside.
- Replace the nozzle if it cannot be unclogged.
All-Purpose Cleaner Storage and Hygiene
Proper storage of your all-purpose cleaner bottle is essential for both safety and longevity. Store the bottle in a cool, dry place away from direct sunlight, as UV rays can degrade the plastic and the cleaner itself. Keep it out of reach of children and pets, and ensure the cap is tightly closed when not in use to prevent evaporation and spills.
For hygiene, label your bottle clearly, especially if you use homemade cleaners, to avoid mix-ups. Clean the outside of the bottle regularly with a damp cloth and mild detergent. If the label becomes unreadable, you can replace it with a waterproof label. Also, check the expiration date of your cleaner; most commercial cleaners have a shelf life of about two years. If the cleaner changes color or smell, it's time to discard it and clean the bottle before reuse.
- Store away from sunlight and heat.
- Keep out of reach of children and pets.
- Clean the outside regularly to maintain hygiene.
Using the Right Tools for a Spotless Kitchen
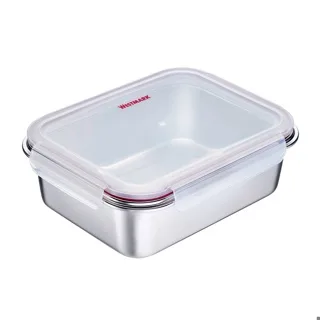
While caring for your cleaner bottle is important, using the right tools in your kitchen can make cleaning easier and more effective. For example, a Stainless steel lunch box/food storage container, 2250 ml is perfect for storing leftovers, reducing the need for heavy-duty cleaners on stained plastic containers. Similarly, a Digital cooking thermometer helps you cook food to the right temperature, minimizing messes and the need for frequent cleaning.
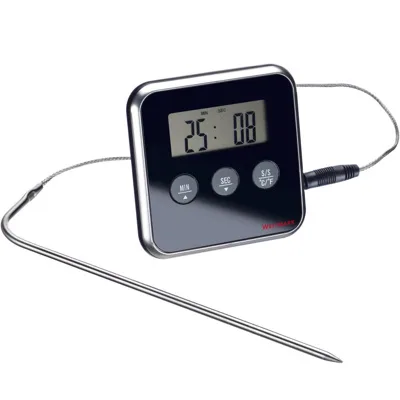
Digital cooking thermometer
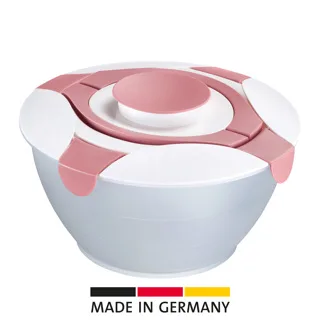
Investing in quality kitchen tools like these can reduce the frequency of deep cleaning. For instance, using a Salad butler »Praktika«, 6,5 l, pink keeps salads fresh and prevents dressing spills, which can be a pain to clean. By combining proper cleaner bottle maintenance with smart kitchen products, you can maintain a cleaner, more efficient home.
- Use high-quality storage containers to reduce cleaning time.
- Thermometers prevent overcooking and messy spills.
- Salad butlers keep ingredients contained and fresh.
Caring for your all-purpose cleaner bottle and nozzle is a simple yet essential part of maintaining a clean and hygienic home. By following the steps outlined above, you can prevent clogs, extend the life of your bottle, and ensure your cleaner works effectively every time. Remember to clean the nozzle regularly, store the bottle properly, and consider using high-quality kitchen tools to make your cleaning routine easier. For more helpful products, explore our selection of kitchen essentials.