Quick answer
Give your natural nails at least three to five days off between press-on sets, and treat those days as active recovery: keep nails short, hydrate the cuticles daily, and avoid filing the nail plate. If a nail bends, peels, or feels tender, extend the break until it grows out rather than gluing a new set over the weak spot.
Press-on nails are designed to be temporary, but the days in between sets are when your natural nails actually recover. Skip that window and you will notice it: more peeling, more sensitivity, and sets that pop off sooner because the surface underneath has gotten rough.
This routine is built for real life, not a spa schedule. It takes a few minutes a day, uses tools you likely already have, and works whether you wear press-ons occasionally or back to back. The goal is simple: keep your natural nails strong enough that the next set fits cleanly and comes off without drama.
Why the between-sets window matters
Adhesive and removal both put stress on the top layers of your nail plate. Even a gentle press-on set involves some bonding and some lifting, and repeated cycles without a pause can leave nails thinner, drier, and more prone to splitting at the free edge. A short recovery window lets the surface settle before you stress it again.
You do not need a long break to see a difference. Three to five days of basic care is usually enough for minor dryness, while a nail that has peeled or bent may need two to three weeks to grow past the weak point. The honest tradeoff: if you want a fresh set every week, your natural nails will show it eventually, so build in a pause when you can.
- Track your sets: if you remove one and apply the next the same day, you are skipping recovery entirely.
- Signs you need a longer break include bending, white spots, peeling layers, and tenderness when you press the nail.
Step 1: Remove the old set gently
Start by loosening the set with warm water and a drop of oil or a removal soak, then work from the sidewalls inward with a cuticle stick. Never pry from the tip or peel upward in one pull, because that takes layers of your natural nail with it. If a nail resists, soak longer instead of forcing it.
After removal, wash your hands and look at the nail plate under good light. Note any rough patches, white marks, or areas that feel thin. That quick check tells you whether this is a normal recovery week or a longer one.
- Common mistake: using a metal tool to scrape adhesive off the nail plate.
- Checkpoint: if the surface looks shiny and smooth, you removed cleanly; if it looks chalky or flaky, be extra gentle this week.
Step 2: File and shape, but keep it short
During recovery, keep natural nails short and rounded. A shorter free edge is less likely to catch, bend, or tear, and it gives thin areas a chance to grow out without stress. File in one direction with a fine grit file rather than sawing back and forth, which causes splitting.
Skip the buffer and skip harsh filing of the top surface. Thinning the nail plate to make the next set sit flatter is a short-term fix that makes the next removal harder. If your nails feel uneven, accept a slightly less perfect surface for a week.
- Common mistake: buffing the top of the nail to smooth ridges, which removes strength.
- Checkpoint: run your thumb over the edge; it should feel smooth, not sharp or snaggy.
Step 3: Do cuticle care the right way
Cuticle care is where most people overdo it. The cuticle is a seal, not dead skin to be removed. Push it back gently after a shower when skin is soft, using a cuticle stick and light pressure, and only trim a hanging piece if it is clearly detached and catching on things.
Apply a cuticle oil or a rich balm along the nail fold and massage it in for a few seconds. Doing this once or twice a day is more effective than a single long session. If your skin is cracked or red, back off the pushing and focus on moisture until it settles.
- Common mistake: cutting the cuticle line all the way around, which leaves the nail open to irritation.
- Checkpoint: healthy cuticles look soft and intact, not red, raw, or shiny from over-trimming.
Step 4: Hydrate and strengthen without overdoing it
Nail strength comes from moisture balance, not hardness. Oils and hand creams keep the nail flexible so it bends instead of snapping. Look for products you will actually use daily, and apply them after washing your hands, when nails are most vulnerable to drying out.
Be cautious with hardeners and harsh strengtheners, especially ones that contain formaldehyde or claim to harden instantly. Overuse can make nails brittle, which causes the peeling you were trying to prevent. If you use one, follow the label and take breaks from it.
- Common mistake: applying strengthener every day indefinitely instead of following the product directions.
- Checkpoint: after a week, nails should feel slightly flexible, not rock hard or crumbly.
Step 5: Handle breaks and peeling before they spread
When a nail breaks, resist the urge to peel the loose layer off. Instead, trim the nail short and gently file the snag smooth. If the break is low on the nail bed and painful, keep it clean and covered with a bandage until it grows out, and avoid pressing on that nail.
For peeling, a thin layer of nail glue gel can seal the edge temporarily, but it is a patch, not a repair. Keep the nail short and let it grow past the peel. If a nail is lifting from the bed or the area is swollen, see a professional rather than trying to fix it at home.
- Common mistake: peeling the lifted layer, which takes healthy nail with it.
- Checkpoint: a break that is trimmed, smooth, and pain-free is ready to grow out; one that hurts or bleeds is not.
Step 6: Choose your next set with recovery in mind
When you are ready to wear press-ons again, pick a length and shape that suits your natural nails that week. A shorter set puts less leverage on the free edge, which matters if your nails are still growing out a weak spot. Longer almond and oval styles look elegant but create more torque if you catch them on something.
Fit matters just as much as length. A set that is too wide or too narrow will lift at the edges and take natural nail with it on removal. Measure before ordering and use the size options rather than guessing, and if you are between sizes, size down slightly for a snugger seal.
- Common mistake: choosing a long set immediately after a break because it hides the damage.
- Checkpoint: the set should sit flat with no edge lifting when you press along the sidewalls.
Your between-sets recovery steps at a glance
- Remove gently: Soak with warm water and oil, then work from the sidewalls inward with a cuticle stick. Never pry or peel from the tip. Checkpoint: the nail plate should look smooth, not chalky or flaky.
- File short and rounded: Use a fine grit file in one direction and keep the free edge short. Skip the buffer and avoid thinning the top surface. Checkpoint: the edge feels smooth and does not snag on fabric.
- Push cuticles back, do not cut them away: Soften skin in the shower, push back with light pressure, and only trim a clearly detached hangnail. Checkpoint: cuticles look soft and intact, not red or raw.
- Oil and moisturize daily: Apply cuticle oil or balm along the nail fold once or twice a day, especially after washing your hands. Checkpoint: nails feel slightly flexible, not brittle or rock hard.
- Treat breaks before they spread: Trim the break short, file the snag, and cover a painful break until it grows out. Do not peel lifted layers. Checkpoint: a break that is pain-free and smooth is ready to grow out.
- Choose the next set for the nail you have now: Pick a shorter shape and a well-fitted size while nails recover, and save long almond styles for when nails feel strong. Checkpoint: the set sits flat with no lifting along the sidewalls.
Sets that work well with a recovery routine
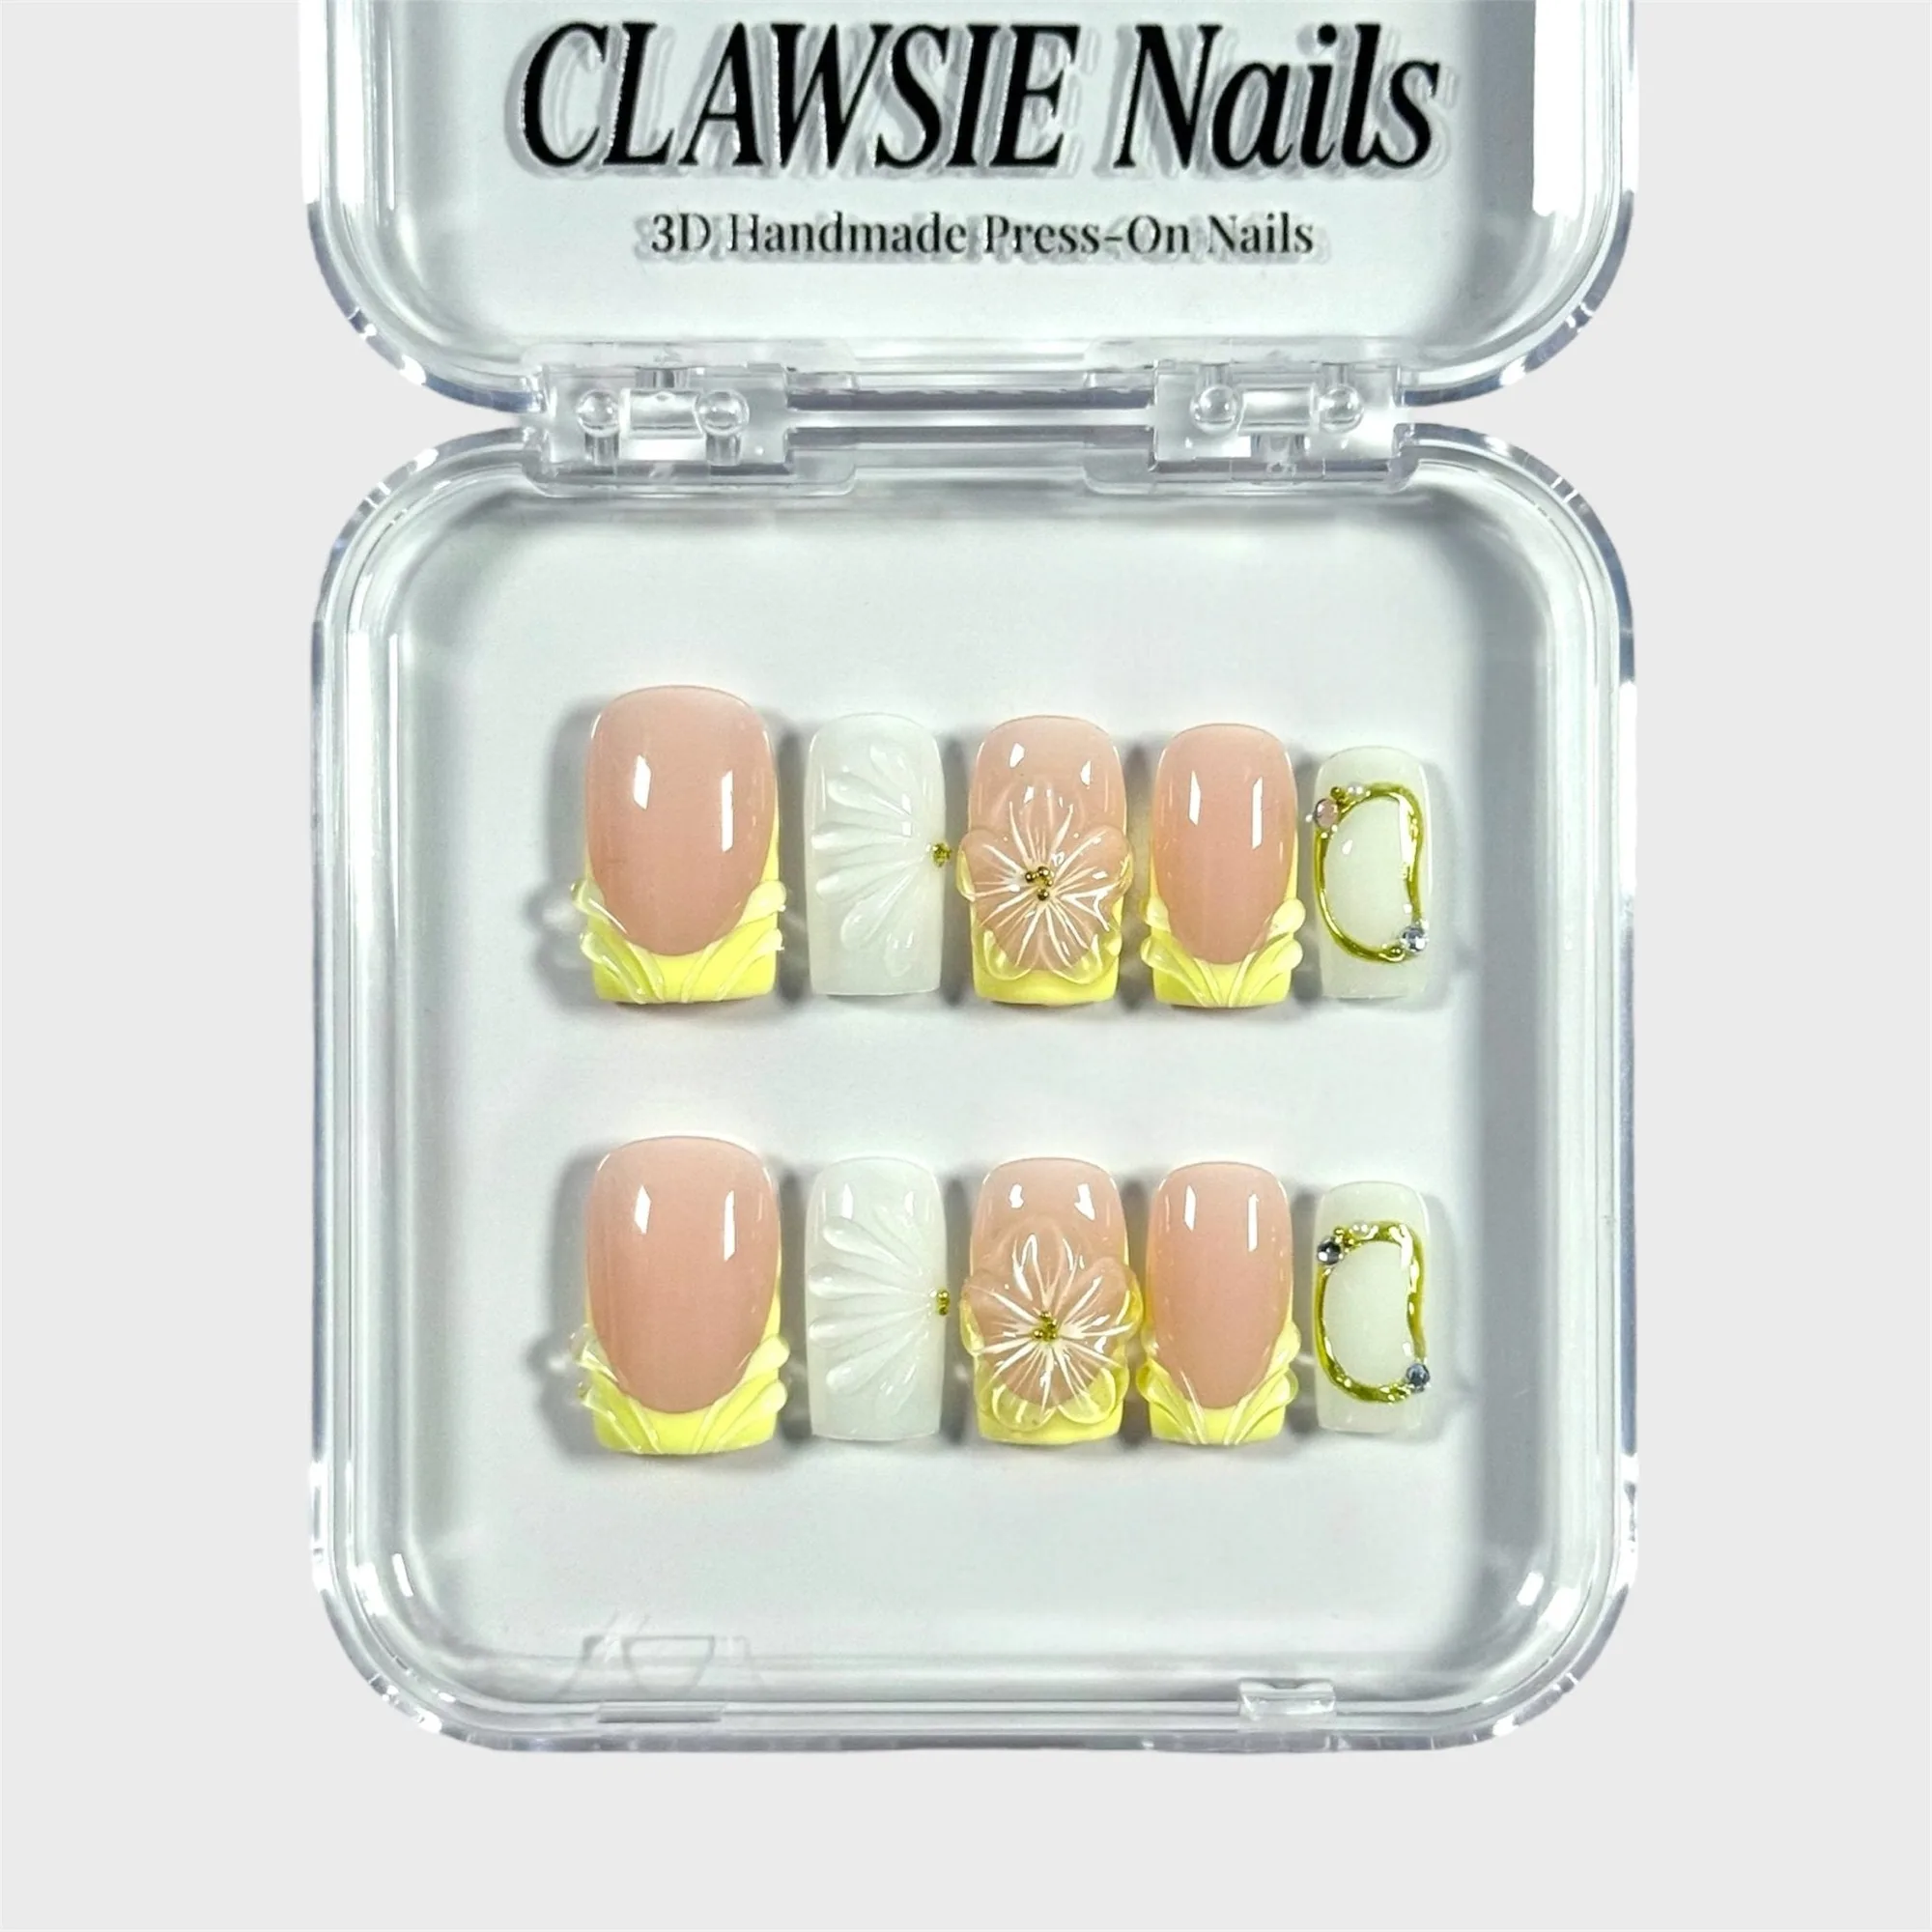
- Butter Yellow: Butter Yellow press-on nails from CLAWSIE Nails are short square nails in a soft, warm yellow shade, available in sizes XS, S, M, and L. Short square sets put less leverage on the free edge than long styles, making them a practical choice when your natural nails are still recovering from a break or peel.
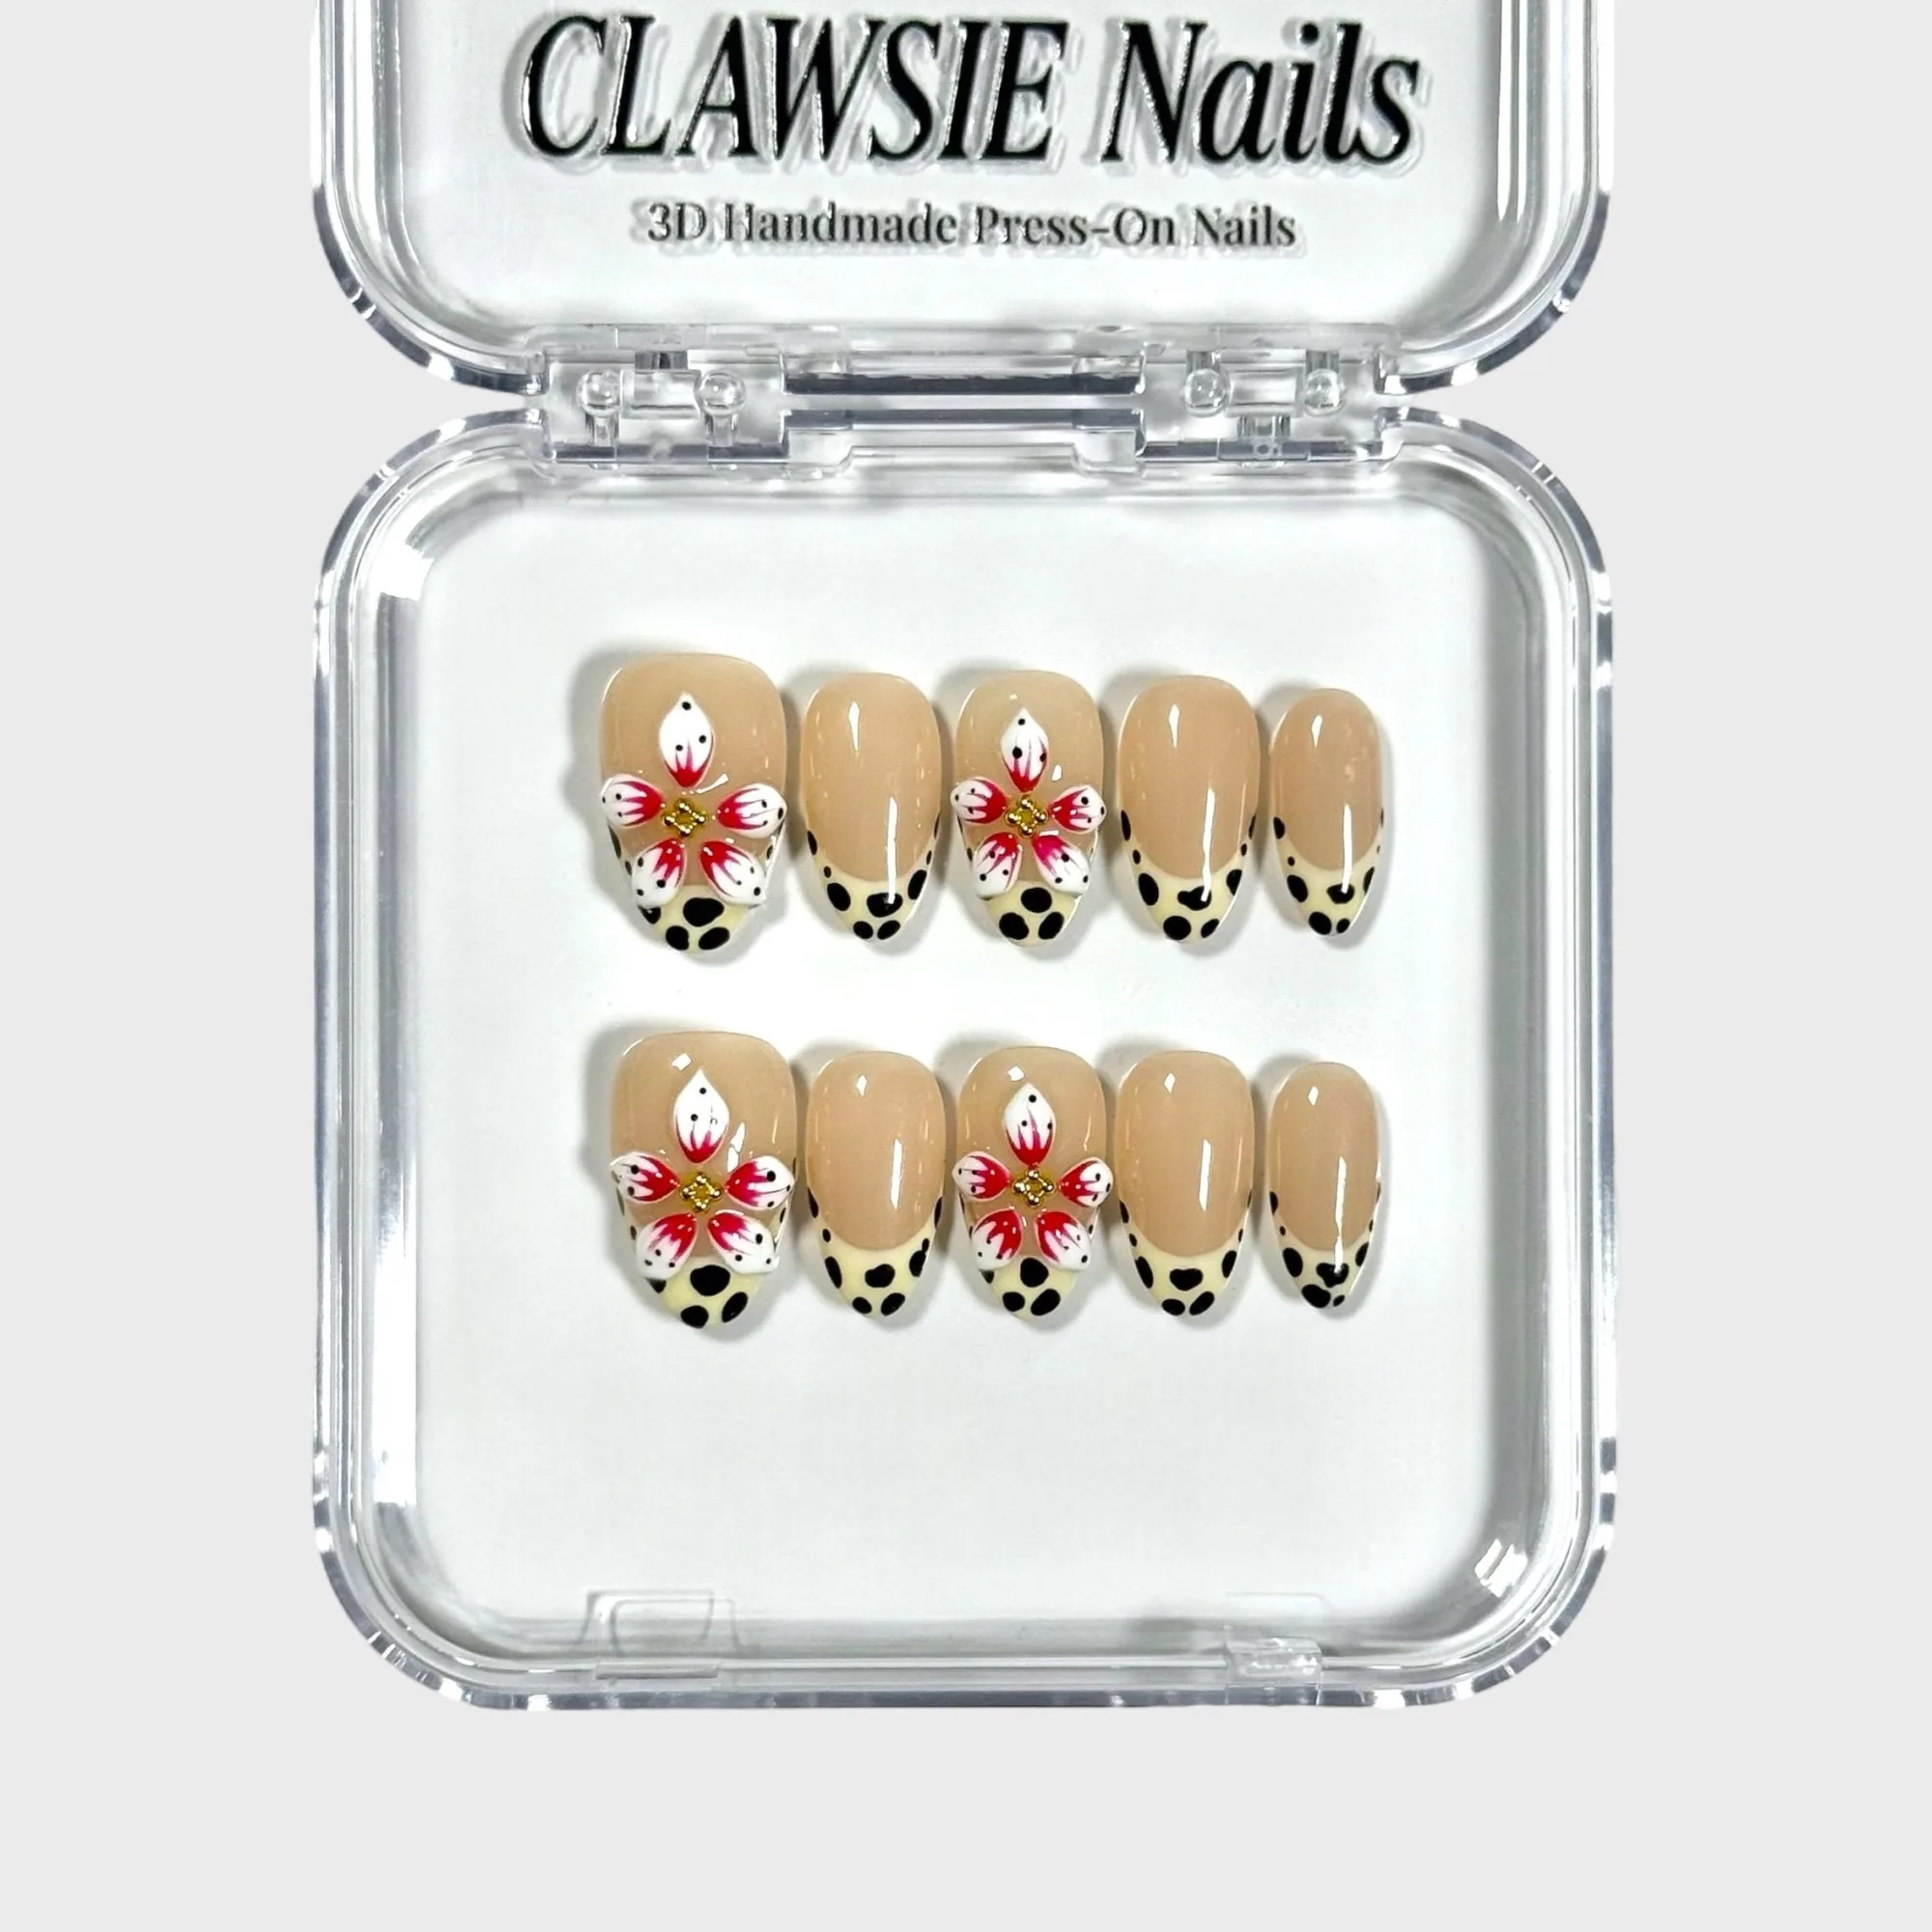
- Cheetah Print: Cheetah Print press-on nails from CLAWSIE Nails are short almond nails with a bold animal-print design, offered in Size M. A short almond shape gives you a more polished look than square without the length that can stress a weak nail, and the single size option simplifies ordering if you already know your fit.
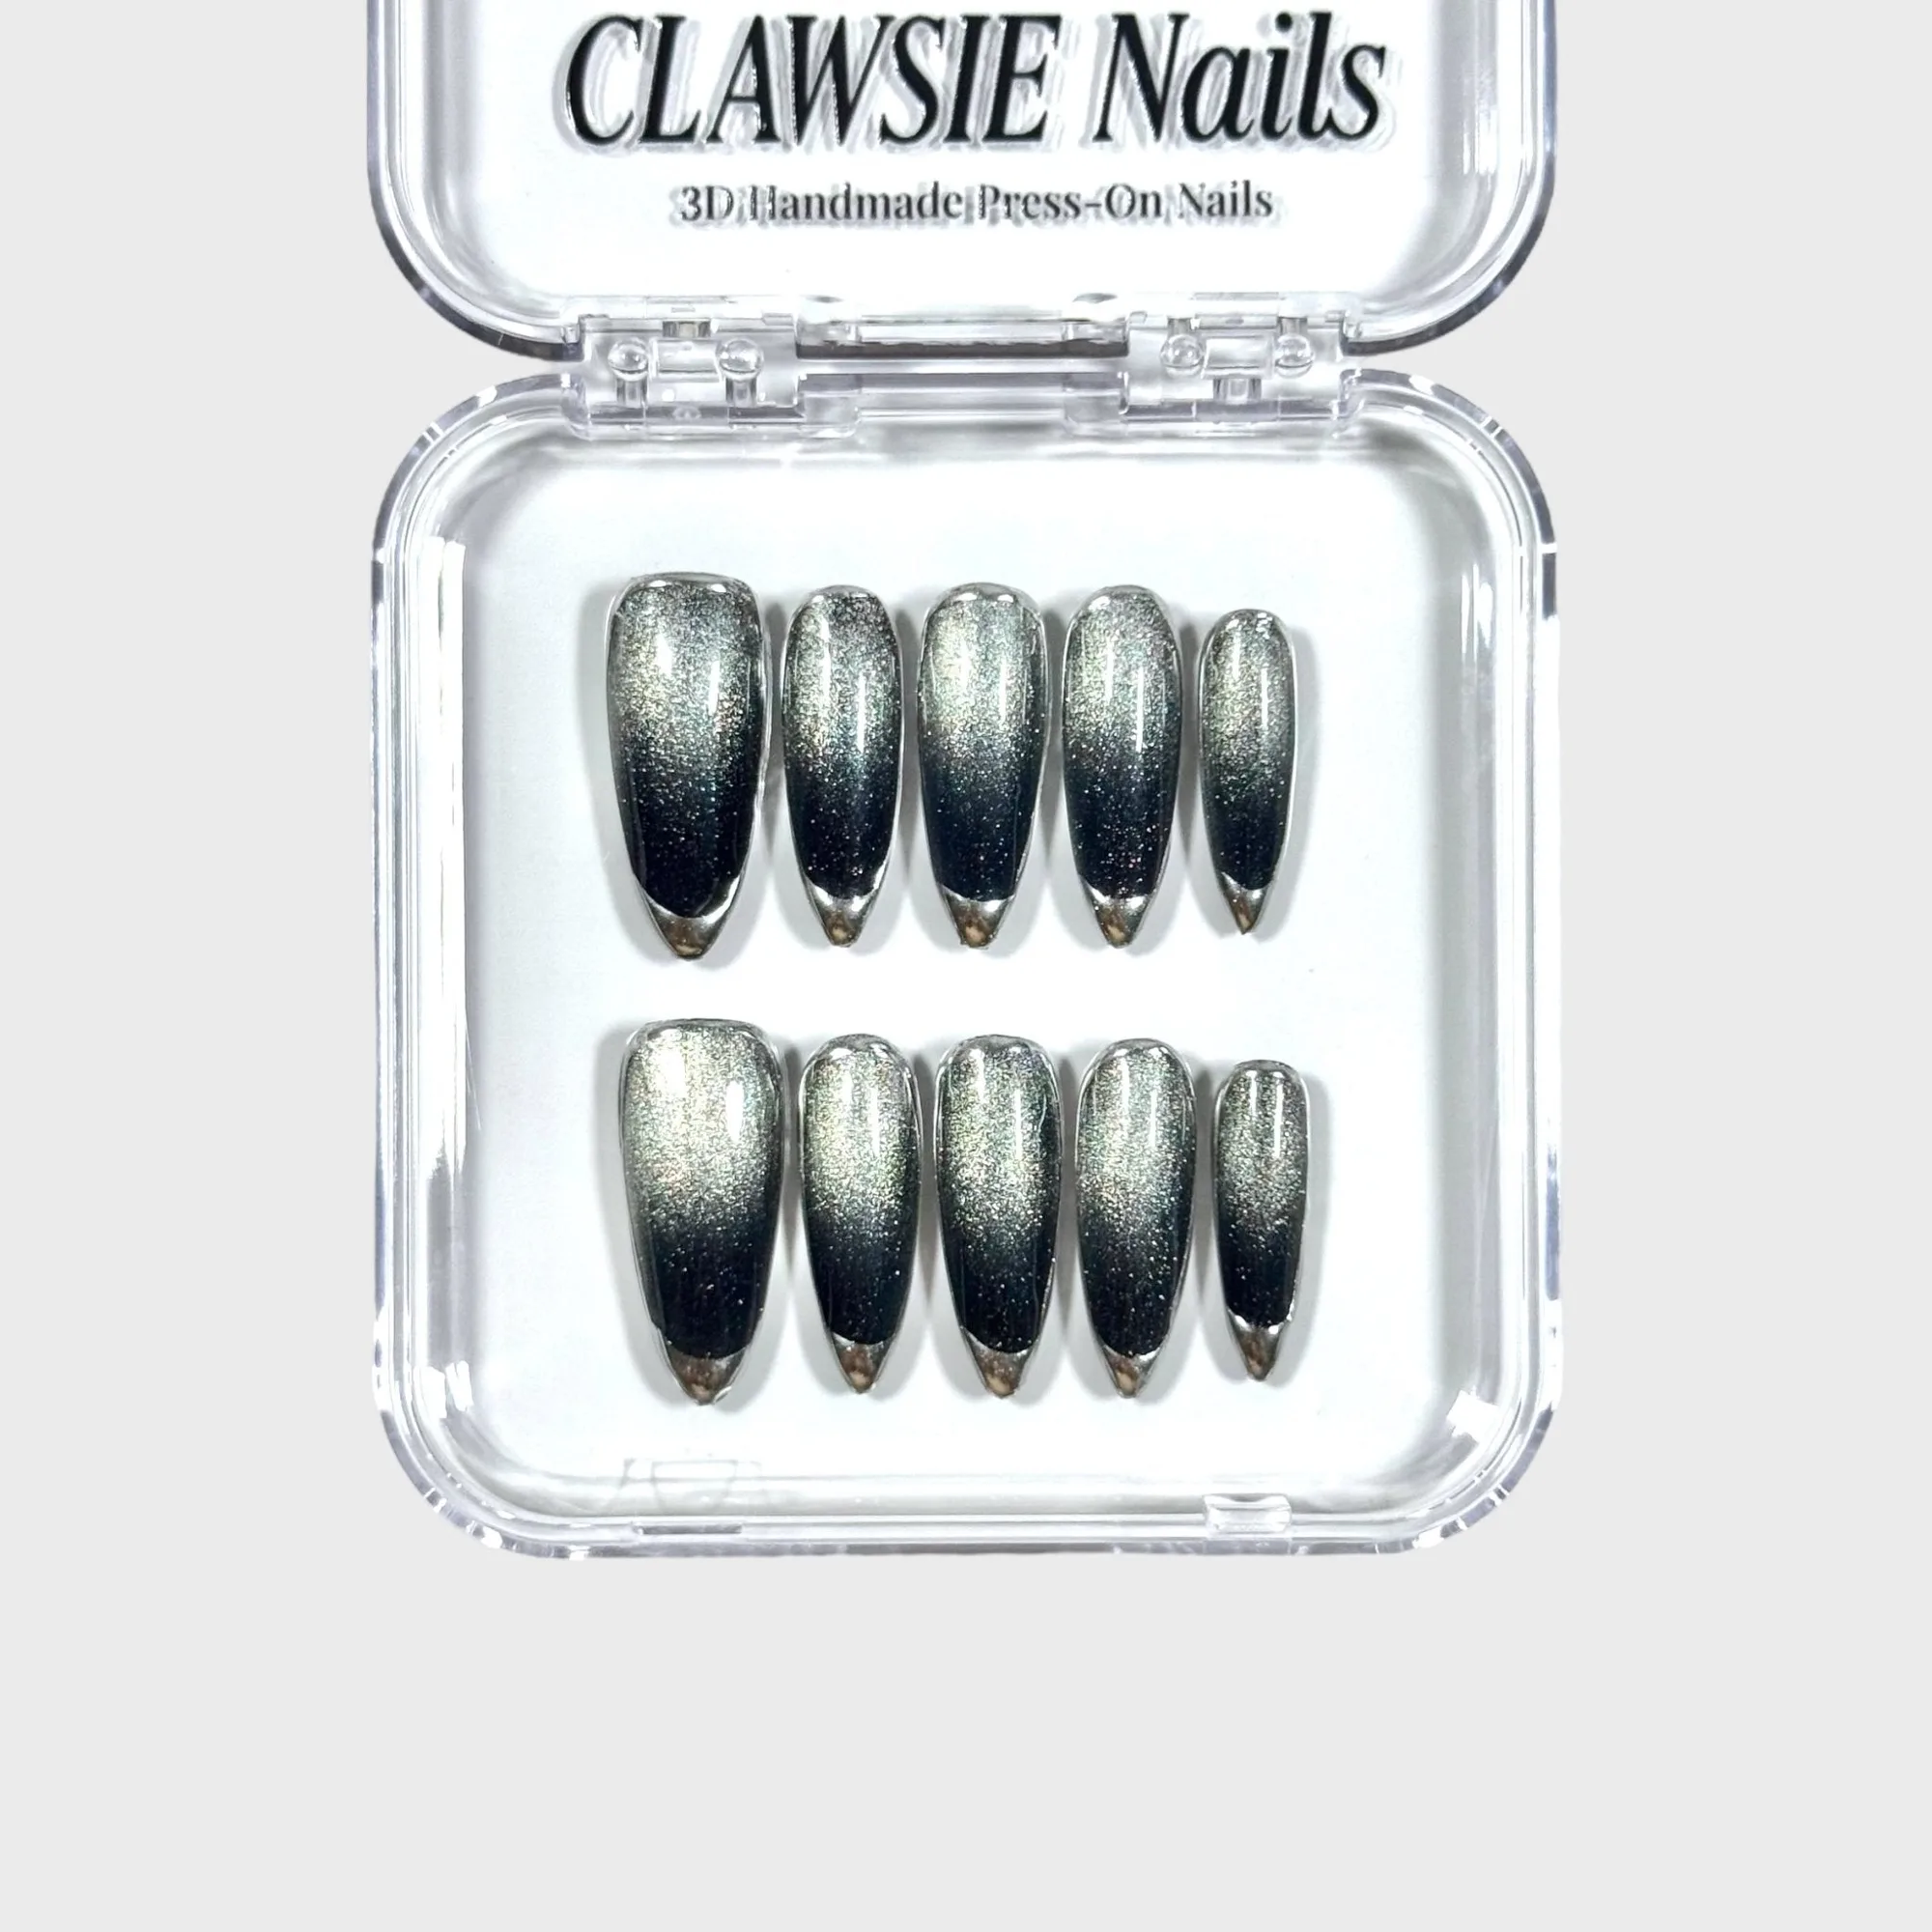
- NOIRIN: NOIRIN from CLAWSIE Nails is a set of long almond press-on nails with a black-to-silver chrome ombre finish, described as lightweight and reusable. Long almond sets are best saved for weeks when your natural nails feel strong, since the extra length creates more torque if you catch a tip.
A good press-on routine is not just about application and removal. The days in between are what keep your natural nails strong enough to wear the next set comfortably, so treat them as part of the process rather than a pause from it.