Quick Answer
To clean your grill brush, shake off loose debris, soak it in warm soapy water for 10–15 minutes, scrub with a nylon brush or cloth, rinse thoroughly, and air-dry completely before storing. For stainless steel bristles, sanitize occasionally with a vinegar solution. Replace your brush every season or when bristles are bent or loose.
A grill brush is one of the most-used tools in your outdoor cooking kit, yet it often gets the least attention. After scraping off charred food, the brush itself collects grease, residue, and bacteria. Without proper cleaning, that buildup transfers back onto your grates and eventually into your food. Learning how to clean a grill brush after use is a small habit that makes a big difference in both taste and safety.
This guide walks you through a simple, step-by-step routine for grill brush care and maintenance. You'll also learn how to spot wear and tear, when to replace the brush, and how to store it so it lasts longer. Whether you grill weekly or just on weekends, these tips will help you get the most from your brush and keep your grill hygienic.
Why Grill Brush Care Matters
A dirty grill brush is more than just unappealing—it can be a health hazard. Grease and food particles left on the bristles become a breeding ground for bacteria. When you use that brush next time, you're spreading those germs across the cooking surface. Regular cleaning removes this buildup and prevents cross-contamination.
Proper maintenance also extends the brush's lifespan. Bristles that are caked with residue lose their effectiveness and can bend or break more easily. A well-cared-for brush keeps its shape and scrubbing power longer, so you won't have to replace it as often. This saves you money and ensures your grill is always ready for the next cookout.
- Always let the brush cool down before cleaning to avoid warping the handle or bristles.
Step-by-Step Cleaning Routine
Start by tapping the brush against the side of your grill or a hard surface to knock off loose char and debris. Then, fill a bucket or sink with warm water and add a few drops of dish soap. Submerge the brush and let it soak for 10–15 minutes. This loosens grease and food particles that are stuck between the bristles.
After soaking, scrub the brush with a nylon brush or a clean cloth to dislodge remaining residue. Pay special attention to the base of the bristles where buildup tends to collect. Rinse the brush thoroughly under running water until the water runs clear. Shake off excess water and let it air-dry completely, bristles down, in a well-ventilated area.
For a deeper sanitizing treatment, mix one part white vinegar with three parts water and soak the brush for 30 minutes once a month. This helps kill bacteria and dissolve stubborn grease. Rinse well afterward and dry as usual.
- Avoid using harsh chemicals or steel wool, which can damage the bristles and handle.
How to Store Your Grill Brush
Proper storage is a key part of grill brush maintenance. Always store your brush in a dry place, away from moisture and direct sunlight. Hanging it on a hook or keeping it in a drawer with good airflow allows it to dry completely and prevents rust or mildew. Avoid leaving it on the grill grate, as exposure to heat and weather can degrade the bristles and handle.
If your brush has a wooden handle, be extra careful to keep it dry. Moisture can cause the wood to crack or splinter. For brushes with plastic or rubber handles, avoid storing them near high heat, which can cause warping. A dedicated storage spot keeps your brush clean and ready for the next use.
- Check your brush before each use for loose or bent bristles—if you spot any, replace it immediately.
When to Replace Your Grill Brush
Even with the best care, grill brushes don't last forever. The bristles wear down, bend, or break over time. A good rule of thumb is to replace your brush at the start of each grilling season, or sooner if you notice any signs of damage. Loose bristles can detach and stick to your grill grates, which is a serious safety risk if they end up in your food.
Other signs that it's time for a new brush include a bent or misshapen head, a cracked handle, or bristles that are no longer effective at scraping. If you see any of these, don't wait—replace the brush immediately. Investing in a new brush is cheaper than a trip to the emergency room.
- Keep a spare brush on hand so you're never tempted to use a worn-out one.
Simple Steps to a Cleaner Grill Brush
- Shake off loose debris: After grilling, tap the brush against the grate or a hard surface to remove charred food particles. Checkpoint: Do this while the brush is still warm but not hot.
- Soak in soapy water: Fill a bucket with warm water and dish soap, then submerge the brush for 10–15 minutes to loosen grease. Checkpoint: If the water gets very dirty, change it and soak again.
- Scrub and rinse: Use a nylon brush or cloth to scrub between bristles, then rinse thoroughly under running water. Checkpoint: Ensure no soap residue remains.
- Sanitize monthly: Soak the brush in a vinegar-water solution (1:3) for 30 minutes to kill bacteria and dissolve stubborn grease. Checkpoint: Rinse well after sanitizing.
- Dry completely and store: Shake off excess water and let the brush air-dry bristles-down in a ventilated area. Store in a dry place away from heat. Checkpoint: Never store a damp brush—it can grow mold.
Related Westmark Products for Your Kitchen
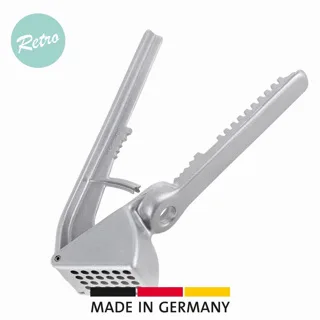
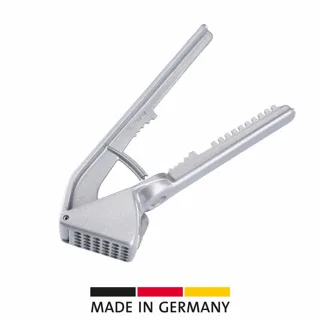
- https://westmarkez.com/products/all-purpose-press-extracta-retro-look-324045All purpose press »Extracta« retro-look: The All purpose press »Extracta« retro-look from Westmark is a versatile cleaning tool designed for everyday use. Its retro-inspired appearance adds a touch of classic style to your cleaning routine. While it's not a grill brush, this all-purpose press is handy for cleaning other kitchen tools and surfaces. Its retro design makes it a stylish addition to your cleaning arsenal.
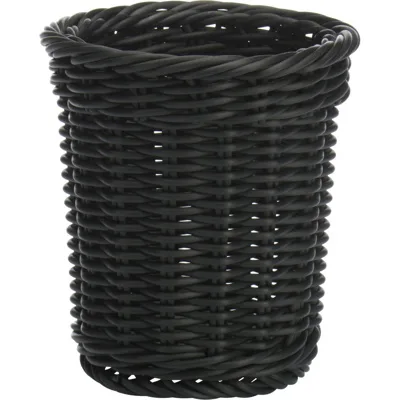
- Round basket, Ø 14 x 16 cm, black: This Westmark round basket offers a simple and practical solution for organizing or serving. With a diameter of 14 cm and a height of 16 cm, it provides a compact size suitable for a variety of uses around the home. Use this basket to store your grill brush and other grilling accessories neatly. Its compact size fits easily on a shelf or counter, keeping everything organized and within reach.
Cleaning your grill brush after every use is a simple habit that pays off in both safety and longevity. With regular care, proper storage, and timely replacement, your brush will stay effective and your grill will be ready for every cookout. Remember to check your brush before each use and replace it at the first sign of wear.