Quick Answer
To clean press-on nails, gently remove any adhesive residue with a cotton swab and acetone-free nail polish remover, then wash them with mild soap and warm water. Let them dry completely before storing them in their original case or a compartmentalized container with the adhesive side up. With proper care, you can reuse your press-ons multiple times.
Press-on nails are a fun and affordable way to switch up your look without committing to a salon appointment. But to get the most out of your sets, you need to know how to clean and store them properly. Whether you've worn a set once or want to rotate between designs, a little care goes a long way in making your press-ons last.
The key to reusing press-ons is keeping them clean, dry, and free of old adhesive. With the right technique, you can keep your nails looking fresh and ready for your next occasion. Here's a step-by-step guide to help you clean, store, and reuse your press-on nails safely.
Why Proper Cleaning Matters
Press-on nails come into contact with your natural nails, skin, and whatever you touch throughout the day. Over time, they can collect dirt, oils, and old adhesive, which not only looks unappealing but can also harbor bacteria. Cleaning them properly ensures they stay hygienic and ready for the next wear.
Skipping the cleaning step can also make your press-ons less sticky. Old adhesive residue can create a bumpy surface that prevents new adhesive from bonding well. By removing all residue and washing the nails, you give yourself the best chance of a secure fit next time.
- Always wash your hands before handling press-ons to avoid transferring oils.
- Use a gentle, acetone-free remover to protect the nail's finish.
Step-by-Step Cleaning Process
Start by gently prying off the press-on nails from the side. Avoid pulling from the tip, as this can bend or break them. Once removed, use a cotton swab dipped in acetone-free nail polish remover to wipe away the adhesive from the back of each nail. Be gentle to avoid scratching the surface.
After removing the adhesive, wash the nails in warm water with a mild soap. Use a soft toothbrush to gently scrub away any remaining residue or dirt. Rinse them thoroughly and pat them dry with a lint-free cloth. Let them air-dry completely before storing—moisture can cause the adhesive to break down and lead to mold.
- Avoid soaking press-ons in water for too long; a quick wash is enough.
- If nails have stubborn residue, use a bit of rubbing alcohol, but test on a small area first.
How to Store Press-On Nails
The best way to store press-ons is in their original case or a compartmentalized container. This keeps them protected from dust, bending, and accidental damage. If you have multiple sets, consider labeling them so you can easily find the design you want.
When placing the nails in storage, make sure they are completely dry and the adhesive side is facing up. This prevents them from sticking to the container and keeps the surface clean. Store them in a cool, dry place away from direct sunlight, which can cause the colors to fade over time.
- Use a small pill organizer or a dedicated press-on nail case if you've lost the original packaging.
- Keep your press-ons flat to avoid warping.
Tips for Making Your Press-Ons Last Longer
To extend the life of your press-ons, avoid exposing them to harsh chemicals like acetone or strong cleaning products. When you're not wearing them, keep them in their case to prevent scratches. Also, try to avoid using your nails as tools—prying open cans or scraping stickers can cause chips and bends.
Another tip is to alternate between sets. If you have several pairs, rotating them gives each set a break and reduces wear and tear. This also lets you clean and store each set properly before wearing it again.
- Store your press-ons away from heat sources like radiators or direct sunlight.
- Invest in a quality adhesive or nail glue to ensure a secure fit that lasts longer.
Press-On Nail Care Steps
- Remove gently: Lift from the side of the nail, not the tip, to avoid bending or breaking. Use a cuticle stick if needed to loosen the edge. Checkpoint: If the nail bends, you're pulling too hard. Try a bit of warm water to soften the adhesive.
- Clean off adhesive: Use a cotton swab with acetone-free remover to wipe away old glue. Be gentle to avoid scratching the surface. Checkpoint: If residue remains, repeat with a fresh swab. Don't use metal tools that can scratch.
- Wash and dry: Wash with mild soap and warm water, using a soft toothbrush to scrub away dirt. Rinse and pat dry with a lint-free cloth. Checkpoint: Let them air-dry completely before storing. Any moisture can cause adhesive failure or mold.
- Store properly: Place in the original case or a compartmentalized container with the adhesive side up. Keep in a cool, dry place. Checkpoint: If the case is missing, use a small pill organizer. Label sets to find designs easily.
- Rotate and reuse: Alternate between sets to reduce wear. Always clean and dry before storing after each wear. Checkpoint: If the adhesive no longer sticks well, replace the adhesive tabs or apply a fresh layer of nail glue.
Press-On Nails That Stand Up to Reuse
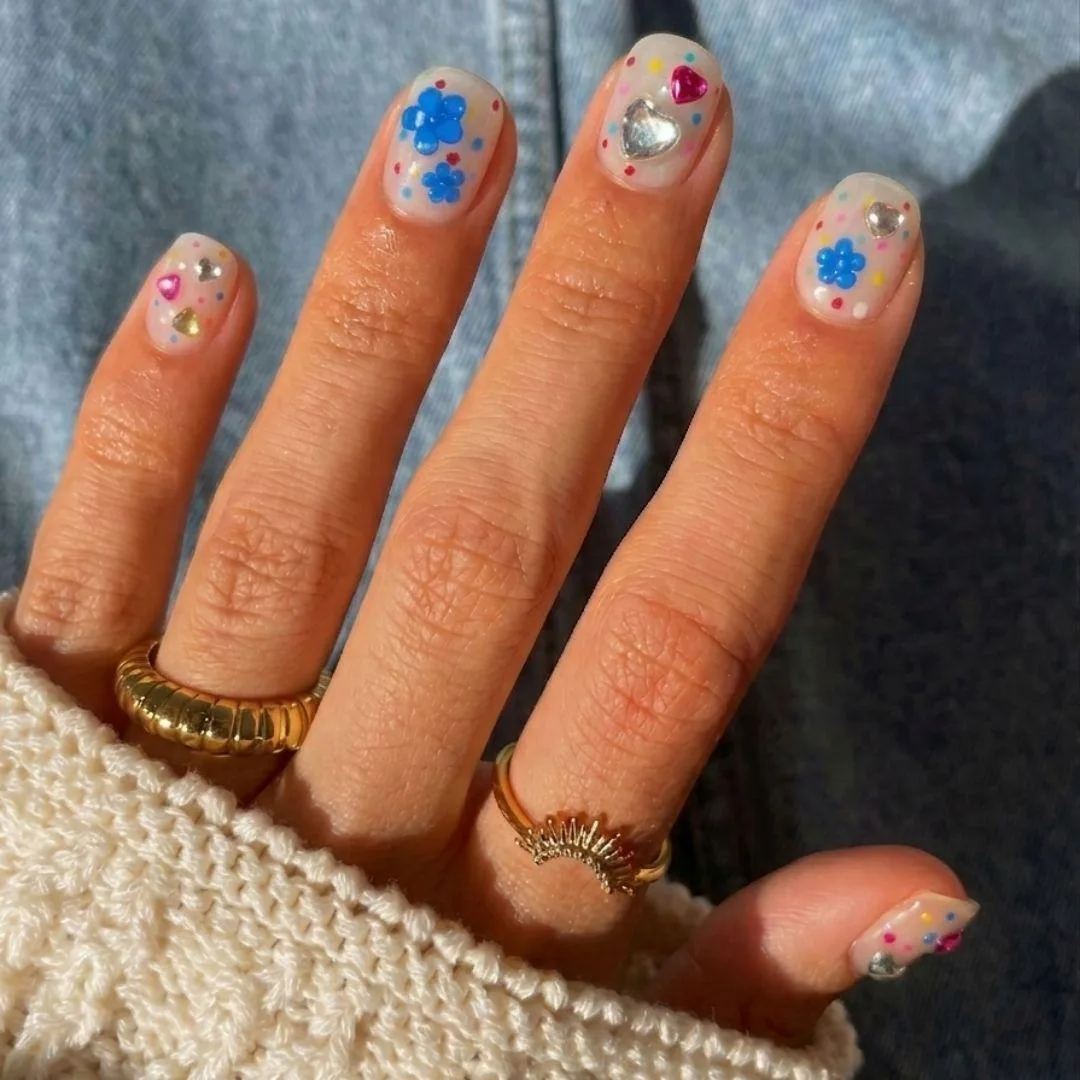
- Dot Cake Press-On Nails: Dot Cake is nonpareil sprinkles scaled up to ten nails. A milky sheer base carries scattered confetti dots in pink, blue, yellow, and red across every nail like the candy shell on top of a fresh bake. Sculpted 3D blue flowers bloom on select nails, while chrome silver hearts, hot pink jewel hearts, and iridescent heart gems sit raised and glossy between the dots. Every nail reads sweet but never matchy. Short round... The raised 3D elements and glossy finish mean you'll want to clean gently to preserve the details. Using a soft brush and avoiding acetone will keep the sculpted flowers and gems intact for multiple wears.
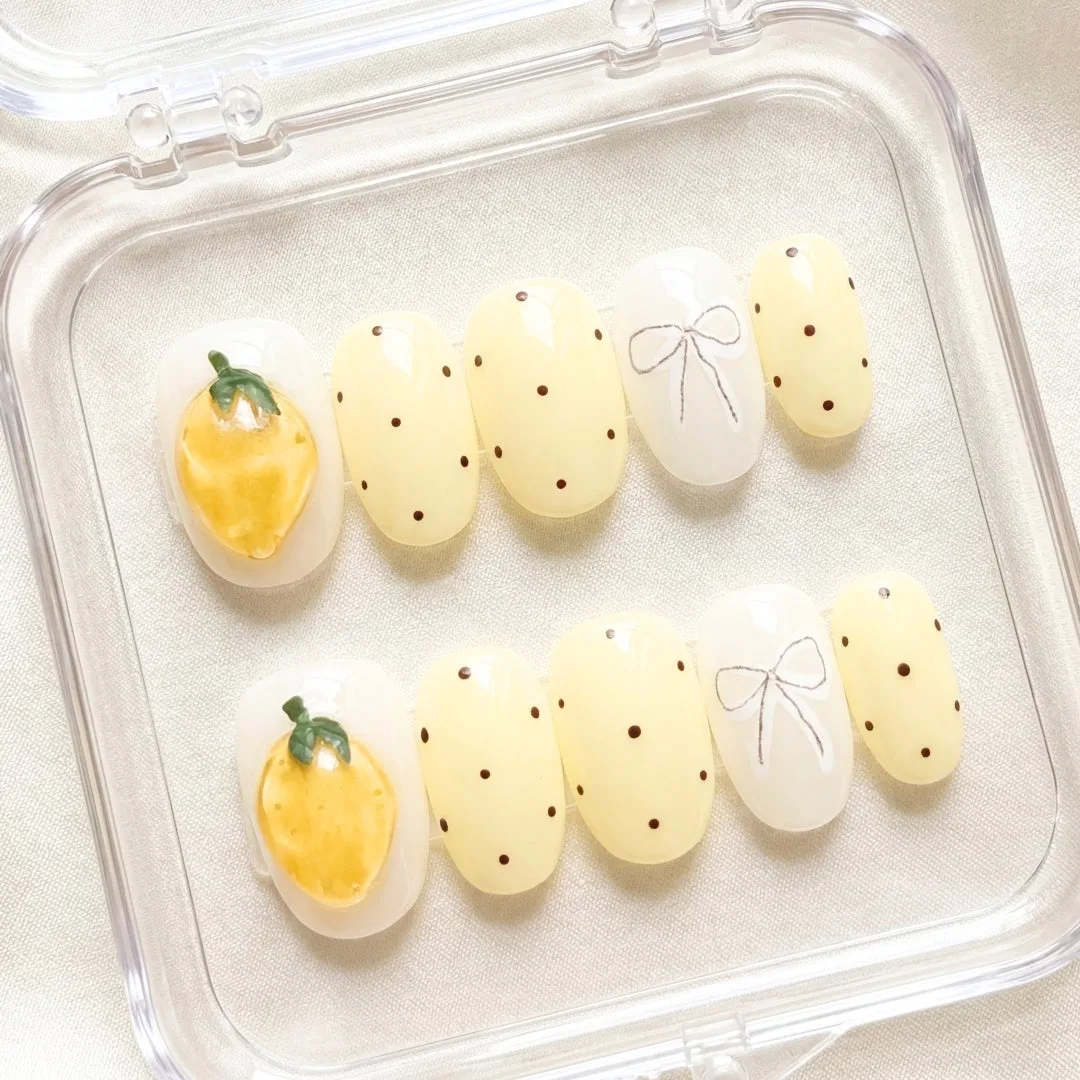
- Limoncello Press-On Nails: Main character energy, squeezed and served. Limoncello brings a zesty, sun-drenched vibe to your fingertips with a fresh pastel yellow palette and playful 3D gel-sculpted lemons. We’ve added vintage-chic polka dots, creamy white bows, and shimmering gemstones for a look that’s equal parts sweet and sassy. It’s the ultimate "brunch-in-Italy" accessory for your next escape. The 3D gel-sculpted lemons and gemstones require careful handling during cleaning. A gentle touch and proper storage will keep these decorative elements from chipping or falling off, so you can enjoy the sunny design again and again.
With these simple steps, you can keep your press-on nails looking beautiful and ready for reuse. A little care goes a long way—clean them gently, store them properly, and you'll get more wears out of your favorite sets. So next time you're ready for a new look, don't toss your press-ons—just give them a quick refresh and wear them again.