Quick answer
Wipe the leash with a barely damp cloth, let it air-dry away from heat, work a small amount of leather conditioner into the leather with your fingers, and buff off the excess. Do this every one to three months, and after any walk where the leash got wet or muddy. Distressed leather is meant to look worn, so skip harsh soaps, saddle soap, and oil-based products that darken or flatten the finish.
Why distressed leather needs a different routine
Distressed leather is finished to look broken-in, with a matte surface and natural color variation. That finish is the point, but it also means the leather has already been through a mechanical treatment. Aggressive cleaning strips what is left of the surface, and heavy conditioners fill in the grain until the distressed look disappears. The goal is to keep the leather supple enough to flex without cracking, not to make it look new.
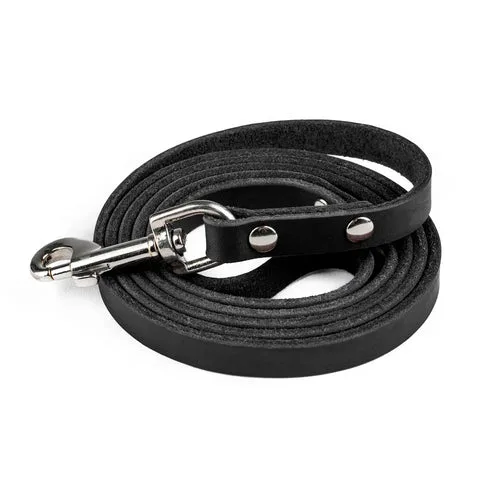
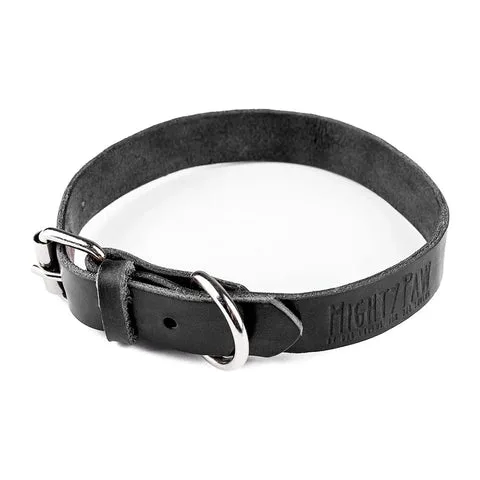
The same logic applies to a distressed leather collar, which sits against the neck and picks up oils, sunscreen, and dirt from fur. Collars and leashes made from soft, pliable leather with silver hardware, like the Mighty Paw Distressed Leather Dog Leash and matching Distressed Leather Collar, are comfortable without bulky padding, but that comfort depends on the leather staying flexible. Dry leather stiffens and can crack at the hardware holes and stitching.
What to keep away from the leather
Most leash damage comes from well-meaning cleaning. Saddle soap, dish soap, laundry detergent, alcohol wipes, and vinegar all pull oils out of the leather or break down the distressed finish. Soaking the leash in water is worse than wiping it, because water swells the fibers and the leather dries stiff and brittle. Heat is the other common mistake: radiators, hair dryers, and direct sun dry the leather too fast and cause cracking.
Conditioners matter too. Heavy waxes and pure oils can darken distressed leather unevenly and leave a greasy surface that collects dirt. Use a small amount of a dedicated leather conditioner or cream, and test it on a hidden area such as the underside near the handle before applying it to the whole leash.
Step-by-step distressed leather leash care
- 1. Brush off dry dirt first: Before any moisture touches the leather, wipe the leash with a dry microfiber cloth or soft brush to remove dust, sand, and dried mud. Pay attention to the stitching and around the hardware, where grit collects. Checkpoint: if the cloth comes away clean, you can move straight to conditioning and skip the damp wipe.
- 2. Wipe with a barely damp cloth: Dampen a microfiber cloth with lukewarm water and wring it out until it is almost dry. Wipe the leather in one direction with light pressure. Do not submerge the leash, and do not scrub the distressed surface. Common mistake: a dripping cloth. If water beads on the leather, the cloth is too wet.
- 3. Air-dry away from heat: Lay the leash flat or hang it in a shaded, ventilated spot at room temperature. Let it dry completely before conditioning, which usually takes a few hours. Never use a hair dryer, radiator, or direct sun. Checkpoint: the leather should feel dry to the touch but still slightly cool, not warm or stiff.
- 4. Apply a small amount of conditioner: Put a pea-sized amount of leather conditioner on your fingertips and work it into the leather in small circles, starting at the handle and moving toward the clip. Add more only if the leather absorbs it immediately. Common mistake: over-applying. A thin, even coat is enough; excess conditioner sits on the surface and attracts dirt.
- 5. Buff off the excess and check the hardware: After ten to fifteen minutes, buff the leash with a clean dry cloth to remove any leftover conditioner. Wipe the silver hardware with a dry cloth, and check the clip and D-ring for grit or stiffness. Checkpoint: the leather should feel supple, not greasy. If it feels tacky, buff again.
- 6. Waterproof only if you walk in wet conditions: If your walks involve rain, snow, or wet grass, apply a leather-safe waterproofing spray or wax after conditioning, following the product instructions. Test it on a hidden area first, since some waterproofers darken distressed leather. Common mistake: waterproofing a dirty leash. Always clean and condition first, or you seal dirt into the leather.
- 7. Store it loosely, not coiled tight: Hang the leash on a hook or coil it loosely for storage. Keep it out of damp basements and away from direct sun, which fades the finish and dries the leather over time. Next step: repeat the full routine every one to three months, and spot-clean after any muddy or wet walk.
Products in this routine
- Distressed Leather Leash: Crafted from super soft, pliable leather with silver hardware and an embossed logo, and designed to hold up to everyday walks. The soft finish is what makes this leash comfortable, and it is also what dries out first, so conditioning is the step that protects the feel you bought it for.
- Distressed Leather Collar: Made from super soft, pliable distressed leather with a distressed finish and silver hardware, sized for dogs of all sizes. Because the collar sits against the neck, it collects more skin oils and dirt than the leash, so it usually needs cleaning first.