Quick answer
Start with one clear movement zone and one low, open shelf at your child's height. Add a defined floor mat or rug for focused play, keep toys in a few visible baskets, and anchor any climbing equipment to the wall. A Montessori playroom works best when your child can reach, choose, and put away materials without adult help.
A Montessori playroom is less about buying a matching furniture set and more about arranging a room so your child can move, choose, and tidy up independently. The setup usually takes an afternoon, but the layout decisions you make early determine whether the room stays usable as your child grows.
This guide walks through a practical order of steps, from measuring the room to choosing movement pieces. You will also see where common mistakes happen, such as placing shelves too high or filling every corner before your child has tested the space.
Measure the room and pick one movement zone
Before moving furniture, measure the longest clear wall and the floor space in front of it. A Montessori playroom needs a movement zone where your child can climb, slide, or balance without hitting a bed or dresser. Mark that zone with painter's tape and live with it for a day to see if it feels too tight.
Keep the movement zone on a wall without windows or radiators if possible. That gives you a safe place to anchor climbing equipment and keeps the floor clear for landing. If the room is small, choose one multi-use piece instead of several separate items.
- Common mistake: placing a climbing frame in the middle of the room where it blocks walking paths.
- Checkpoint: your child should have at least one arm's length of clear floor around any climbing piece.
Set up low, open shelving at your child's height
Montessori playroom essentials begin with a shelf your child can see and reach without help. A low open shelf, roughly waist-high for your child, lets them choose one activity and return it before taking another. Avoid deep bins or closed cabinets for everyday toys because they hide choices and encourage dumping.
Place the shelf against a wall near the movement zone but out of the climbing fall zone. Use a few shallow baskets or trays to group similar items, such as blocks, art supplies, or small figures. Rotate what is on the shelf every week or two instead of displaying everything at once.
- Common mistake: filling every shelf space so your child feels overwhelmed.
- Checkpoint: your child can reach the top shelf while standing on the floor.
Define a floor mat or rug for focused play
A defined floor area gives your child a visual boundary for sitting and working. A simple rug or mat near the shelf works well for puzzles, books, and building. Keep this area separate from the climbing zone so toys do not end up under a swing or slide.
If you already have a play mat, check that it does not slide on your floor. A non-slip pad underneath is a small fix that prevents frustration. The goal is a stable, clear surface your child can return to after moving.
- Common mistake: using a thick, foldable mat that tips over when your child stands on it.
- Checkpoint: the mat stays flat when your child pushes a chair or basket across it.
Add movement pieces that match your child's age
Movement is part of a Montessori playroom setup, not an extra. For younger children, a low climbing arch or a foldable triangle gives them a safe challenge. For older children, a slide or climbing rope adds variety. Choose one primary piece first and see how your child uses it before adding more.
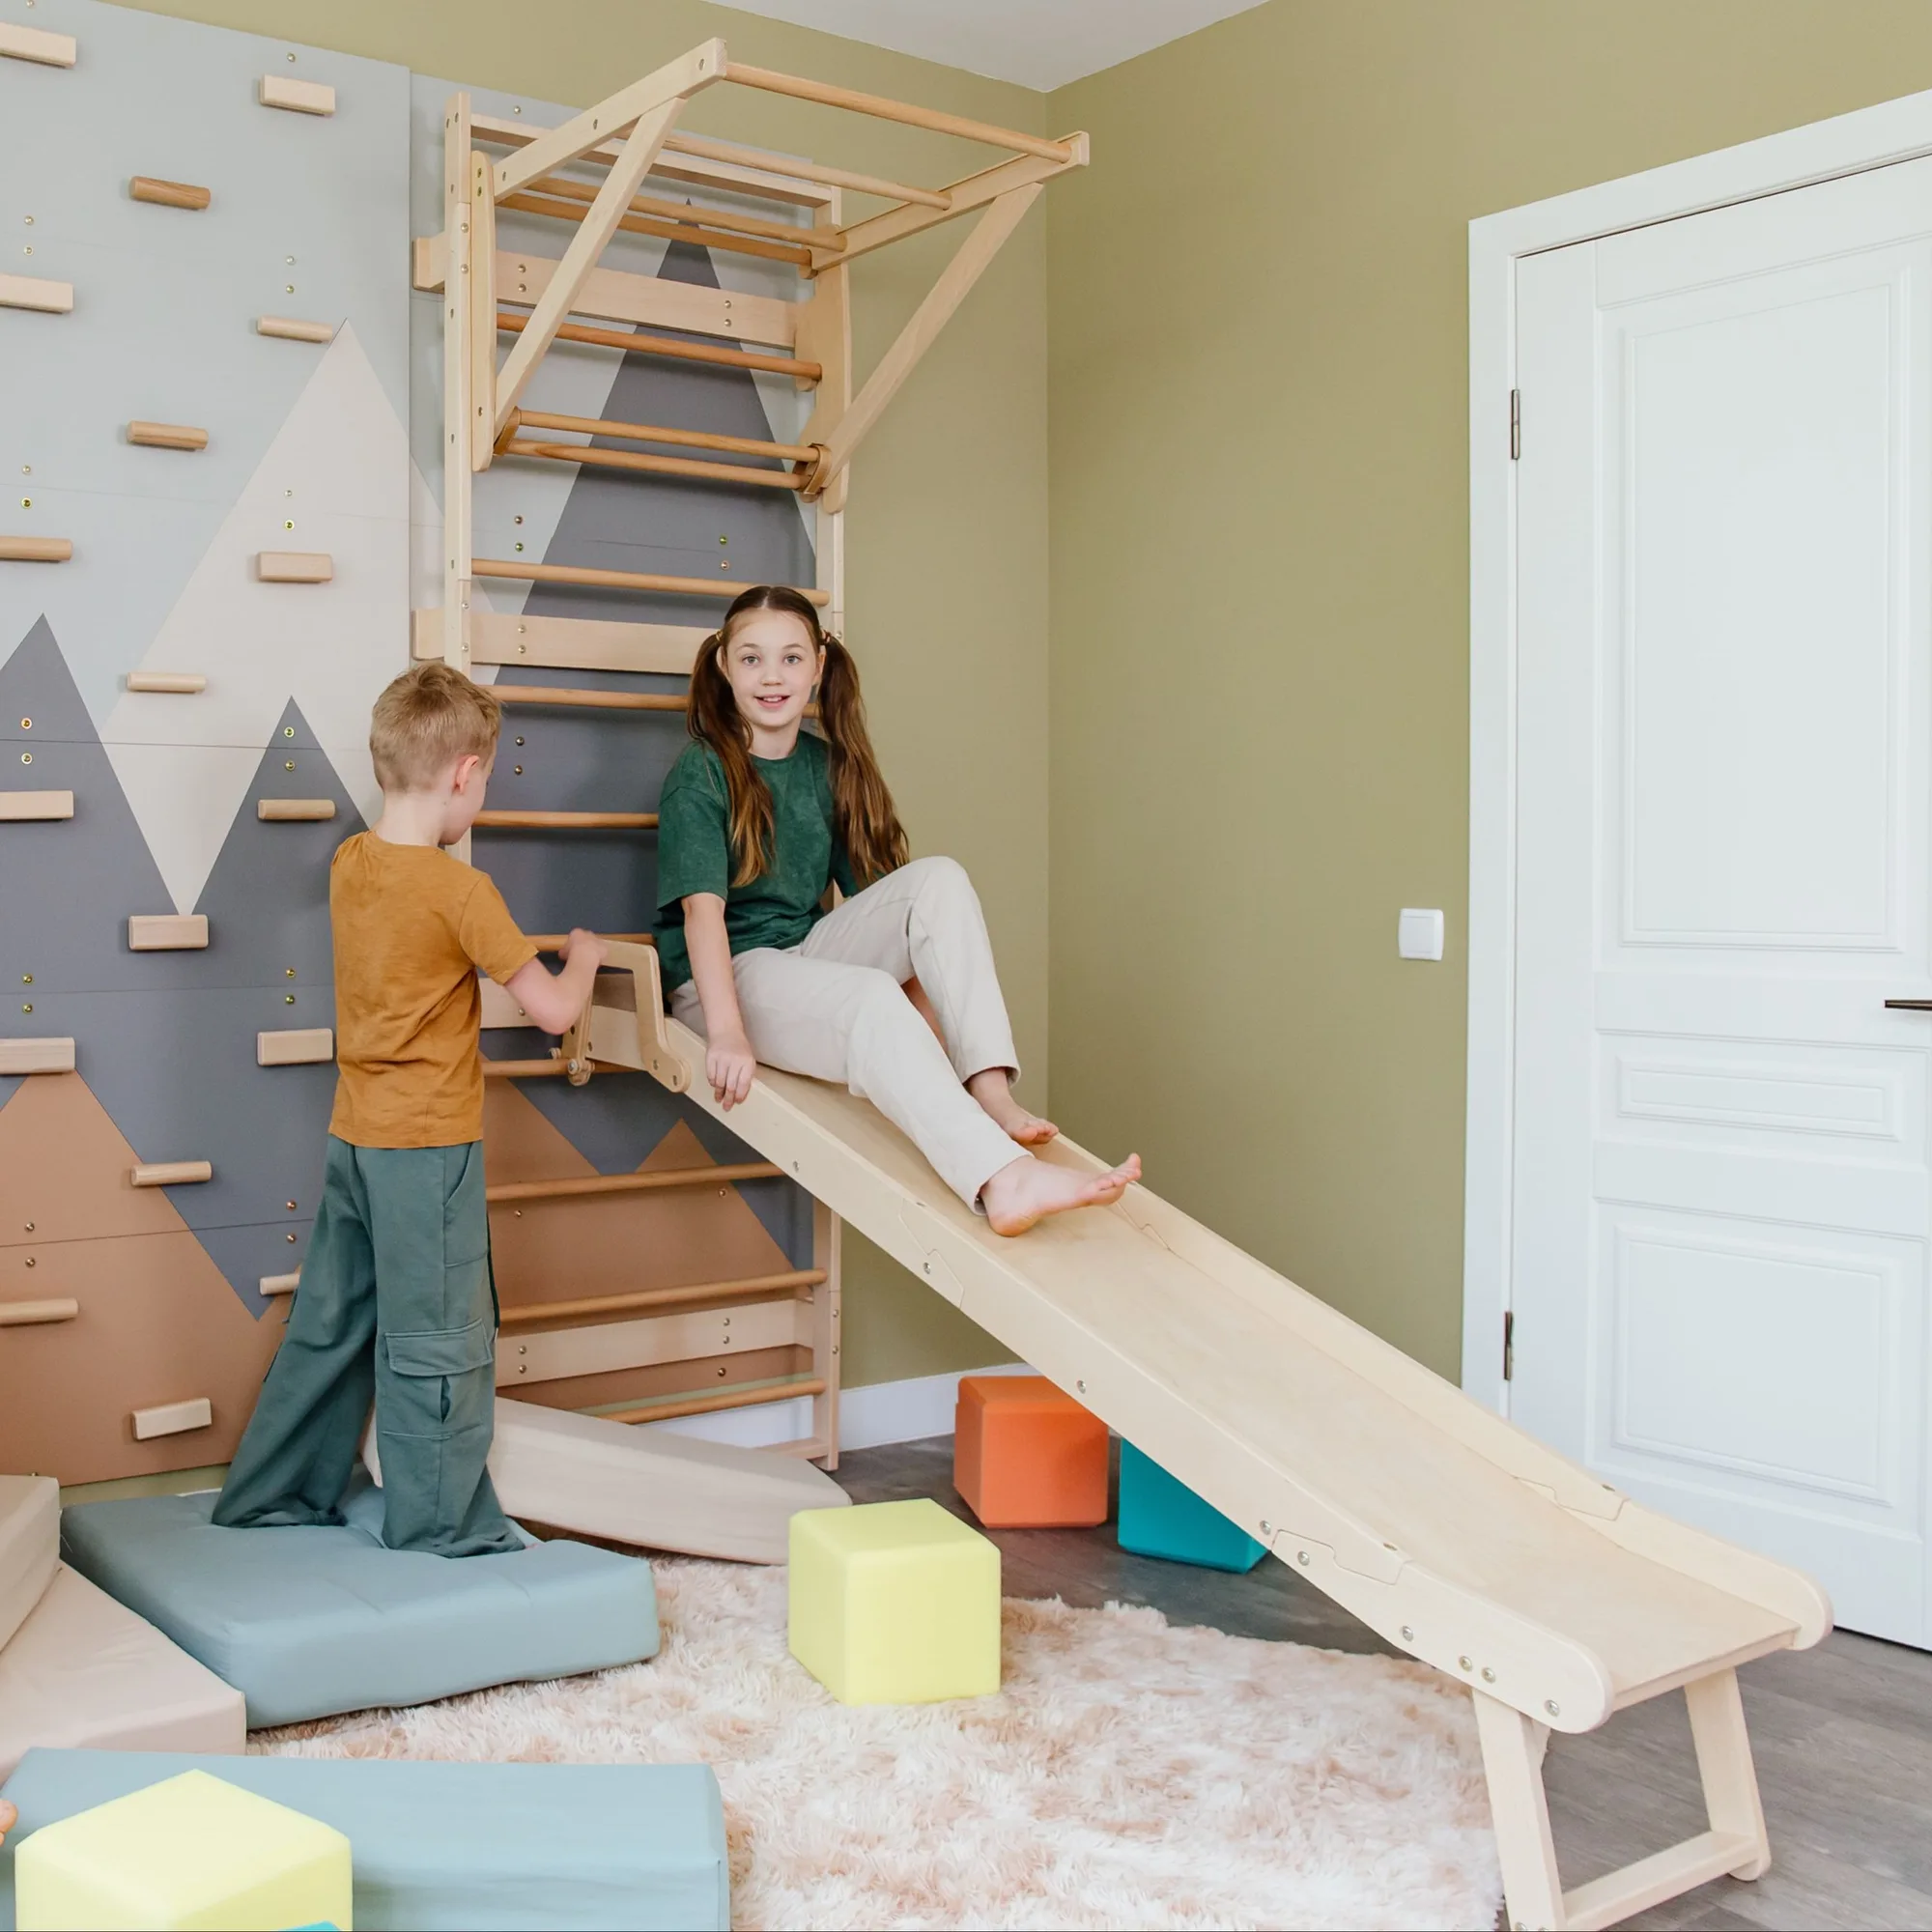
Anchor wall-mounted equipment into studs, and check the weight limit for every piece. The Montessori Slide, for example, holds up to 60 kg (132 lbs) and attaches securely to wall bars. The Kids Climbing Rope comes in two length options so it fits different frame heights. These details matter because a piece that wobbles or hangs too low will not get used.

Kids Climbing Rope
- Common mistake: buying a full climbing set before checking ceiling height and wall studs.
- Checkpoint: every climbing piece is stable when your child pulls on it.
Keep toys visible, limited, and easy to put away
Montessori playroom design favors fewer, visible choices. Aim for five to eight activities on the shelf at a time, with a small basket for each. If your child dumps a basket, that is a sign the shelf has too much or the items are too small to manage.
Store extra toys out of sight in a closet or a higher shelf. Rotate them in when your child seems bored. This keeps the room calm and makes cleanup something your child can do alone.
- Common mistake: keeping a large toy box in the playroom, which encourages mixing everything together.
- Checkpoint: your child can put away one activity before taking out another.
Test the layout and adjust after one week
After a week, watch how your child moves through the room. Are they avoiding the shelf because it is behind a door? Is the climbing piece too close to the rug? Small changes, like swapping the shelf and mat positions, often make the room work better.
Adjust one thing at a time and give it a few days. A Montessori playroom is meant to change as your child grows, so plan to revisit the layout every few months.
- Common mistake: rearranging the whole room at once and losing track of what helped.
- Checkpoint: your child can move from shelf to mat to climbing zone without asking for help.
Montessori playroom setup steps
- Measure and mark the movement zone: Choose the longest clear wall and tape off a climbing area with at least one arm's length of clear floor around it. Checkpoint: no furniture or doors swing into the taped zone.
- Place a low open shelf at child height: Set the shelf against a wall outside the fall zone and fill only five to eight activities in shallow baskets. Checkpoint: your child can reach the top shelf while standing.
- Add a defined floor mat: Put a non-slip rug or mat near the shelf for puzzles, books, and building, separate from the climbing area. Checkpoint: the mat stays flat when pushed.
- Install one movement piece and anchor it: Start with a slide, climbing arch, or rope that matches your child's age. Anchor wall-mounted gear into studs and check weight limits. Checkpoint: the piece does not wobble when pulled.
- Rotate toys and remove overflow: Keep extra toys out of sight and swap them in when your child seems bored. Keep a small basket for each activity. Checkpoint: your child can tidy one activity before starting another.
- Review the layout after one week: Watch where your child hesitates or avoids, then move one item at a time and wait a few days before changing more. Next step: revisit the layout every few months as your child grows.
Playroom pieces that support this layout
- Montessori Slide: The Montessori Slide is made of certified birch plywood, holds up to 60 kg (132 lbs), attaches securely to wall bars, and includes handles for extra grip. A secure attachment and a clear weight limit let you plan a slide zone without guessing whether it will stay put during play.
- Kids Climbing Rope: The Kids Climbing Rope is available in 2 options to fit different climbing frame heights and helps develop gross motor skills, arm, leg, and torso strength, plus agility and endurance. Because frame heights vary, choosing the right rope length prevents a rope that hangs too low or sits out of reach.
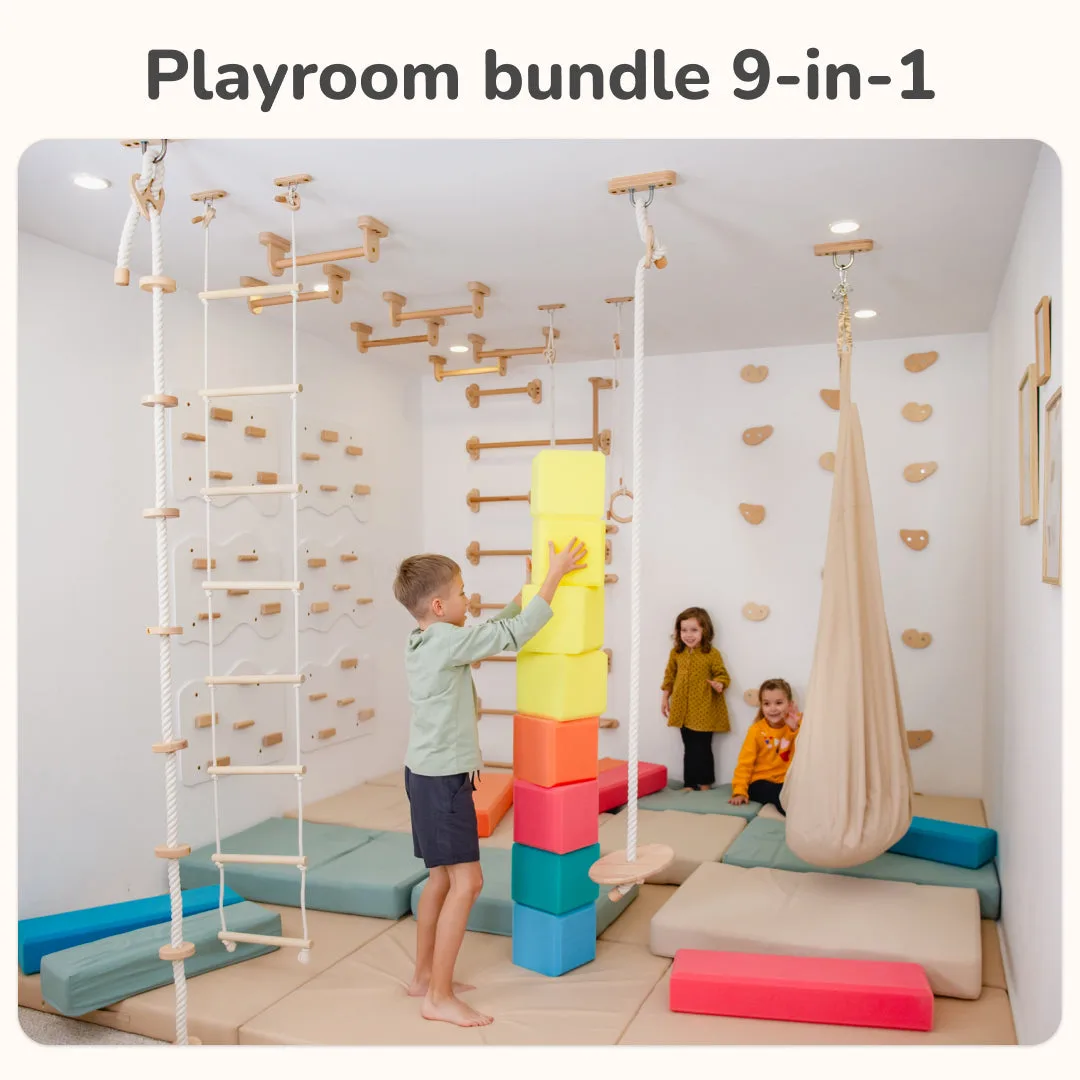
- All-in-One Playroom Bundle for Kids: The All-in-One Playroom Bundle for Kids combines climbing, swinging, building, and sensory play elements, and is available with climbing wall color and pod swing and foam block cover color options. A bundle can cover several zones at once, but you still need to measure your wall and floor space before committing to a full set.
A Montessori playroom at home works when your child can move freely, see their choices, and put things away without help. Start with the movement zone and shelf, add one climbing piece, and adjust after a week of real use.