Quick answer
To customize your HG Zaku II J. Ridden's Custom, plan a color scheme, apply decals, and finish with weathering. Focus on panel lines and subtle shading for the best visual impact.
Why the HG Zaku II is a great customization base
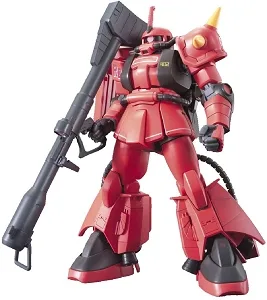
The HG Zaku II J. Ridden's Custom kit offers a straightforward building experience, making it ideal for hobbyists who want to practice customization techniques. Its classic mobile suit design provides a familiar canvas, and the included markings help you recreate the distinctive look or serve as a guide for your own scheme.
Because it's a High Grade kit, you can focus on painting, decaling, and weathering without worrying about complex assembly. This makes it a good choice if you're new to customizing or want to try a technique you haven't used before.
Choosing a paint scheme that fits your skill level
You can keep the original color scheme and just add shading and panel lines, or repaint the entire kit in a custom scheme. If you're new to painting, consider using spray cans or hand brushing with acrylics. For more advanced builders, an airbrush gives you finer control over gradients and highlights.
Remember that the kit's J. Ridden's custom color scheme is already distinctive. If you repaint, you'll need to match or replace the included decals to fit your new colors.
Customization steps
- Snap-fit and test pose: Build the kit without glue or paint first. This lets you see how parts fit and where panel lines are. It also helps you decide which areas to highlight or weather. Check that all parts fit snugly before painting.
- Sand and prep surfaces: Lightly sand all parts with fine grit (800-1000) to remove nub marks and mold lines. Wash parts in warm soapy water to remove release agents, then let them dry completely. Skipping this step can cause paint to peel or look uneven.
- Prime the kit: Apply a primer (gray is a safe choice) to all parts. This gives paint a uniform base and helps colors pop. Let it cure fully before painting. Use a light coat to avoid hiding panel lines.
- Paint your base colors: Spray or brush your chosen colors in thin layers. Build up coverage gradually to avoid drips. For the Zaku II, consider a slightly darker shade for the main body to allow for weathering contrast. Thin coats are better than one thick coat.
- Add panel lines and shading: Use a panel line accent color or a fine-tip pen to darken panel lines. For a more dynamic look, apply a wash or use an airbrush to add shadows along edges and recesses. Clean up excess with a cotton swab and lighter fluid or enamel thinner.
- Apply decals: Use the included markings or custom water-slide decals. Cut them out, soak in warm water, slide into place, and press gently. Seal with a clear coat after they dry. Use a setting solution to help decals conform to curved surfaces.
- Weathering and final seal: Add weathering with dry brushing, chipping, or a wash. Focus on edges and areas that would see wear. Finish with a matte or flat clear coat to protect your work. Less is often more – step back and check the balance.
Kit facts
-
Zaku II J. Ridden's Custom HG: The HG Zaku II J. Ridden's Custom kit includes parts and markings to recreate the distinctive look. The included markings give you a solid starting point for decal placement, whether you follow the original design or mix them with custom decals.
Zaku II J. Ridden's Custom HG