Quick answer
To install a car seat base with ISOFIX, locate the ISOFIX anchor points in your vehicle, attach the base connectors, push until you hear a click and see green indicators, then extend the support leg or top tether and tighten. Always check for a snug fit and no movement at the connection points.
Why a secure base installation matters
A correctly installed ISOFIX base reduces the risk of incorrect fitting, which is one of the most common car seat errors. The base stays fixed in the vehicle, so you only need to click the seat on and off without re-threading belts each time.
Modern bases like the Ickle Bubba Nimbus i-Size Spin Isofix Base meet both R129 and ISOFIX standards, meaning they undergo stricter side-impact and dynamic testing. However, even the safest base is only effective if installed properly.
Common installation pitfalls
Many parents assume a click means the base is fully locked, but a partial connection can loosen over time. Always push the base firmly into the seat bight until both connectors show green indicators.
Another frequent mistake is leaving slack in the vehicle seat belt if using a belt-secured base, or forgetting to lock the support leg on a load-leg base. Check the base manual for your specific model's locking sequence.
Step-by-step ISOFIX base installation
- Locate the ISOFIX anchor points: Check your vehicle manual for the exact location of the ISOFIX anchor points. They are usually found in the rear seat bight where the seat back meets the seat cushion, marked with a small ISOFIX symbol. If you cannot find the anchors, your vehicle may not have ISOFIX — check the manual or look for metal loops in the seat crease.
- Attach the ISOFIX connectors: Extend the two ISOFIX arms from the base. Align them with the anchor points and push until you hear a distinct click. Check that the indicators on the connectors turn green — red means not fully locked. A click alone is not enough; always verify the green indicator. If the connector won't click, check for obstructions like seat belt buckles or crumbs in the anchor.
- Deploy the support leg or top tether: If your base has a support leg (common on i-Size bases), press the release button and extend the leg until it touches the floor firmly. The leg's indicator should show green. For top tether bases, hook the strap to the designated anchor point and tighten until snug. A support leg that is not touching the floor or is over-extended can reduce stability. Adjust the leg length so it is firm but not lifting the base off the seat.
- Tighten and test for movement: Push the base firmly into the seat bight while tightening any tension straps or the support leg. Grasp the base at the belt path and try to move it side-to-side and front-to-back. It should not move more than 1 inch (2.5 cm) in any direction. If the base shifts more than allowed, release the connectors and reattach, ensuring the seat bight is clean and the base is pressed fully back before locking.
- Final safety check: Confirm all indicators are green, the support leg is stable, and the base is level according to the built-in bubble level or vehicle seat angle. Attach your car seat to the base and check that the seat clicks in securely with no wobble. Perform this check every time you reinstall the base or switch vehicles. A loose base can compromise crash protection even if the seat itself is correctly attached.
Product facts
-
Ickle Bubba Nimbus i-Size Spin Isofix Base: The Ickle Bubba Nimbus i-Size Spin Isofix Base meets both i-Size international safety (R129) and ISOFIX installation standards. This dual certification means the base is designed for easier, more secure fitting with clear red-to-green indicators that help you confirm correct installation at a glance.
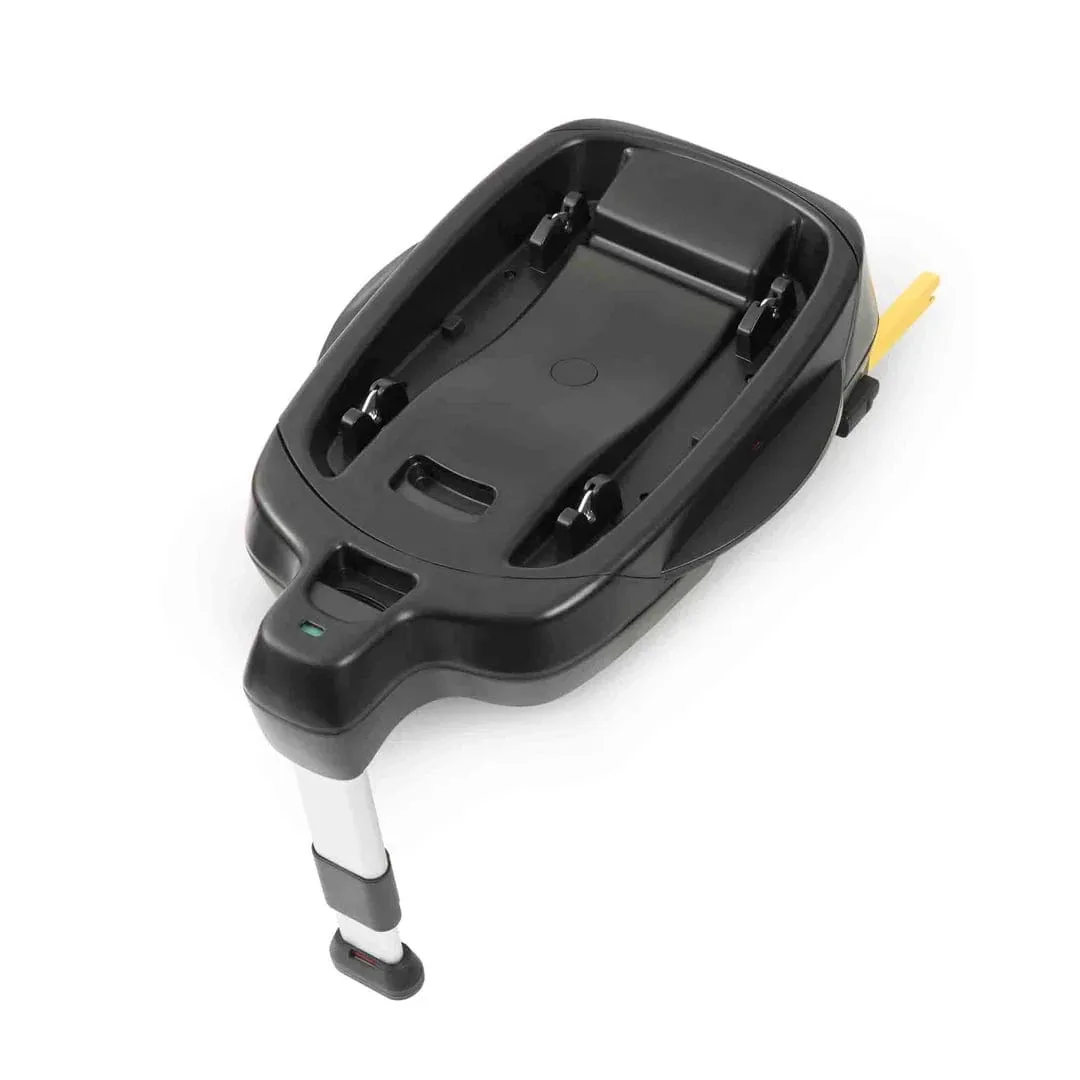
Ickle Bubba Nimbus i-Size Spin Isofix Base