Quick answer
To install Zendure Support Brackets for Solar Panels, choose a level ground spot, assemble the triangular frame, adjust the tilt angle between 20° and 35°, then securely mount your solar panel onto the bracket.
Why Use Support Brackets for Your Solar Panels
Support brackets elevate your solar panels off the ground, improving airflow and reducing the risk of overheating. They also allow you to adjust the tilt angle to capture more sunlight as seasons change.
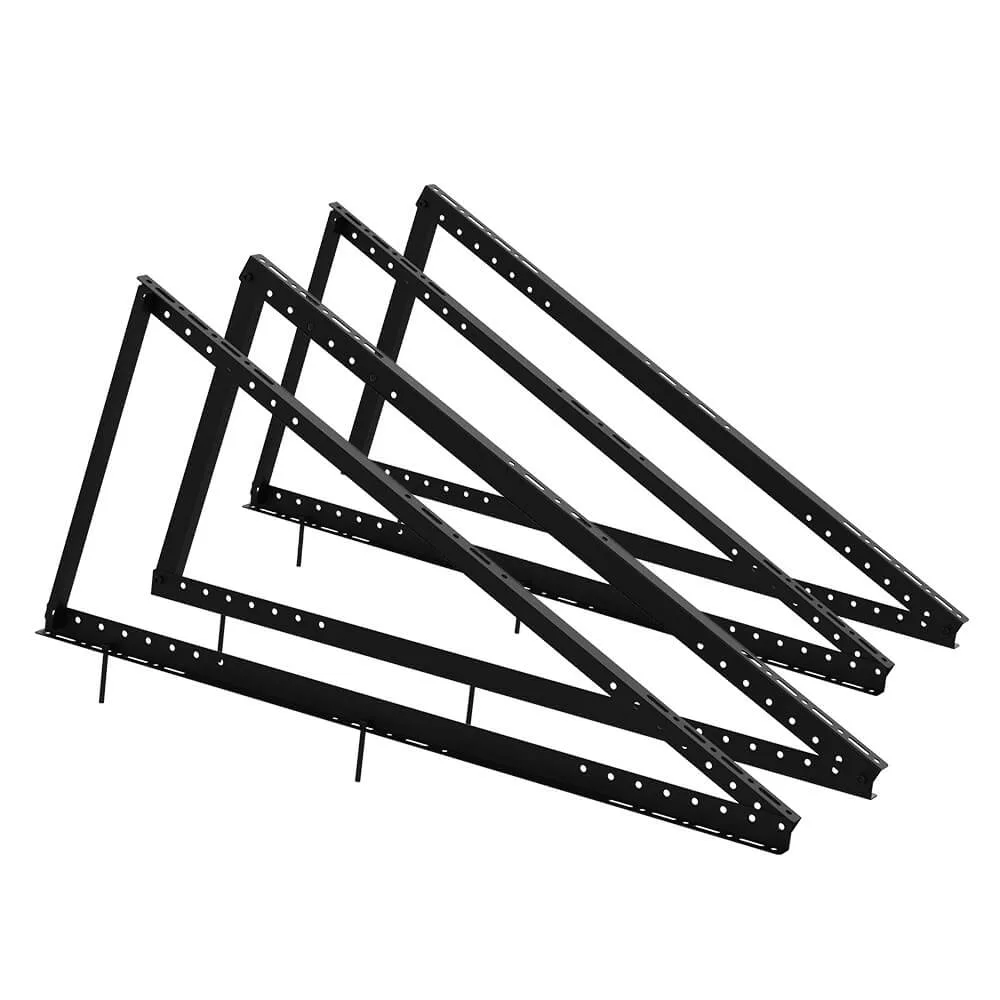
The Zendure Support Brackets feature a triangular frame that balances stability with a compact footprint, making them suitable for balconies, gardens, or flat rooftops where space is limited.
Before You Start: Tools and Site Prep
You will need a drill, screwdriver, level, measuring tape, and the bolts provided with the bracket. Check that your solar panel dimensions match the bracket's triangular frame (118 × 118 × 53 cm ±5 mm).
Choose a spot with firm, level ground. Avoid areas prone to standing water or loose soil, as the bracket needs a stable base to prevent tipping in strong winds.
Step-by-Step Installation Guide
- Step 1: Assemble the Triangular Frame: Lay out all bracket components on a flat surface. Connect the three main beams to form a triangle, securing each joint with the supplied bolts. Do not fully tighten yet. Common mistake: Over-tightening before alignment can cause the frame to sit crooked. Leave bolts loose until the frame is positioned.
- Step 2: Position the Frame on Your Installation Site: Carry the assembled frame to your chosen spot. Use a level to ensure the base is even. If the ground is uneven, dig small depressions rather than adding fill, which can settle later. Checkpoint: Confirm the frame does not wobble. An unstable base will compromise the entire installation.
- Step 3: Adjust the Tilt Angle: Locate the tilt adjustment mechanism on the rear leg. Set the angle between 20° and 35° depending on your latitude and season. Use the built-in notches for precise increments. Common mistake: Setting the angle too steep (over 35°) can reduce wind resistance and increase the risk of the panel catching strong gusts.
- Step 4: Secure the Frame to the Ground: Use the ground stakes or anchor bolts (not included with all models) to fix the bracket into the soil or concrete. Drive stakes at a 45° angle away from the frame for maximum hold. Checkpoint: If you are on a balcony or rooftop without soil, use concrete anchors. Never rely on the frame's weight alone.
- Step 5: Mount the Solar Panel: Place your solar panel onto the bracket's mounting rails. Align the panel's mounting holes with the bracket slots, then insert and tighten the bolts. Work diagonally to avoid warping the panel. Common mistake: Tightening one side fully before the other can bend the panel frame. Tighten all bolts gradually in a cross pattern.
- Step 6: Final Tightening and Inspection: Once the panel is mounted, go back and fully tighten every bolt on the frame and the panel mounts. Double-check the tilt angle with a protractor or angle finder. Checkpoint: After 24 hours, re-check all bolts. Temperature changes can cause slight loosening.
Product Facts
-
Support Brackets for Solar Panels: The triangular frame measures 118 × 118 × 53 cm (±5 mm) and allows tilt adjustment from 20° to 35° (±2°). This compact design fits most standard solar panels and lets you optimize energy yield throughout the year without needing extra tools.
Support Brackets for Solar Panels