Quick answer
To light your dungeon with LED torches, start by choosing battery-powered or wired torches that fit your terrain's scale, then plan their placement along walls and key focal points before building. Hide the wiring under floors or behind walls, and use diffusers or dimmers to create flickering, atmospheric light. Test the full setup before your game session to avoid mid-game surprises.
LED torches can turn a flat dungeon layout into a living, breathing scene. The flickering glow draws players' eyes to important areas and makes corridors feel genuinely dangerous. But without a plan, you can end up with tangled wires, dead batteries, or lights that wash out the whole table.
This guide walks you through a practical process for adding LED torch dungeon lighting to your terrain. You'll learn how to choose the right torches, place them for maximum impact, manage power, and keep the setup tidy. Whether you're lighting a single room or a sprawling dungeon, these steps will help you get reliable, atmospheric results.
Choose the right LED torches for your terrain
Not all LED torches are built for tabletop use. Look for small, self-contained units that run on button cells or coin batteries, or wired torches that connect to a central power source. Scale matters: a torch that's too large will look like a bonfire next to 28mm miniatures. Most dedicated dungeon lighting terrain uses torches around 1 to 1.5 inches tall, but check the product specs if available.
Consider the color temperature. Warm white (around 2700K–3000K) mimics firelight and feels more natural for torches, while cool white can look harsh and modern. Some LED torches include a flicker effect, which adds realism but can be distracting if overused. If you plan to use many torches, wired options with a single switch are easier to manage than dozens of individual batteries.
- Check the torch's diameter—it should fit into standard wall sockets or clips without wobbling.
- If you're buying unpainted terrain, you can paint the torch housing to match your dungeon's stone or wood.
- Test a single torch in a dim room before committing to a full set.
Plan placement before you build or glue anything
The biggest mistake is drilling or gluing first and realizing later that a torch blocks a door or casts shadows in the wrong direction. Lay out your dungeon tiles on the table and place unlit torches where you imagine them. Focus on key areas: entrances, treasure rooms, boss chambers, and long corridors that need a sense of depth. A torch every few feet is usually enough; too many lights flatten the scene and reduce contrast.
Think about the light's purpose. A torch near a secret door can hint at its importance. A row of torches along a corridor can guide players forward. In large rooms, place torches on opposite walls to create overlapping pools of light. If you're using terrain with built-in torch slots, like walls with sconces, use those as anchors and fill gaps with freestanding torches.
- Sketch a simple map with light positions marked—this helps you visualize coverage.
- Avoid placing torches directly behind a Game Master screen or where they'll shine in your eyes.
- Leave at least one dark area for contrast; not every corner needs light.
Install torches and hide the wiring
For individual torches with coin batteries, installation is as simple as attaching them to walls with removable adhesive putty or rare-earth magnets if your terrain has magnetic anchors. For wired torches, you'll need to route thin wires under floor tiles or behind walls. Many Dwarvenite pieces have channels or gaps where wires can be tucked away. If you're using a set with translucent pieces, like the Lava Advanced Builder (Painted), you can place a light panel underneath to create a glow without visible torches at all.
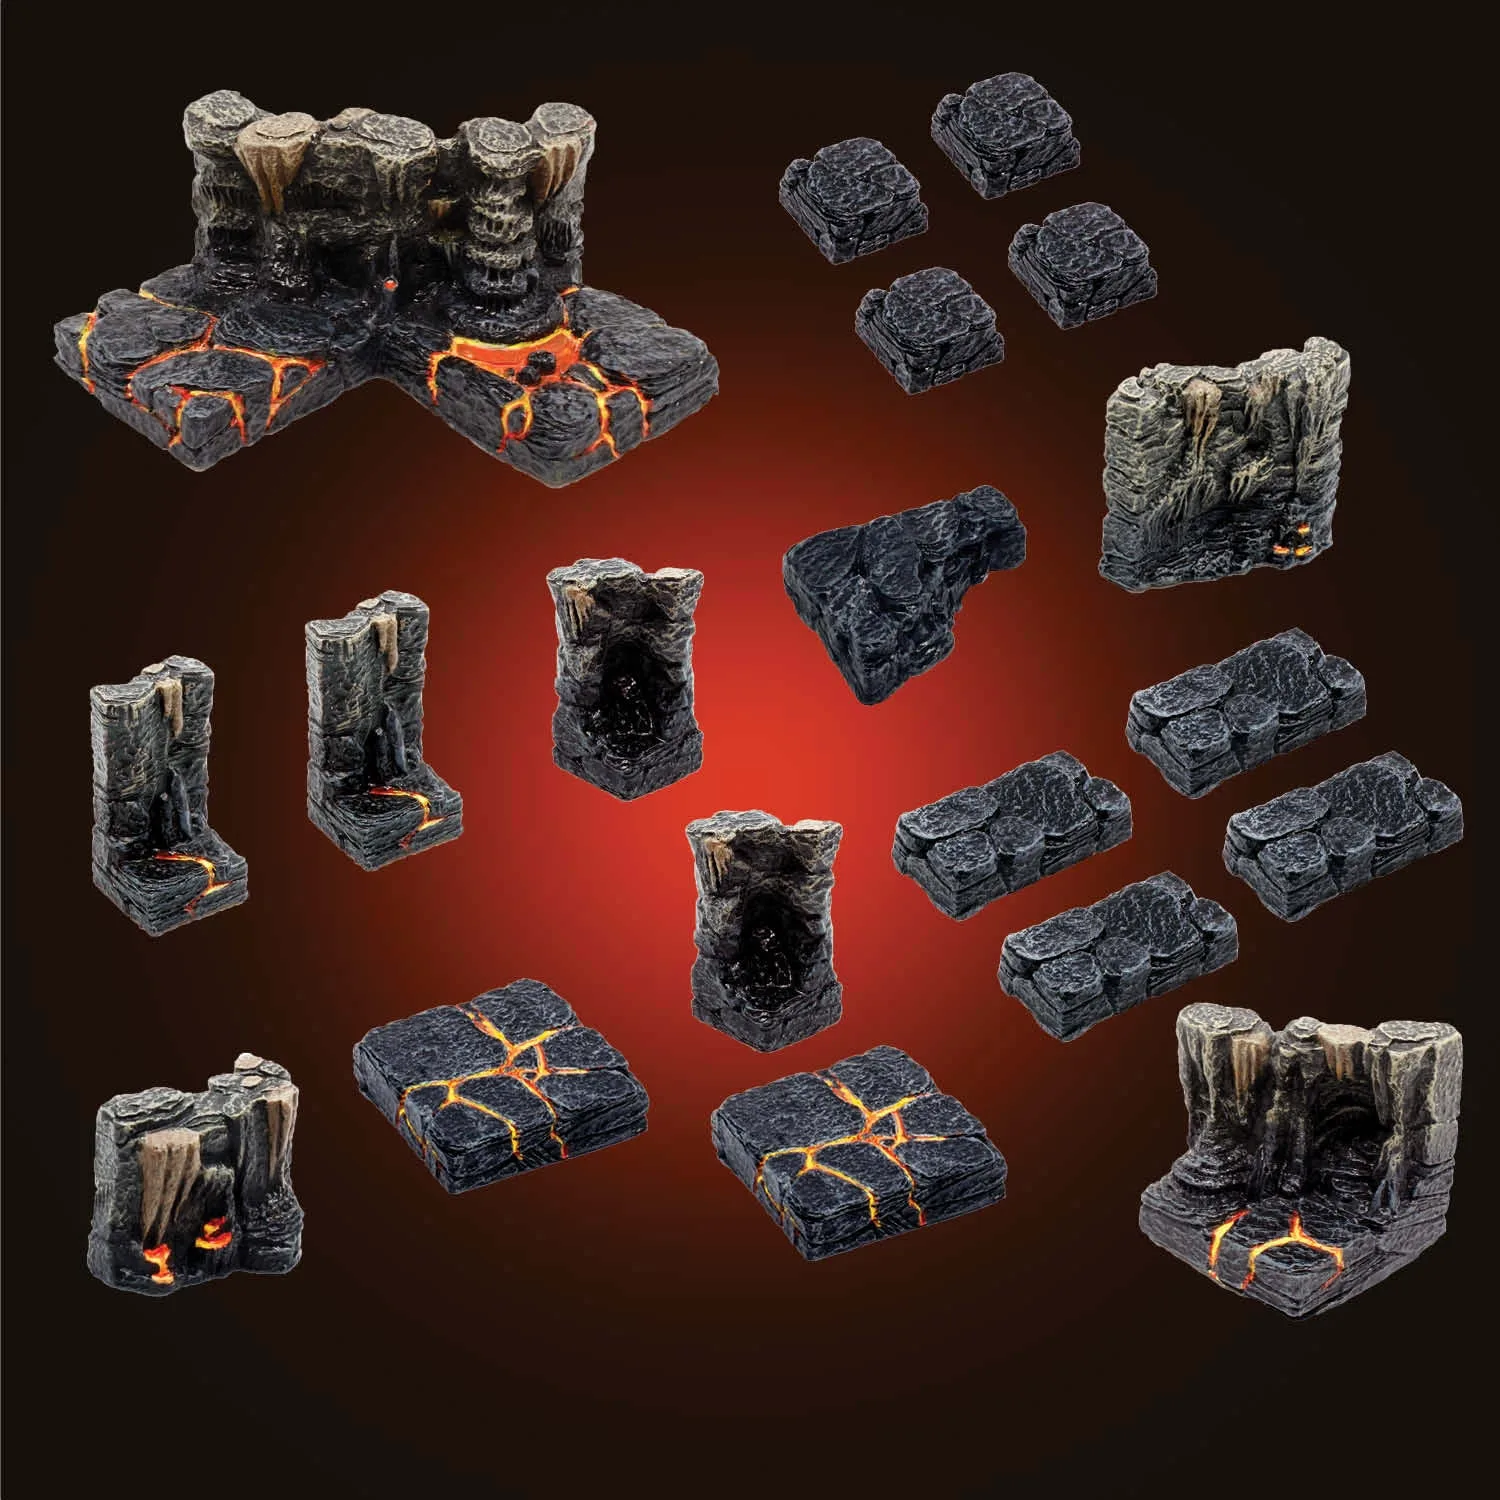
Lava Advanced Builder (Painted)
When drilling holes for wires, use a pin vise or small drill bit and go slowly to avoid cracking the terrain. Feed the wire through, then secure it with a dab of hot glue on the underside. Keep wires away from areas where players will rest their hands or place miniatures. If you can't hide a wire completely, run it along a wall base and cover it with scatter terrain like rubble or a rug.
- Label your wires if you're using multiple circuits—it saves time when troubleshooting.
- Use black or dark brown wire to blend into shadowy areas.
- Test each torch after installation before moving to the next.
Power and control your lights
Battery-powered torches are convenient but can dim over time and require replacements. Wired setups with a central battery pack or USB power bank give consistent brightness and a single on/off point. If you're using many torches, consider a switched power strip or a remote control outlet so you can turn them all on at once. For flicker effects, some LED torches have built-in circuits; otherwise, you can use a flickering LED driver.
Dimmers are useful for adjusting ambience. During exploration, keep lights low; during combat, brighten them for clarity. If your torches are too bright, add a diffuser like a small piece of parchment paper or a thin layer of hot glue over the LED. This softens the light and reduces glare. Always check that your power source can handle the total current draw—most small LEDs draw 20mA or less, so a 2000mAh battery pack can run dozens for hours.
- Keep spare batteries and a small screwdriver in your gaming kit.
- If using USB power, a portable charger with a switch is ideal.
- Test battery life before a long session—run the lights for an hour and check brightness.
Create atmosphere with light and shadow
The goal of dungeon ambience lighting is not to illuminate everything, but to create mood. Use torches to cast warm pools of light and leave other areas in shadow. You can enhance this by placing torches at different heights—some on walls, some on floors or pedestals. The Dread Pedestal - Sinister (Painted) has a 4"x4" footprint and sits 2" high, with four pole accessory holes that can hold torches or other accessories, making it a great centerpiece for a ritual chamber or throne room.
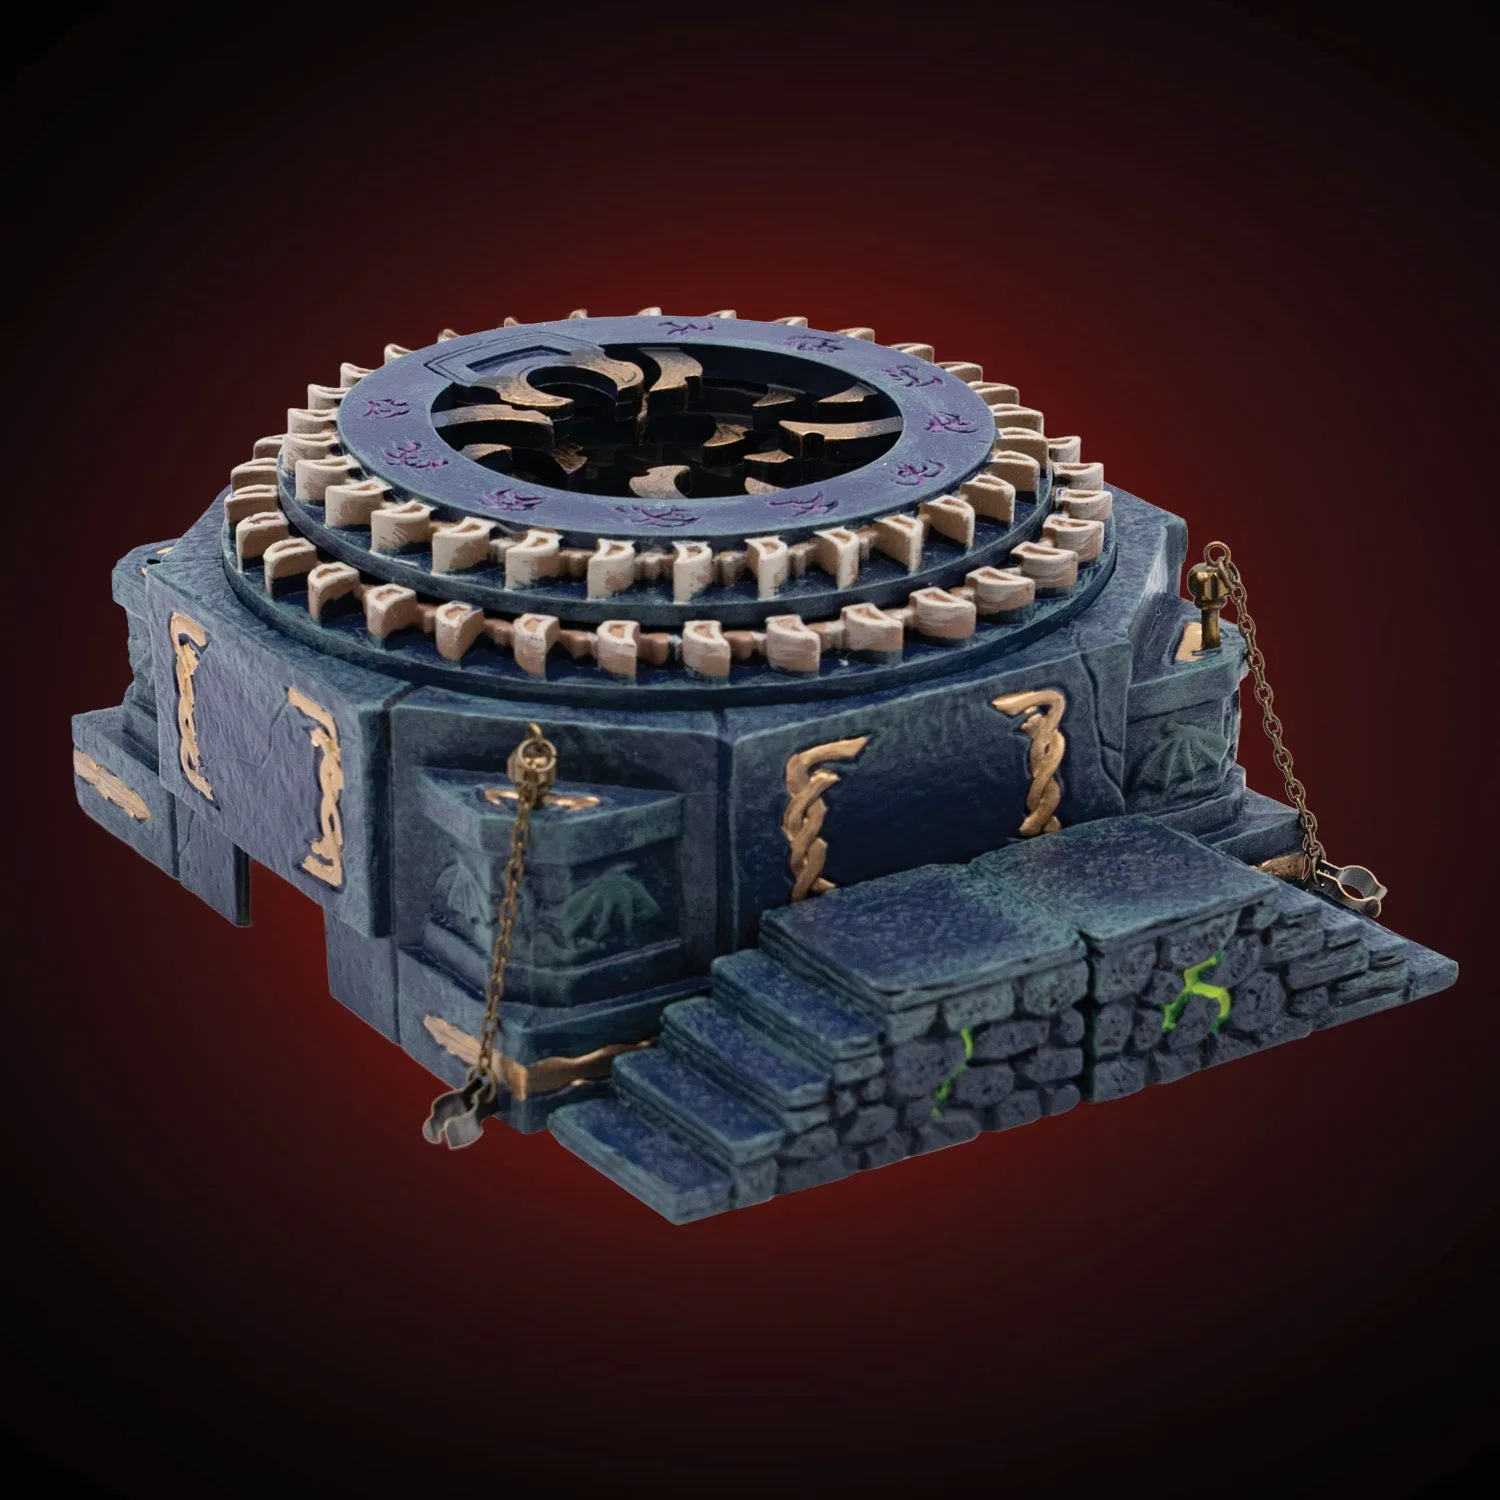
Dread Pedestal - Sinister (Painted)
Combine torchlight with other light sources. A translucent piece like the Lava Advanced Builder (Painted) can be lit from below with DF Light Panels (sold separately) to create a glowing lava effect, while torches provide warm accents. For a magical feel, use colored LEDs—blue for arcane, green for necrotic. Just remember that colored light can make miniatures harder to see, so use it sparingly.
- Place a torch behind a translucent piece to create a silhouette effect.
- Use a small piece of colored cellophane over an LED to change its color temporarily.
- Dim the room lights during key scenes to make the torches pop.
Test and troubleshoot before game night
A dry run saves frustration. Set up your full dungeon with lights on, then turn off the room lights. Walk around the table as players would. Check for glare, dead spots, and wires that might snag. If a torch is too dim, replace its battery or check the connection. If a light flickers unexpectedly, it might be a loose wire—secure it. Also consider heat: LEDs run cool, but if you're using incandescent bulbs (unlikely), ensure ventilation.
Have a backup plan. Keep a few battery-powered torches on hand in case a wired circuit fails. A small flashlight can substitute for a torch in a pinch. After the session, turn off all lights and remove batteries if you won't play again soon. Store torches in a padded box to prevent damage.
- Run your lights for at least 30 minutes before the game to check for overheating or dimming.
- Keep a multi-tool and spare batteries in your terrain kit.
- Take a photo of your lit setup to remember what worked.
Step-by-step: LED torch setup checklist
- Choose torches that match your scale and power needs: Pick small LED torches with warm white light and either coin batteries or wired connections. Avoid oversized or overly bright units. Checkpoint: A single torch should look proportional next to a 28mm miniature.
- Lay out your dungeon and mark light positions: Place unlit torches on the table before building. Focus on entrances, corridors, and key rooms. Leave some areas dark for contrast. Checkpoint: You can see a clear path of light that guides the eye without flat, even illumination.
- Install torches and conceal wires: Use adhesive putty or magnets for battery torches. For wired torches, drill small holes and route wires under floors or behind walls. Secure with hot glue. Checkpoint: No wires are visible from a player's typical viewing angle.
- Set up power and controls: Connect wired torches to a central battery pack or USB power source with a switch. Use dimmers or diffusers to adjust brightness. Checkpoint: You can turn all lights on or off with one action.
- Test the full setup in dim light: Turn off room lights and walk around the table. Check for glare, dead spots, and flickering. Replace batteries or fix connections as needed. Checkpoint: The lighting enhances the scene without making miniatures hard to see.
- Refine ambience with shadows and color: Adjust torch heights and positions to cast dramatic shadows. Add colored LEDs sparingly for magical effects. Checkpoint: The dungeon feels atmospheric and immersive, not just brightly lit.
Dwarven Forge products that work well with LED torches
- Lava Advanced Builder (Painted): This set contains a mix of versatile pieces, both small and large, that are ideal for complicated layouts and recreating specific maps from published modules. The big 4"x4" Convex Curve is one of our favorites pieces for gentle, organic corners, and the two Swell Walls work together to break up long straight runs. Since this set is cast in translucent Dwarvenite, you can add illumination with DF Light Panels (sold separately). The translucent material lets you light the set from below or within, creating a glowing lava effect that pairs beautifully with torchlight on nearby walls. It's a way to add dungeon lighting terrain without visible fixtures.
- Dread Pedestal - Sinister (Painted): A versatile showpiece collection that can be the center of any scene. First, brand new to this campaign, is the Dread Pedestal. This chunky piece boasts a solid 4"x4" footprint and sits 2" high. It has four pole accessory holes to further tweak its look by adding thematic accessories, such as the included manacles. It builds in-line with your other pieces like a large 4x4 floor, or can be scatter built on top of... The four pole accessory holes are perfect for mounting LED torches or other light sources at different heights, making it a focal point for ambience. Its 2" height raises lights above the floor, casting longer shadows.
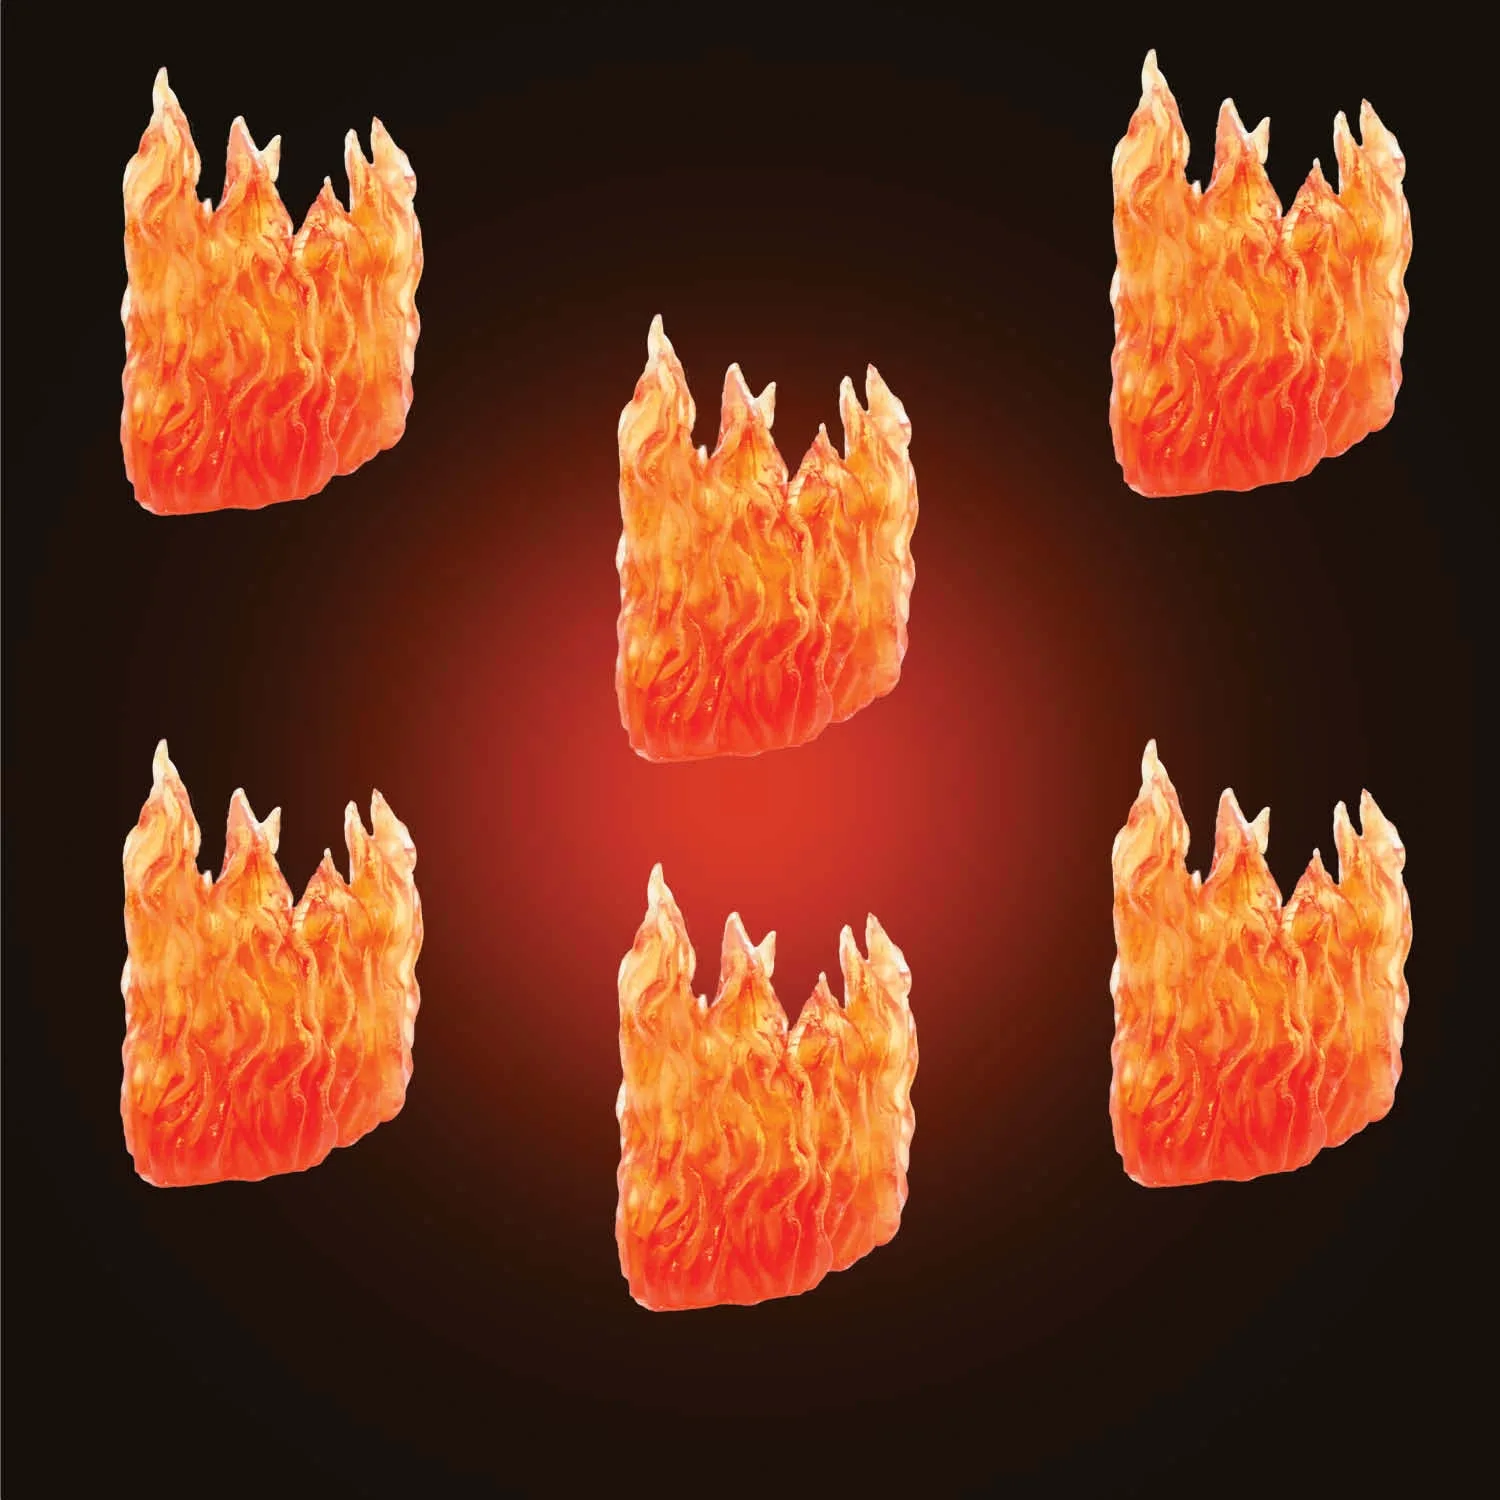
- Wall of Fire Pack (Painted): Half a dozen walls of fire to create spell effects, hazards, or just fiery decor. These walls are 2" wide so they fit in a standard passage. They have a gentle curve to them so they can be used to create either a wall or a circle. These translucent pieces can be backlit with LEDs to simulate a burning wall, adding dramatic dungeon ambience lighting. Their 2" width fits standard passages, so you can integrate them into corridors without blocking movement.
Lighting your dungeon with LED torches is a rewarding project that transforms your tabletop. Start with a clear plan, choose torches that fit your terrain, and hide the wiring for a clean look. Test everything before game night, and don't be afraid to adjust for mood. With a little effort, you'll create a memorable, atmospheric dungeon that your players will love.