Quick answer
To make ice pops at home without sticking or freezing issues, start with a mold that releases cleanly, use a balanced liquid that is not too sugary or too watery, and freeze in stages with proper airflow. The most common mistake is overfilling the mold or using thick purees that trap air and expand unevenly. Follow the steps below for reliable results every time.
Why ice pops stick and fail to freeze evenly
Sticking usually happens when the mold is not designed for easy release or when the liquid is too dense. High-sugar mixtures stay soft and glue-like, while very watery mixtures freeze into hard blocks that cling to the mold. Uneven freezing comes from filling the mold too high, placing it in a warm part of the freezer, or stacking molds so air cannot circulate. A good mold with a flexible base or individual cavities solves most sticking problems before they start.
Freezing time also matters. Most home freezers need at least 4 to 6 hours for standard pops, but dense or large molds can take 8 hours or more. If your pops are still slushy in the center after that, the issue is usually temperature or overcrowding, not the recipe.
Choosing the right mold and tools
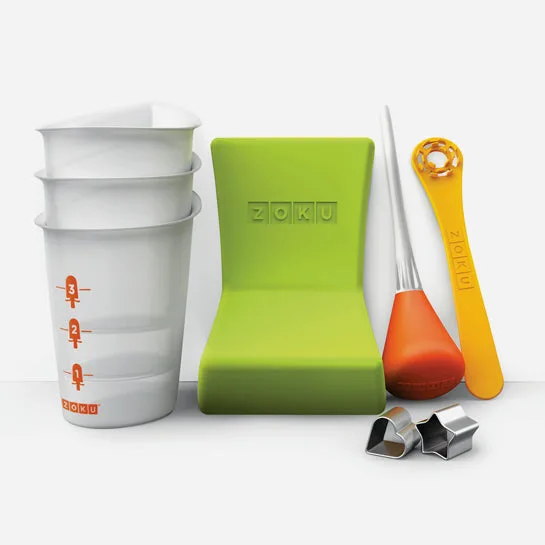
tools
Look for molds made from flexible silicone or with a quick-release design. Rigid plastic molds can work, but they often require a warm water dip to release the pop, which melts the surface. Silicone molds let you push the pop out from the bottom without thawing. If you are making layered or filled pops, choose a mold with a wide opening so you can add chunks of fruit without trapping air pockets.
For stick-free results, avoid metal molds unless they are specifically designed for ice pops, as metal conducts cold too quickly and can make removal difficult. A mold with a lid or individual covers also prevents freezer burn and keeps pops from absorbing odors.
Balancing your ice pop base for clean freezing
The ideal ice pop base is about 70% water or juice and 30% sugar, fruit puree, or dairy. Too much sugar keeps the pop from freezing solid, while too little makes it icy and hard. If you are using very sweet fruit like mango or banana, add a squeeze of lemon or a pinch of salt to balance the flavor and improve texture. For creamy pops, use full-fat yogurt or coconut milk instead of skim milk, which freezes into ice crystals.
Always taste your mixture before freezing. It should taste slightly sweeter than you want the final pop, because freezing dulls sweetness. If the mixture is too thick, thin it with a little water or juice so it pours easily and fills the mold without air gaps.
Step-by-step: How to make ice pops without sticking or freezing issues
- Step 1: Prepare your mold and workspace: Wash and dry your mold completely. Any residual water or oil can cause sticking. Place the mold on a small tray or sheet pan so it stays level when you move it to the freezer. Checkpoint: The mold should be at room temperature, not cold from the fridge.
- Step 2: Mix your base and taste it: Blend or stir your ingredients until smooth. Aim for a pourable consistency. If it is too thick, add liquid one tablespoon at a time. Taste and adjust sweetness—remember it will taste less sweet when frozen. Common mistake: Adding too much sugar, which prevents full freezing and causes a sticky, soft pop.
- Step 3: Fill the mold with headspace: Pour the mixture into each cavity, leaving about 1/4 inch (6 mm) of space at the top. This allows for expansion as the liquid freezes. If you overfill, the pop will push against the lid and create a mess or crack. Checkpoint: The liquid should not touch the underside of the lid.
- Step 4: Insert sticks and freeze flat: Place sticks according to your mold's design. If using wooden sticks, insert them after the pop has frozen for about 1 hour so they stand straight. Freeze the mold flat on a level shelf, away from the freezer door and other items. Common mistake: Freezing at an angle or too close to the freezer walls, which causes uneven freezing and sticking.
- Step 5: Wait the full freezing time: Freeze for at least 6 hours for standard pops, or up to 8 hours for large or creamy molds. Do not check early by wiggling the stick—this creates cracks and air pockets. If your freezer is packed, add 2 extra hours. Checkpoint: The pop should feel rock solid and the stick should not move when gently twisted.
- Step 6: Release without force: For silicone molds, press up from the bottom to release. For rigid molds, dip the mold in lukewarm water for 5 to 10 seconds, then pull the stick. Never use hot water or a knife, which can damage the mold or crack the pop. Common mistake: Twisting the stick too hard, which breaks the pop or leaves the bottom stuck.
- Step 7: Store properly to prevent sticking: If not eating immediately, wrap each pop in parchment paper or place in a freezer bag. Lay them flat or stand them upright in a container. Avoid stacking unwrapped pops, which freeze together. Next step: Label with the date and use within 2 weeks for best flavor and texture.
Product facts
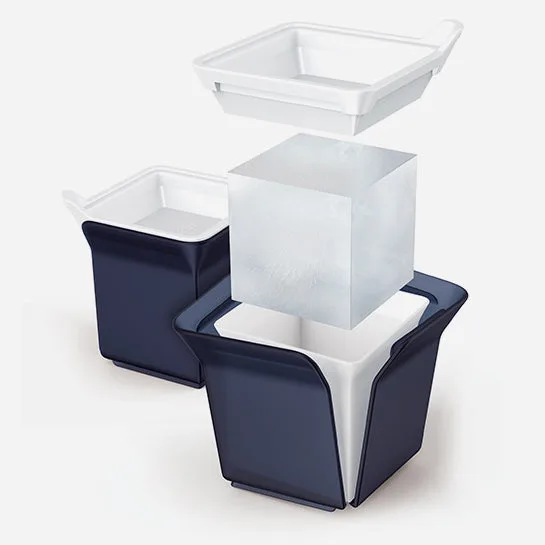
- Cube Ice Molds: Cube Ice Molds are perfect for enjoying your favorite drinks without diluting the taste. Simply fill the ice mold, snap on the lid, and freeze. Once ready, easily remove the ice cubes—no rinsing needed! These slow-melting cubes keep your beverages cool and maintain flavor longer. The same snap-lid, no-rinse release design translates well to ice pops: a secure lid prevents spills and freezer burn, and the easy removal means less sticking and no need to run the mold under water.
- Set of 2 Slush & Shake Makers - Orange and Green: The ZOKU Slush & Shake Maker can make refreshing slushies, milkshakes, frozen alcoholic drinks and healthy fruit smoothies in as little 7 minutes right on your countertop. If you want to make ice pops with a slushy or shake-like texture, you can pre-freeze your base in this maker first, then pour it into molds. This shortcut avoids icy separation and gives a smoother bite.