Quick Answer
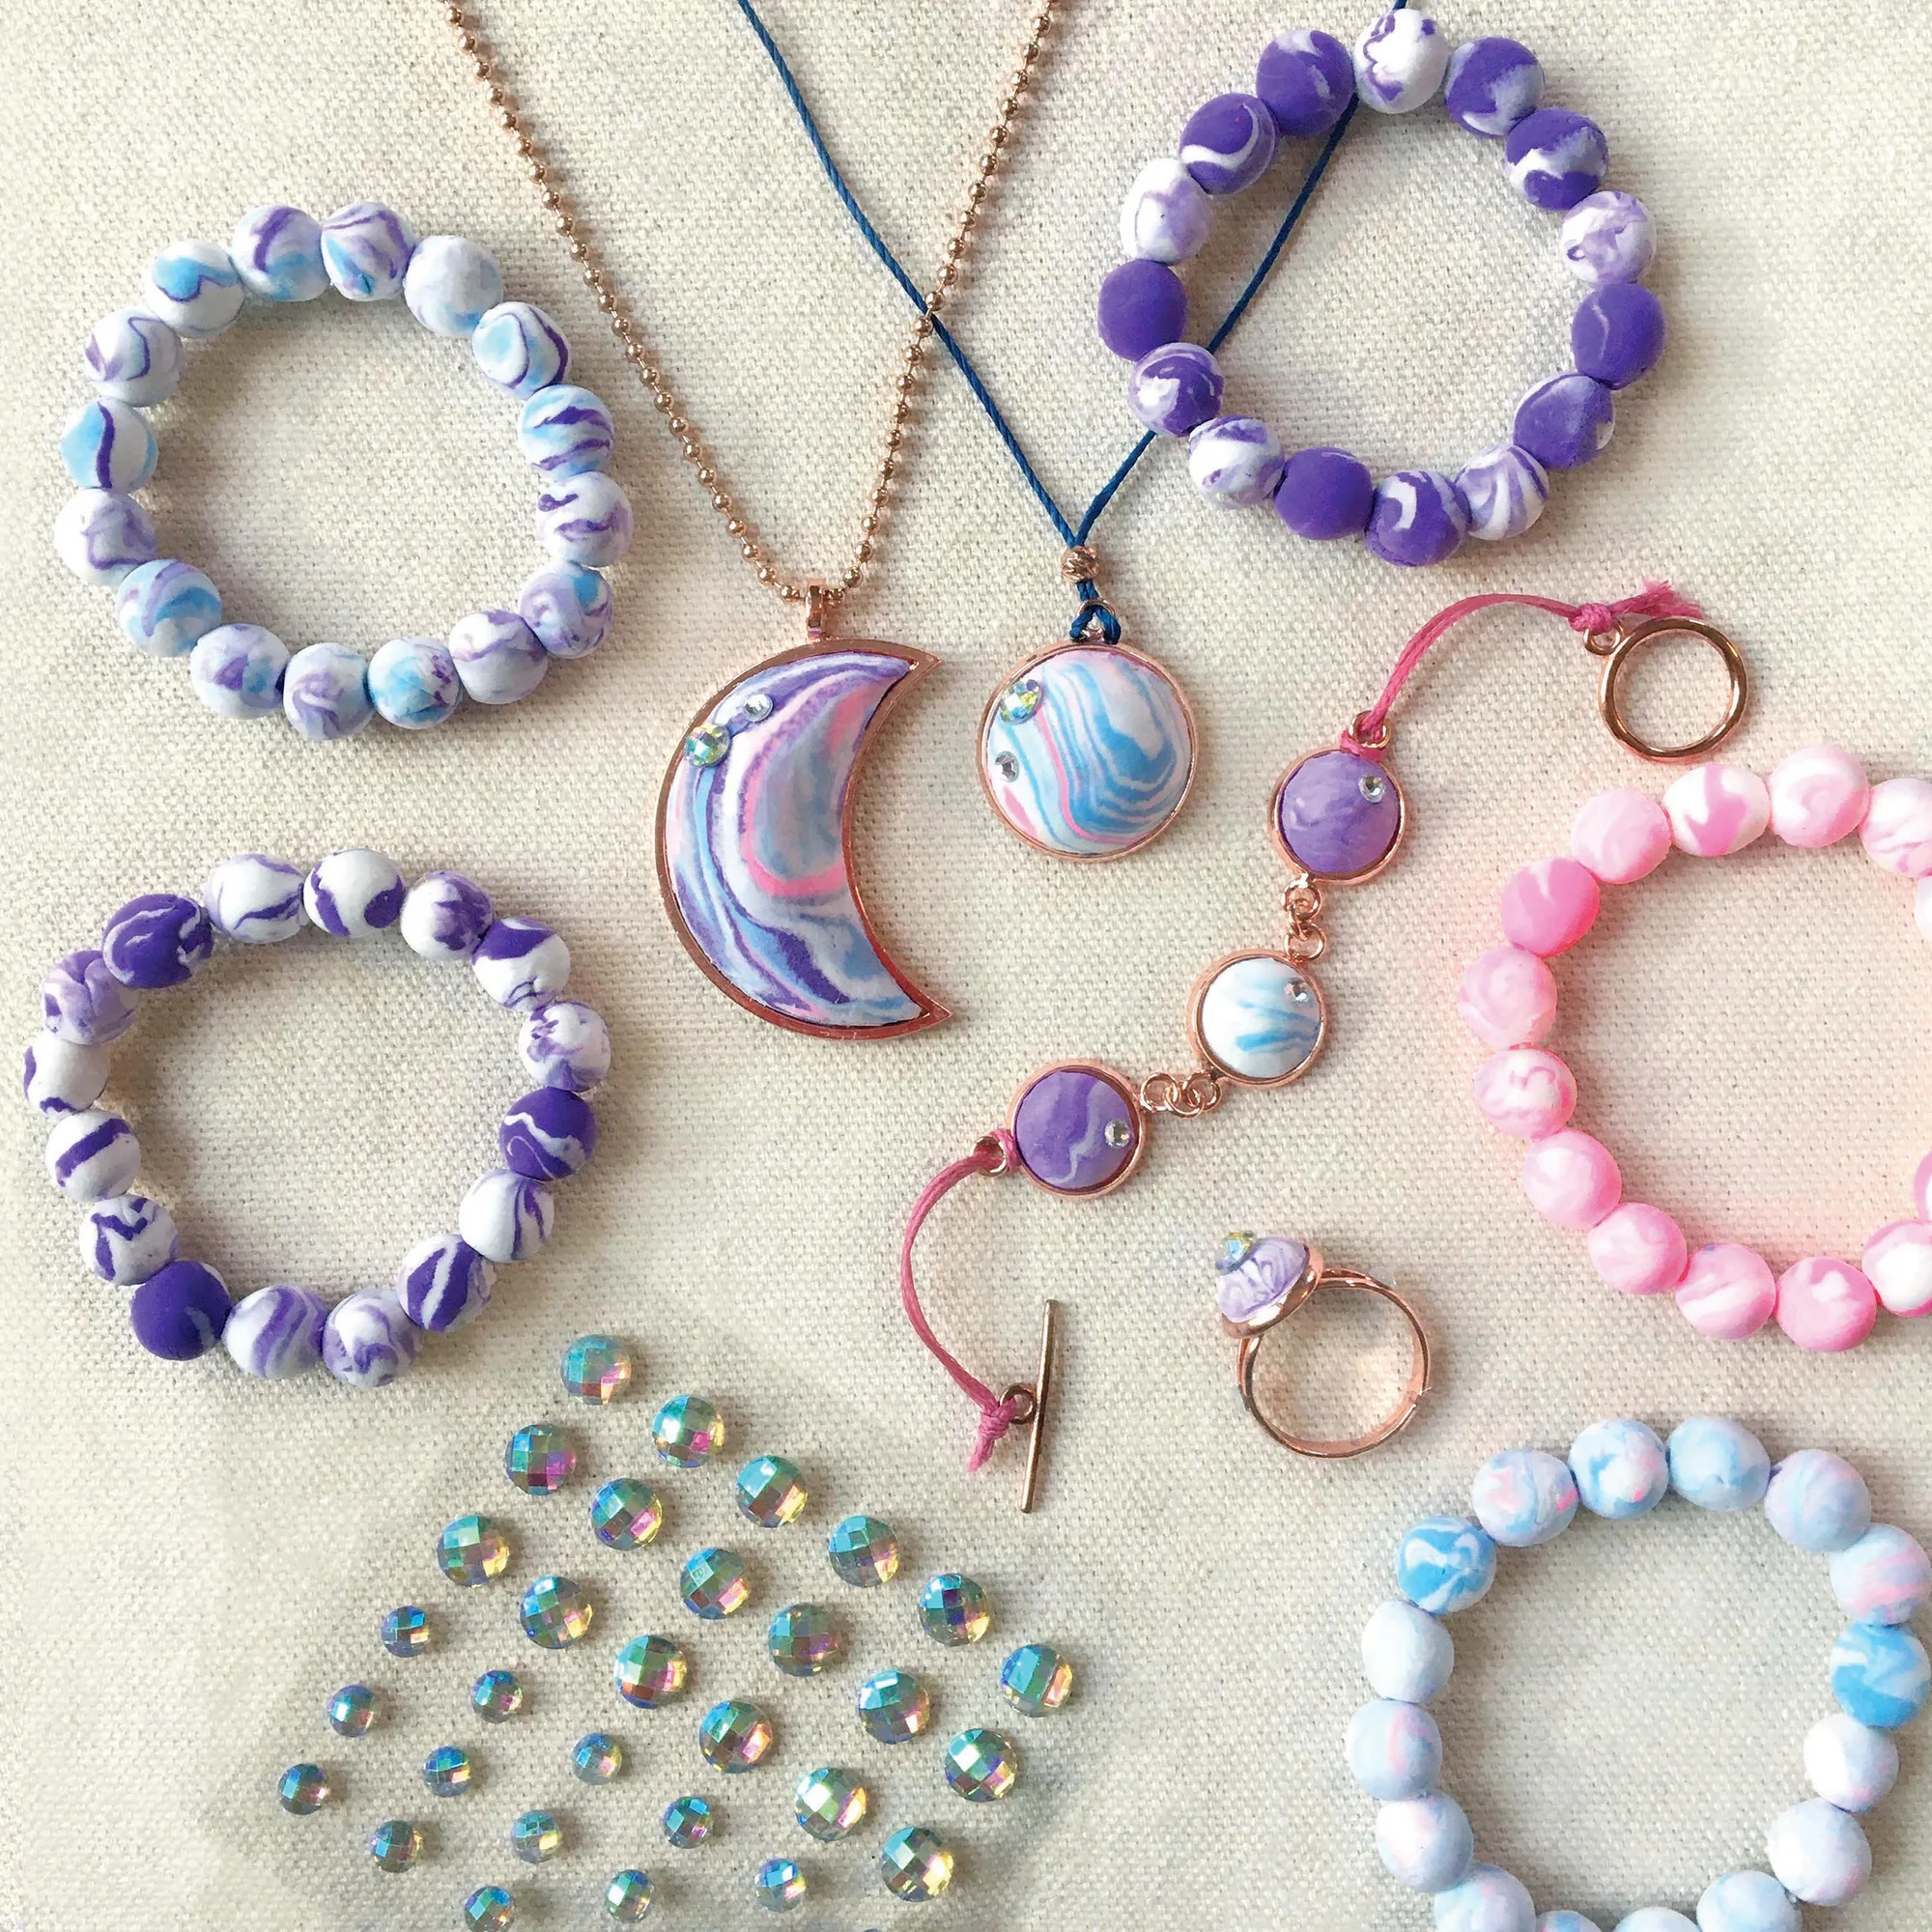
To make marbled moon jewelry, swirl two colors of air-dry clay together, press into rose gold findings, add gems, and let dry. The Wish*Craft kit includes everything you need for five bracelets, two necklaces, a charm bracelet, and a ring.
Why Marbling Creates Unique Pieces
The marbling technique works by twisting two clay colors together without overmixing. The result is a swirled pattern that mimics natural stone, so every piece you make will look different. This makes the craft exciting for kids and satisfying for adults who want one-of-a-kind accessories.
Trade-Off: Air-Dry Clay Needs Patience
Air-dry clay is easy to shape and requires no oven, but it must dry completely before you wear the jewelry. Rushing this step can cause cracks or misshapen pieces. Plan for at least a few hours of drying time, and handle the pieces gently while they set.
Step-by-Step: Make Marbled Moon Jewelry
- Prepare your workspace: Lay out a clean, flat surface and gather the clay, findings, and gems from the kit. Keep a small bowl of water nearby to moisten your fingers if the clay starts to stick. A non-stick mat or parchment paper makes cleanup easier.
- Choose two clay colors: Pick two colors that you want to marble. Roll each into a snake shape, then twist them together gently. Avoid overmixing—you want distinct swirls, not a solid new color. If the colors blend too much, start over with fresh clay for a clearer marbled pattern.
- Form the clay into small balls or shapes: Break off small pieces of the twisted clay and roll them into balls that fit your findings. For bracelets, make beads; for pendants, make a flat disc that will sit in the rose gold setting. Keep the pieces uniform in size so your jewelry looks balanced.
- Set the clay into the rose gold findings: Press each clay piece gently into the pendant, ring, or bead finding. Make sure it fits snugly and the marbled pattern faces outward. Add gems while the clay is still soft for extra shimmer. Don't press too hard—you could distort the pattern or push the clay through the finding.
- Let the clay dry completely: Place the finished pieces on a flat surface and allow them to air-dry. Drying time varies, but wait until the clay is hard and no longer cool to the touch before wearing or handling further. Check for any cracks after drying; you can smooth them with a little water and let it dry again.
- Assemble your jewelry: String the marbled beads onto the included cords to make bracelets, attach pendants to necklaces, and put together the charm bracelet and ring. Follow the kit's instructions for the order of components. Lay out all pieces before assembly to ensure you have everything you need.
What's in the Kit
-
Wish*Craft Marbled Moon Jewelry: Includes 4 colors of air-dry clay, rose gold pendants and jewelry findings, and gems for shimmer. You don't need to buy extra supplies—everything to make five bracelets, two necklaces, a charm bracelet, and a ring is in the box.
Wish*Craft Marbled Moon Jewelry