Quick Answer
Use the weak-adhesive Mr.Masking Tape (MT605) for gentle curves on painted surfaces and the strong-adhesive version (MT604) for tight curves on bare plastic. The assortment lets you test both before committing to a full roll.
Why Tape Choice Matters for Curves
Curved masking is tricky because standard tape either lifts at the edges or leaves adhesive residue. Mr.Masking Tape Assortment includes four types with different adhesive strengths so you can match the tape to the surface and curve radius. The weak-adhesive tape (MT605) is ideal for curves over a painted coat where you want to avoid peeling the underlying layer. The strong-adhesive tape (MT604) holds tighter on bare plastic for sharp compound curves.
The assortment also includes the easy-cut PET case feature from the MT606. You can cut the tape without removing it from the case, which reduces dust accumulation on the adhesive side—a small but real advantage when you are placing multiple short curved strips.
Step-by-Step: Masking Curves with Mr.Masking Tape
- Choose the Right Tape Width and Adhesion: For gentle curves (e.g., wing roots, helmet domes), start with the 10mm weak-adhesive tape (MT605). For tight curves (e.g., panel line intersections, small circular details), use the 10mm strong-adhesive tape (MT604). The assortment includes both so you can compare. Common mistake: using strong-adhesive tape on fresh paint—it can lift the paint when removed.
- Cut Short Overlapping Strips, Not One Long Piece: Cut the tape into 15–20 mm lengths using the easy-cut case. Place each strip so that it overlaps the previous one by about 2 mm. This prevents the tape from lifting at the curve's apex. Checkpoint: if the tape wrinkles or bubbles, the strip is too long. Cut shorter pieces.
- Burnish the Tape Edge with a Cotton Swab: After placing all strips, run a cotton swab firmly along the tape edge that borders the paint line. This seals the edge and prevents paint bleed. Pay extra attention at the overlap points. Common mistake: skipping burnishing on curves—paint always finds the unsealed edge.
- Paint and Remove While the Paint Is Still Tacky: Apply your paint in thin coats. Remove the tape as soon as the final coat is dry to the touch but not fully cured (usually 10–15 minutes). Pull the tape back over itself at a 180-degree angle to avoid lifting the fresh paint edge. Checkpoint: if the tape resists removal, wait another 5 minutes. Forcing it can tear the paint.
Product Facts
-
Mr.Masking Tape Assortment (4 Types) (MT607): This assortment features four popular types of Mr.Masking Tape, including MT604 (Strong Adhesive) and MT605 (Weak Adhesive), both 10mm wide. You can test both adhesive strengths on your curved surface before buying full rolls, saving money and avoiding paint damage.
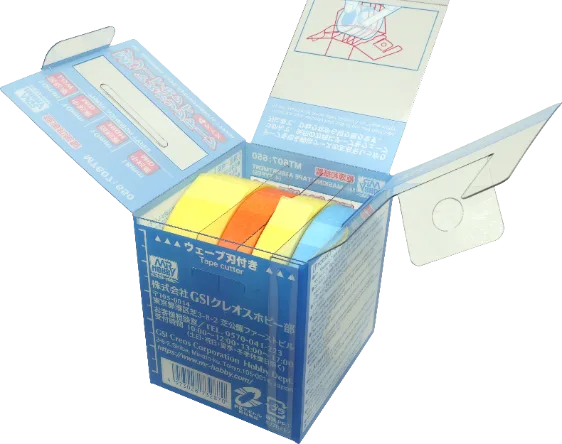
Mr.Masking Tape Assortment (4 Types) (MT607)
-
Mr.Masking Tape Assortment (4 Types) (MT607): It includes the same easy-cut function used in the MT606 50mm wide PET case, allowing you to cut without removing the tape. Less dust on the adhesive means better adhesion on curves and fewer paint bleeds under the tape edge.