Quick answer
Organise a small craft room by working in one zone at a time: empty the space, sort supplies by station, store vertically, label everything, and keep only what you use. The goal isn't a perfect room; it's a room where you can find a tool in seconds and put it back just as fast.
A small craft room doesn't need more space; it needs a system that matches how you actually make things. If you've ever cleared a spot on the desk only to lose it again by the next project, the problem is usually storage flow, not square footage.
This guide walks through a practical order of operations for craft room organisation in tight spaces. You'll sort by station, use vertical space, label what you can't see, and build small habits that keep the room usable between projects.
Start with a full clear-out, not a tidy-up
Before buying a single basket, empty the room as much as you can. Pull everything out of drawers, boxes, and shelves and pile it in one visible area. This feels worse before it gets better, but it forces you to see duplicates, dried-out adhesives, and supplies you forgot you owned.
The most common mistake is starting with storage containers. Buying bins first locks you into a shape and size before you know what you're storing. Sort first, measure second, buy third.
- Set aside a 'maybe' box and revisit it in two weeks; if you haven't reached for it, it can go.
- Check inkpads, glues, and markers for dryness as you go so you're not storing dead supplies.
Sort by station, not by product type
Group supplies by the activity they belong to: stamping, die cutting, colouring, sewing, and finishing. A die cutting station holds your machine, cutting plates, dies, and a bone folder. A colouring station holds markers, pencils, and a mixing palette. This mirrors how you work and stops you walking across the room mid-project.
Once grouped, you can see which station is oversized for your space and which supplies are homeless. Stray items usually belong to a station you haven't defined yet.
- Keep a small tray for in-progress projects so a half-finished card doesn't spread across the desk.
- If a station has more than three containers, split it into two sub-stations.
Go vertical and use the back of the door
Floor and desk space run out fast; wall and door space usually doesn't. Mount shallow shelves above the desk for inks and markers, hang a pegboard or rail for scissors, tweezers, and rulers, and use an over-door organiser for lightweight supplies. Clear containers at eye level let you see stock without opening anything.
Deep shelves are a trap in small rooms because items disappear behind each other. Favour shallow shelves, risers, and drawer inserts so everything is one layer deep where possible.
- Measure the gap between shelf and desk before buying risers; you need clearance to lift items out.
- Keep heavy items low and light, rarely used items high.
Label everything you can't see through
Opaque boxes and drawers are efficient but forgettable. Label the front and, if the box is deep, the lid too. A label that names the station and the contents, such as 'Die cutting: plates and shims', saves you opening five boxes to find one item.
If you share the room or craft with family, labels also stop supplies drifting into the wrong zone. A simple label maker or washi tape and a marker works fine; consistency matters more than fancy equipment.
- Label the shelf edge as well as the container so empty spots are obvious at a glance.
- Review labels after a month and rename anything you keep misplacing.
Use stash and store tips to protect what you keep
Storing supplies well is part of organising them. Keep paper and cardstock flat and away from damp, store inks upright with lids sealed, and keep adhesives out of direct heat. Small items like sequins, magnets, and gilding flakes are best in shallow lidded containers so they don't migrate.
A stash and store approach means having a designated home for overflow, not just for current stock. When a sale or new kit arrives, it goes into the overflow spot rather than onto the desk.
- Store cardstock by colour family so you can pull a shade without flipping the whole stack.
- Keep a small 'use first' bin for partial packs and opened supplies.
Build a five-minute reset habit
The system only holds if it's easy to return to. End each session with a five-minute reset: put tools back in their station, close adhesives, and clear the desk surface. This is the single habit that keeps a small craft room from collapsing back into clutter.
If resetting takes longer than five minutes, something in the layout is wrong. Move the most-used items closer to where you sit and move rarely used items further away.
- Keep a waste bin and a 'to sort' tray within arm's reach of your seat.
- Photograph your organised setup so you can restore it after a busy project.
Seven-step small craft room reset
- Empty and assess: Clear one zone completely and pile everything where you can see it. Checkpoint: if you can't name what a container holds, it needs sorting.
- Sort by station: Group supplies into stamping, die cutting, colouring, sewing, and finishing piles. Mistake to avoid: sorting by colour or brand instead of by how you work.
- Purge duplicates and dead stock: Test markers, inks, and adhesives; bin anything dried out and set duplicates aside for donation. Checkpoint: aim to remove at least one full bag before you buy storage.
- Measure and plan vertical space: Note wall, door, and under-desk dimensions, then choose shallow shelves and risers. Mistake to avoid: buying deep bins that hide items behind each other.
- Assign a home to each station: Give every group a container, shelf, or drawer and return stray items to their station. Checkpoint: every tool should have one obvious place.
- Label and protect: Label opaque containers front and lid, then store paper flat, inks upright, and small items in lidded trays. Mistake to avoid: leaving adhesive and inks in direct heat or sunlight.
- Reset after every session: Spend five minutes returning tools, sealing adhesives, and clearing the desk. Next step: if reset takes longer than five minutes, move your most-used tools closer.
Products that help small-space craft storage
- Crafter's Companion Metal Die Template - Easter Treat Boxes: This set includes a template for the treat box plus metal dies to create a lamb, chick, or rabbit finish. Kits that combine a template and dies store as one flat pack, so seasonal projects take up a single slot instead of several loose pieces.
- Crafter's Companion Embroidery Threads 20 Pack: The pack contains 20 colours, including bright red, blue, and yellow plus black and white shades. A single multi-colour pack replaces 20 individual spools, which is easier to store and label in a small sewing or soft-craft station.
- Crafter's Companion Dissolvable Embroidery Florals 2 Pack: The designs are backed with adhesive, so you cut out the chosen design, stick it to the fabric, and sew over the outline guide before washing it away. Flat, adhesive-backed sheets file easily in a shallow drawer or pocket, keeping small embellishments visible and protected.
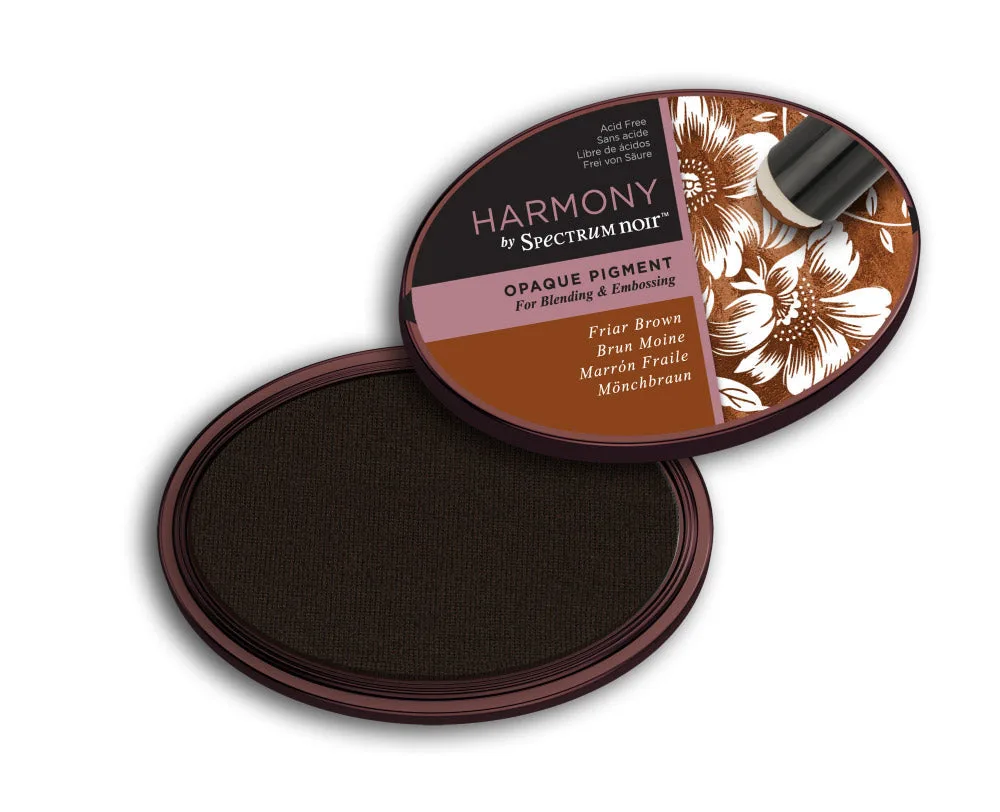
- Spectrum Noir Harmony Opaque Pigment Inkpad - Friar Brown: The inkpad has a sticky, slow-drying texture designed for blending and embossing. Slow-drying pigment ink needs its lid sealed and upright storage, so plan a dedicated ink shelf rather than a loose drawer.
Small craft room storage works when it follows your workflow, not when it looks tidy in a photo. Sort by station, go vertical, label what you can't see, and reset after each project; the room will stay usable no matter how little space you have.