A well-organized pantry is the cornerstone of an efficient kitchen. It saves you time, reduces food waste, and makes meal prep a breeze. But achieving that Pinterest-worthy pantry often feels like a daunting task, especially when you're dealing with a mix of snacks, baking supplies, and those elusive sauce packets. That's where ShelfBin organizers come in—simple, versatile bins that can transform your pantry from chaotic to calm in an afternoon.
In this guide, we'll walk you through a step-by-step approach to pantry organization using ShelfBin organizers. From assessing your space to categorizing your items and maintaining your new system, you'll learn practical tips that work for any pantry, regardless of size. Let's dive in and turn that cluttered shelf into a model of efficiency.
Why ShelfBin Organizers Are a Pantry Game-Changer
ShelfBin organizers are more than just storage containers—they're a system. Their open-top design allows you to see everything at a glance, so you never forget what you have. Unlike opaque bins or baskets, ShelfBins make it easy to grab what you need without rummaging. This visibility is key to reducing food waste and avoiding duplicate purchases.
Moreover, ShelfBins come in various sizes, making them perfect for categorizing different types of items. Use smaller bins for snack packs and larger ones for bulk items like flour or pasta. The sturdy construction ensures they hold their shape even when fully loaded, and their stackable design maximizes vertical space. Whether you have deep shelves or narrow ones, ShelfBins can be arranged to fit your specific layout.
- Open-top design for easy visibility and access
- Multiple sizes to accommodate different item categories
- Sturdy and stackable to maximize shelf space
Step 1: Assess Your Pantry and Gather Supplies
Before you start organizing, take a good look at your pantry. Empty every shelf and categorize items into groups: snacks, canned goods, baking supplies, packets, and so on. This gives you a clear picture of what you have and what you need to store. It's also the perfect time to check expiration dates and toss anything past its prime.
Once you've decluttered, measure your shelves to determine how many ShelfBins you'll need and what sizes will fit best. Consider the height of your shelves as well—ShelfBins come in different depths, so choose ones that allow you to see the contents without wasting vertical space. Gather your bins, labels (if you like), and a damp cloth for wiping down shelves.
- Empty and clean your pantry shelves before organizing
- Measure shelf dimensions to choose the right bin sizes
- Use clear bins so contents are visible, or label for extra clarity
Step 2: Categorize and Assign Bins
Now comes the fun part—sorting your items into groups and assigning a ShelfBin to each category. For snacks, use medium-sized bins to hold individual packs of chips, granola bars, or crackers. For baking supplies, a larger bin can accommodate flour, sugar, and other dry ingredients. For those pesky sauce packets and seasoning mixes, a smaller bin works perfectly to keep them corralled and easy to find.
Think about how you use your pantry. If you're an avid baker, keep baking bins at eye level. If you have kids, place snack bins on lower shelves where they can reach them independently. The goal is to create a logical flow that makes sense for your daily routine. Don't be afraid to mix and match bin sizes within a category—for example, use a large bin for bags of chips and a small one for individual snack packs.
- Group similar items together: snacks, baking, packets, etc.
- Place frequently used bins at eye level for easy access
- Use a combination of bin sizes to fit different item types
Step 3: Implement the ShelfBin System
Once your bins are assigned, it's time to place them on your shelves. Start with the heaviest items on lower shelves and lighter items on upper shelves. Arrange the bins so that the most-used categories are front and center. For example, if you use spices daily, keep them in a bin at the front of a shelf. If you have deep shelves, place less-used items behind the bins, but make sure they're still visible.
To maximize vertical space, stack bins where possible. ShelfBins are designed to stack securely, so you can create two tiers of storage on a single shelf. Just ensure the bottom bin is stable and not overloaded. This is especially useful for small pantries where every inch counts. You can also use shelf risers or lazy Susans in combination with ShelfBins for even more efficiency.
- Place heavy items on lower shelves for safety
- Stack ShelfBins to double your storage capacity
- Use shelf risers or turntables to access items in the back
Step 4: Maintain Your Organized Pantry
An organized pantry is only as good as its maintenance. To keep your ShelfBin system working, make it a habit to return items to their designated bins after each use. Encourage family members to follow the same rule. A quick weekly check can help you spot items that are running low and need restocking, as well as any stray items that have been misplaced.
Another tip is to rotate your stock. When you buy new items, place them behind older ones so you use the oldest first. This prevents food from expiring unnoticed. With ShelfBins, this is easy because you can see everything at a glance. You'll also find that meal planning becomes simpler when you know exactly what you have on hand.
- Return items to their bins after use to maintain order
- Do a weekly inventory to identify low-stock items
- Rotate stock to use older items first
Complement Your ShelfBin System with Other Organizers
While ShelfBin organizers are incredibly effective, they work even better when paired with other organizational tools. For instance, if you have a lot of spice jars, consider a dedicated spice organizer like the SpiceStack® Spice Organizer, 24 Bottle to keep them tidy on a shelf or in a drawer. This frees up your ShelfBins for other categories.
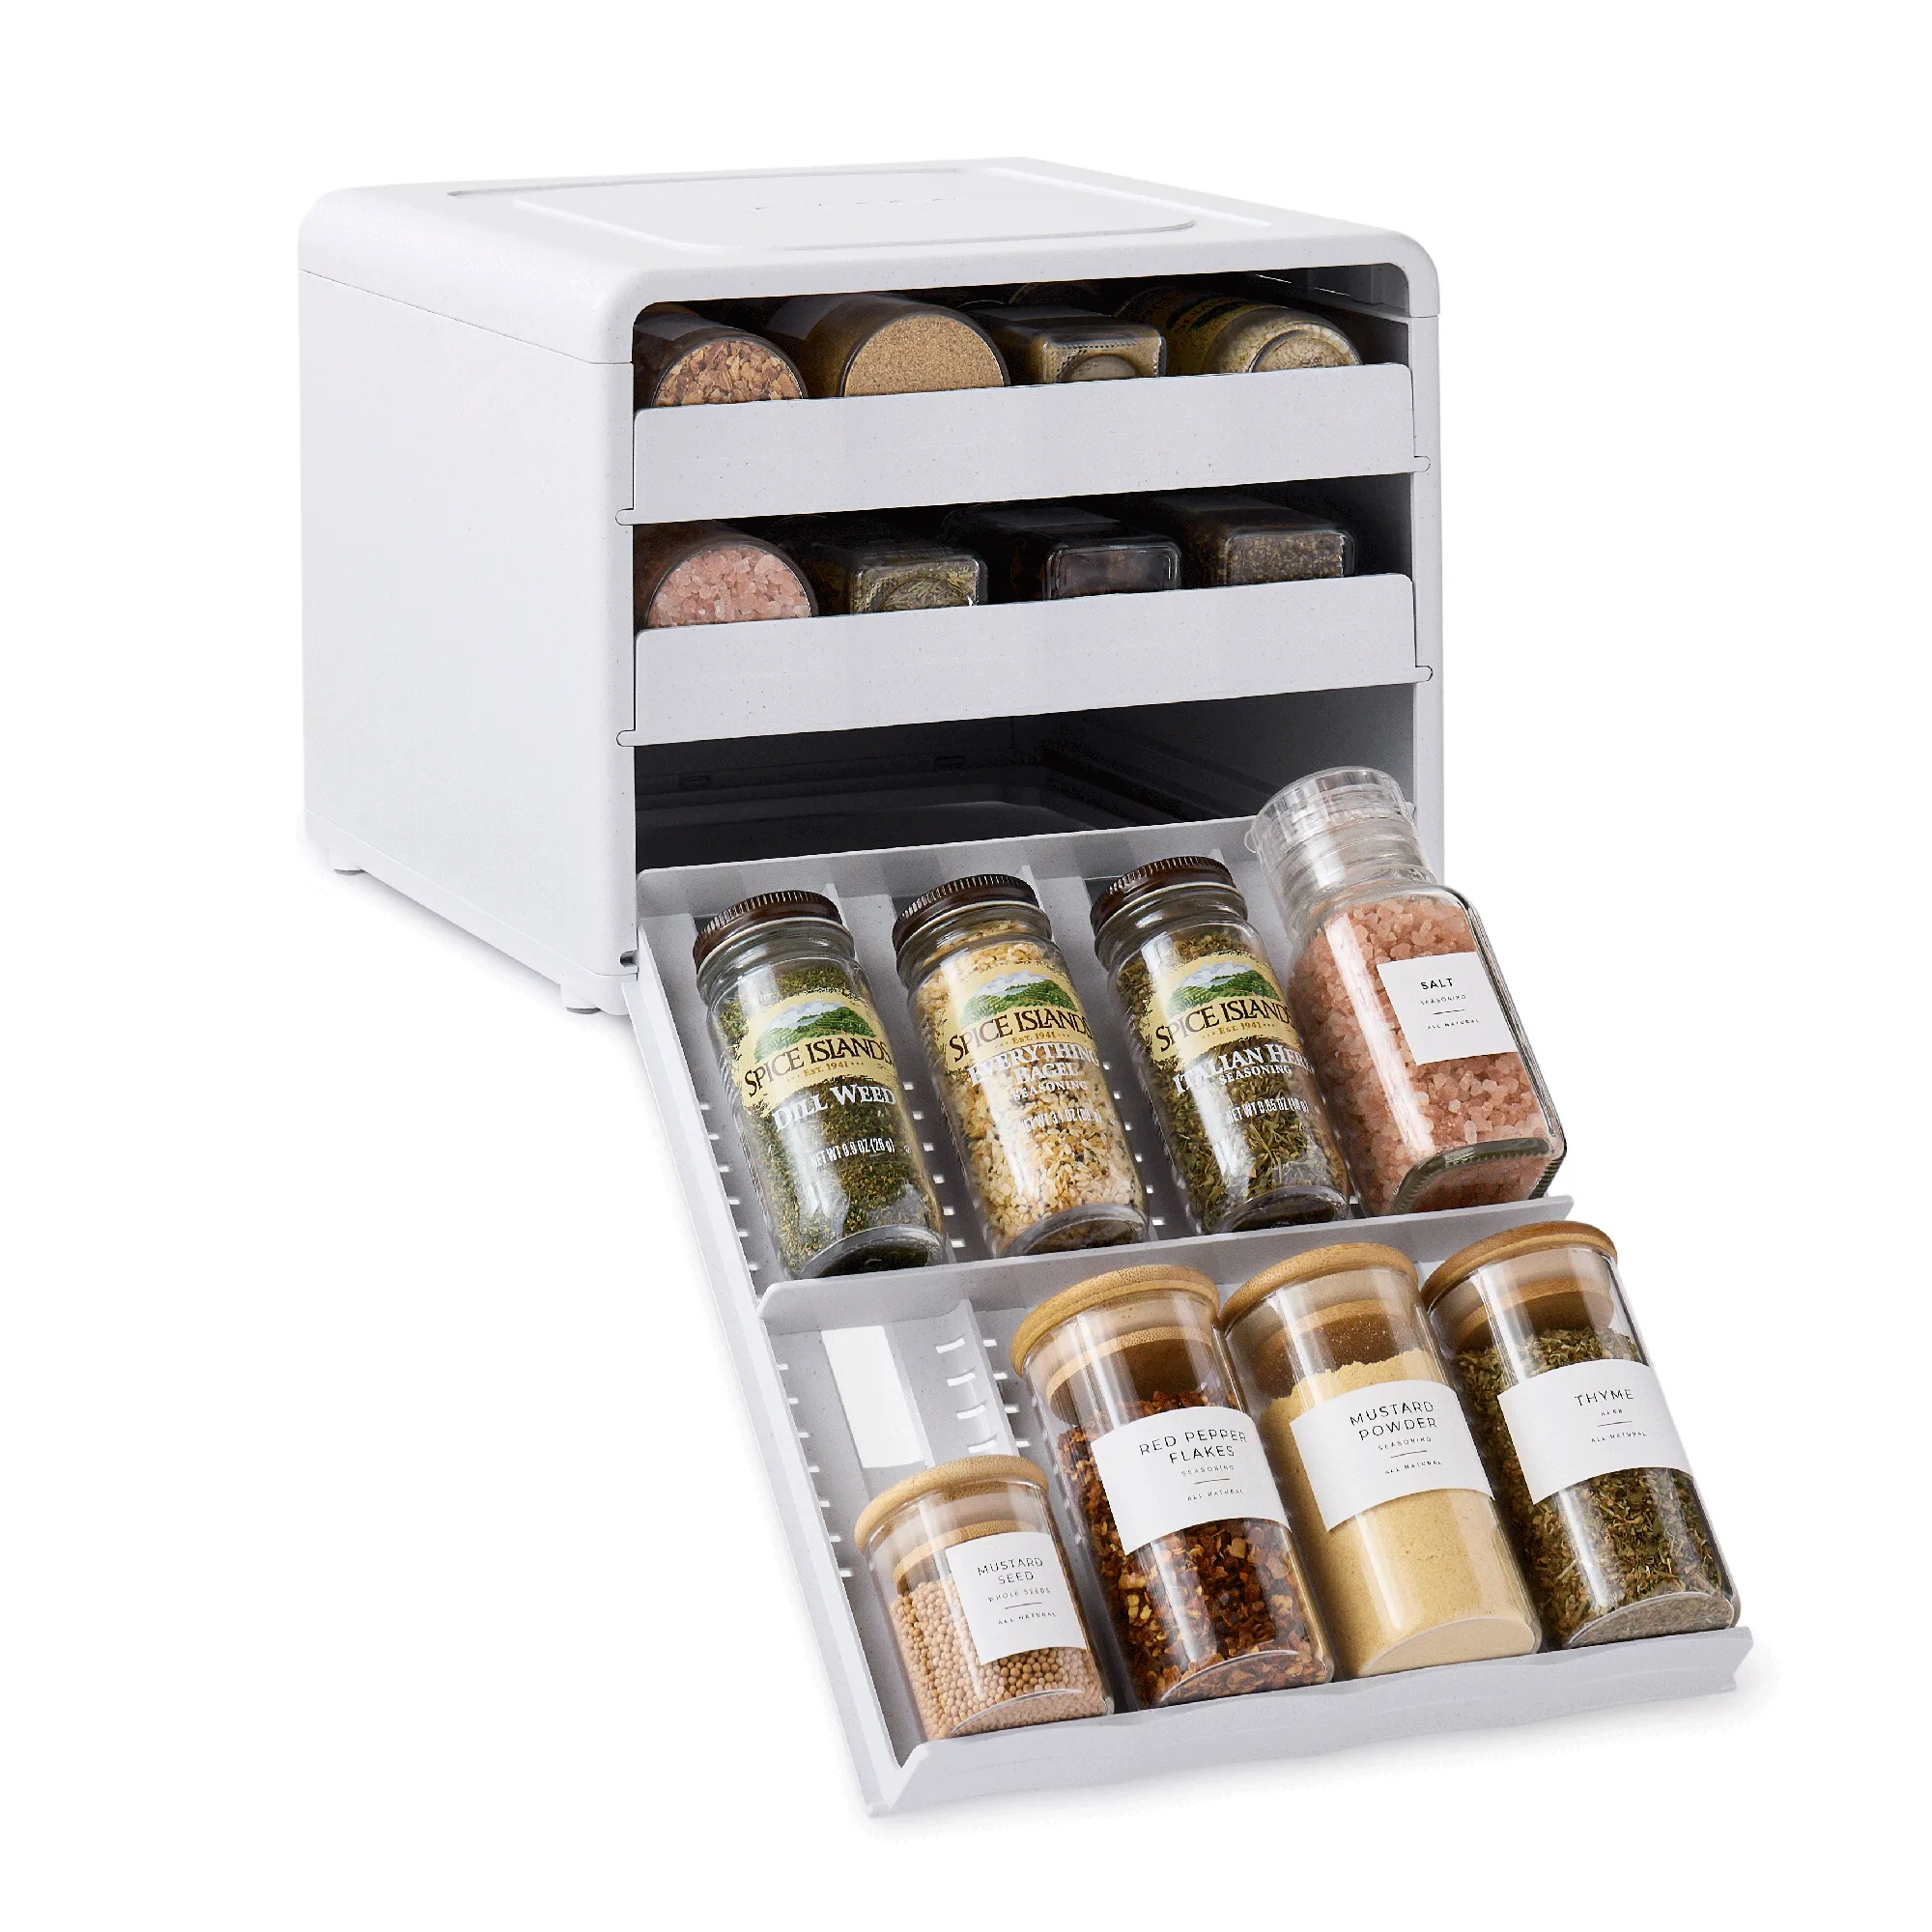
SpiceStack® Spice Organizer, 24 Bottle
For those who struggle with food storage containers, a lid holder like StoraLid can keep lids organized, while ShelfBins hold the bases. Similarly, if you have a collection of plastic bags, a StoraBagTM Food Bag Dispenser, 4 Slot can be mounted inside a cabinet door to keep them accessible without taking up shelf space. These complementary products help you create a fully optimized pantry.
- Pair ShelfBins with a spice organizer for herbs and spices
- Use a lid holder to manage food storage container lids
- Mount a bag dispenser on a cabinet door for plastic bags
Organizing your pantry with ShelfBin organizers is a simple yet transformative project. By categorizing your items, assigning bins, and maintaining the system, you'll enjoy a clutter-free pantry that makes cooking and meal prep a joy. Start with a few ShelfBins and expand as you see the difference they make. For a complete pantry solution, consider adding a StoraBagTM Food Bag Dispenser, 4 Slot to keep your bags organized and within reach.